Saturday, February 27, 2021

Reduce Stress in Seconds with These 8 Pressure Points

We all have our own ways of dealing with stress. Some people escape to a sunny beach, some prefer a nice glass of wine, and others even do their best to ignore it. Each way has its advantages (and disadvantages), but we can’t always do what's best at the exact moment we need to. This is where pressure points become a quick and effective long-term solution. Pressure points are areas in the body that can trigger various physical and mental effects when pressure is applied to them.
1. The Scalp
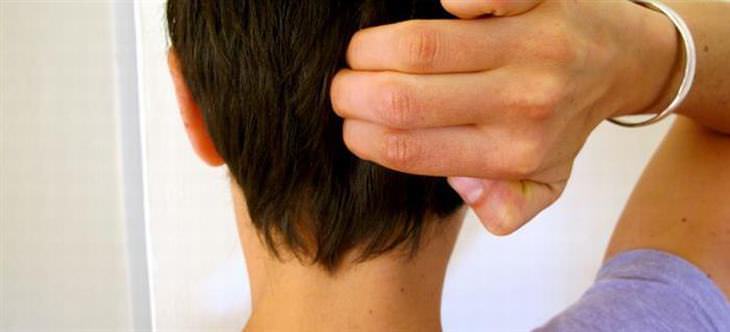
stress pressure points
The scalp is full of pressure points, many that can effectively and discretely reduce stress levels. You can sit at your office desk, lean back and use two fingers to massage the point where the neck meets the skull for about 20 seconds. Much of the stress we accumulate during the day collects in the shoulders and neck muscles, and applying pressure to this point can relieve much of it.
 
2. The Ear
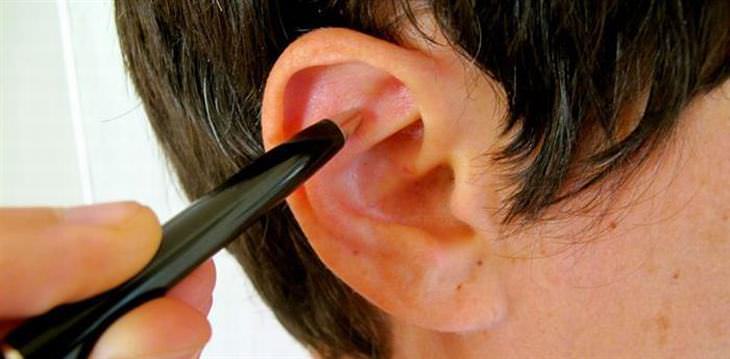
stress pressure points
This pressure point is known as Shen Men (The Spirit Gate), and some experts claim it’s the best stress-relieving point in the body. In reflexology, it’s also used to reduce inflammation and pain throughout the body. It’s recommended that you massage this spot with a cotton bud or even a pen, and to take deep, slow breaths during the massage. 
 
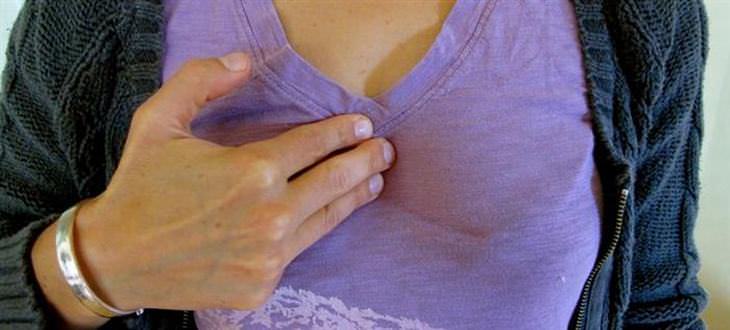
3. The Chest
 stress pressure points
Stress can make us forget to breathe or take shallow breaths. This point helps reduce the stress that accumulates in your chest while reminding you to breathe normally again. Use three fingers to massage this point, or one finger to tap rhythmically on the area while taking deep breaths. If you experience chronic stress, combine massaging this point with the point between your eyebrows. The connection between these two points helps to calm the nervous system. 
 
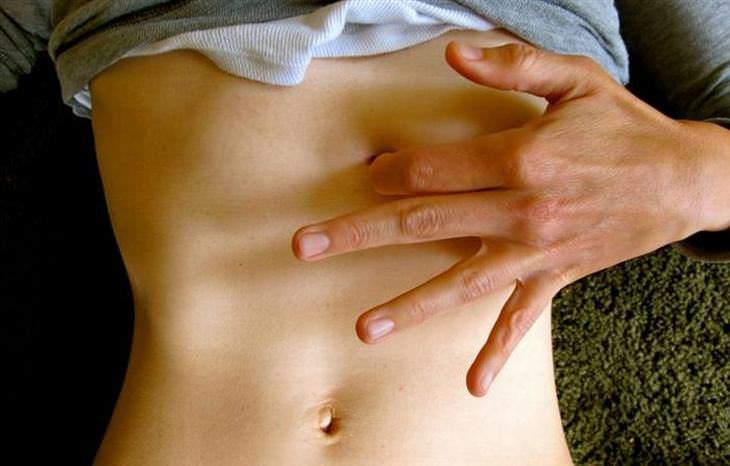
4. The Stomach
stress pressure points
Many reflexologists prefer to use this point because it helps create movement that frees the chest and diaphragm, which improves the breathing process. Patients who have this treatment instinctively take deeper breaths and almost always report a sensation of relief. 
 
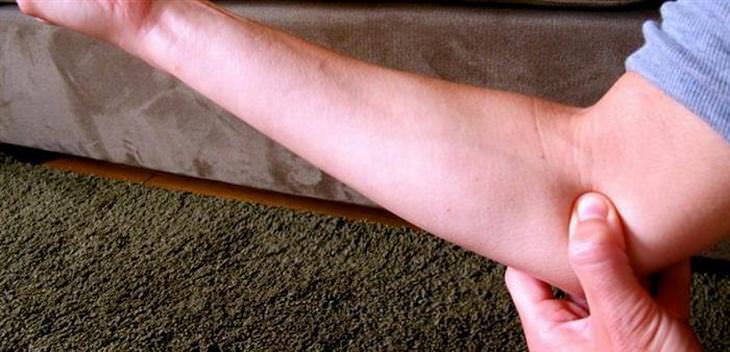
5. The Forearm
stress pressure points
This is a classic spot for reflexology and acupuncture. Stress and anxiety create reverse energy flow in the body, which this spot is supposed to repair. It helps your energy to move in the right direction while aiding your mental focus and reducing stress.
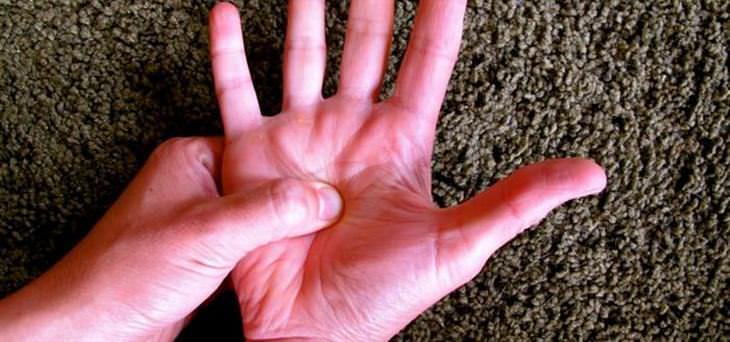
6. The Palm
stress pressure points
The moment you press on this spot, you’ll feel your stress evaporating. It is located on one of the most important meridians (an energy channel), which affects the heart, liver, and pancreas. It's believed that much of the stress we experience is stored in the liver, so applying pressure on this point is highly effective. It is also a great spot for treating headaches, stomachaches, indigestion, and insomnia – all of which could be symptoms of stress. 
 
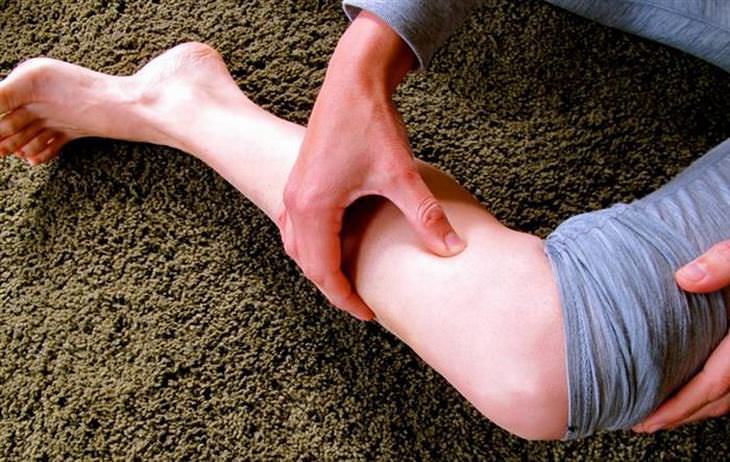
7. The Calves
stress pressure points
If you feel stress in the upper part of your body, massaging this spot is perfect. The area could be quite tender in people who deal with a lot of stress - women in particular.
 
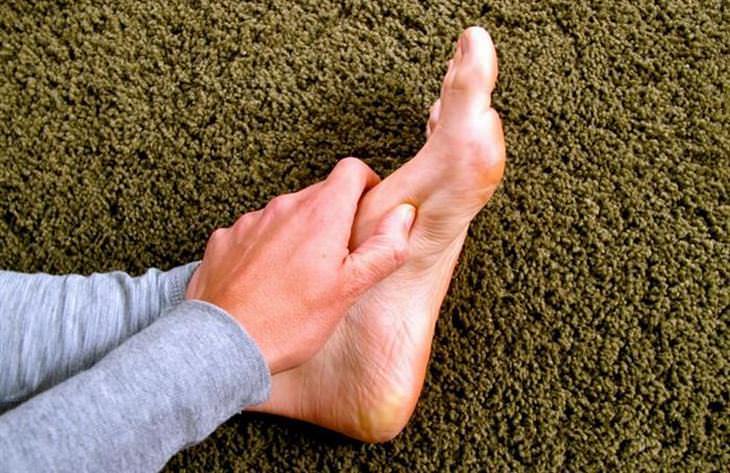
8. The Foot
stress pressure points
Pressure on this point can help ease a stressed mind that over-obsesses a certain worry. Some reflexologists believe that this is the best meridian for treating the pancreas and that its location, at the center of the foot, helps patients reduce stress and pay better attention to their bodies.

This is only for your information, kindly take the advice of your doctor for medicines, exercises and so on.     

https://gscrochetdesigns.blogspot.com. one can see my crochet creations  
https://gseasyrecipes.blogspot.com. feel free to view for easy, simple and healthy recipes    
https://kneereplacement-stickclub.blogspot.com. for info on knee replacement

Labels: , , , , , , , , , ,

Saturday, July 04, 2020

3 acupressure points for healthy lungs and immunity

Try acupressure for lungs health

In the past six months, we have come to know a lot about coronavirus, yet there are a lot of things we are still unaware of. Scientists around the globe are still trying to figure out the exact nature of the virus and ways to contain it. Every passing day we come to know something new about this deadly virus. In such circumstances, prevention is the only way to keep oneself protected from getting infected. We know that COVID-19 is a respiratory disease, which is spread by tiny respiratory droplets. Apart from practising social distancing, wearing a mask and maintaining proper hygiene, it is important to take good care of your lung health at this time. For this, you can try acupressure.  

Acupressure and lungs health

Acupressure is based on this concept of life energy which flows through meridians in the body. It is believed that any blockage and disruption in the flow of energy through the median can lead to different health issues. The lung meridian is one of the major ones comprising of 12 meridian pathways in the human body. Applying gentle pressure on these points can actually help to improve your lungs health and boost your immunity. Here are the three acupressure points that you should press regularly.  

​Hands

You will find the second point in your hand. Stretch your one hand with palms facing downwards. Press between the V shape formed between the web of the thumb and index finger.

Palm

The third point can be found on the fleshy pad of the palm between the wrist and the joint of the palm.

Collarbone

The first point is the hollow space under the collarbone. The point is located between the first and second rib. You can locate this point on both sides. Apply gentle pressure on these points.

How to apply pressure

Apply gentle pressure on these three points for 1 to 2 minutes daily twice or thrice. Hold the pressure points with your fingertips for 4-5 breaths and then release. Repeat the same 5 times in a row.

This is only for your information, kindly take the advice of your doctor for medicines, exercises and so on.     

https://gscrochetdesigns.blogspot.com. one can see my crochet creations  
https://gseasyrecipes.blogspot.com. feel free to view for easy, simple and healthy recipes    
https://kneereplacement-stickclub.blogspot.com. for info on knee replacement


Labels: , , , , , ,

Monday, August 26, 2019

9 Exercises to Alleviate Joint Pains

One of the most common health issues in seniors is joint aches and pains. With every movement, you can feel the stress on your joints, but just like a rusty hinge, joints can be “lubricated” through a series of stretches and exercises.  This article will provide you with an array of information about joint pains and the exercises that help ease them.
joints
What are Joints?
Joints are where our bones connect. They provide physical support and provide our body with a range of motions. Any damage to the joints, incurred through force or infection, may hinder our ability to move, and cause pain. Joint pains are quite common; with about a third of the population suffering from joint aches and pains. The knees, shoulders, and thighs tend to be the most problematic areas. The older we get, the more likely it is that we’ll suffer from joint pains.
What are Joint Pains? Joint pains can be weak or strong, and can be acute - lasting from one to two weeks, or chronic – lasting for several months. Whether it’s a strong pain or a weak one, it lowers our quality of life and must be treated. Treatment can be done by taking medication, through alternative medicine, or by performing simple, daily exercises.
By exercising the muscles around the joints, you can strengthen them, thus improving your control over those joints. This will also help reduce joint-related pains.
Knee Pain
Knee pain is especially noticeable when going up a flight of stairs. With severe joint pains, even walking becomes a painful experience.
Pillow Squeeze
joints
This exercise will help you strengthen your inner thighs and provide more support for your knees.
• Lie on your back, with your knees bent.
• Put a pillow between your knees.
• Squeeze the pillow with both knees for 5 seconds and release.
• Perform two sets of ten repetitions.
• If the exercise is too difficult, start by doing it while sitting on a chair.
From Sitting to Standing
joints
This exercise will help you transition between sitting and standing, making it easier for you to straighten your knees.
• Place two pillows on a chair and sit on them. Maintain an upright posture with both feet flat on the floor.
• Use your leg muscles to slowly and smoothly stand up.
• Slowly sit back down.
• Pay attention that your knees do not move forward and pass your toe line.
• Try doing this with your hands crossed against your chest and when they’re hanging at your sides.
• If the exercise is too difficult, add a pillow or two, or use a chair with armrests to use as leverage.

Thigh Joint Pain
The largest joint in the human body, the thigh joint, supports most of our body weight and is a key component in maintaining one’s balance. Since these joints are critical for walking, any pain in the area can debilitate a person. Chronic pains in this region become more common with age.
Bridge Exercise
joints
The bridge is a simple exercise you can perform every morning, which loosens the thigh joint. This makes it easier to move your joints throughout the day.
• Lay down on the floor with your back flat and your legs bent. Your feet must be pressed against the floor.
• Lift your pelvis by pushing with your ankles. Keep your stomach muscles hard and your knees in line with your ankles. Your body should be in a straight line from your shoulders to your feet.
• Stay in this position for 3-5 seconds, and then lower your pelvis back to the floor slowly.
• Repeat ten times.
Classic Leg Lift
joints
If you have pain on one side, lay down on the opposite side. This can be done on the carpet or on a yoga mat.
• Raise the sore leg 6 inches (15cm) from the floor. Hold it in the air for 2-3 seconds
• Slowly lower your leg back down to the floor.
• Perform 10 repetitions. If possible, do the same for the other leg, but if you’re in too much pain, stop.

Shoulder Joint Pain
Another common joint pain is shoulder pain, which is most common in people who perform repetitive movements with their shoulders, or those who spend long hours at a desk, in front of a computer.
Shoulder Stretches
joints
joints
You will need a fitness elastic band for this exercise. This type of exercise is a great way to strengthen your shoulder muscles, as well as improve their elasticity and range of motion.
• Secure the band to an object at waist-height.
• Grasp the band and stand with your back to the securing object. Take a step forward so that the band is stretched a little.
• Keep your arm straight and lift it upwards until it is parallel to the floor. Pay attention not to lift your shoulder.
• Keep your arm in that position for a second, and then slowly lower it back to the starting position.
• Perform 15 repetitions.

It is recommended that you perform this exercise in different variations and in different directions, as shown in the images above.
Wrist Pain
Wrist pain can be caused by inflammation or repetitive actions such as typing on a computer, or even using kitchen utensils. These pains can appear as weakness in the palm, making it difficult to perform everyday tasks, like opening a jar.
Fist Stretch
joints
Do these exercises whenever your palm feels weak, sore, or stiff.
• Open your palm and stretch your fingers outwards.
• Close your fists and stay in this position for a few seconds.
• Straighten and stretch your fingers again.
• Perform several repetitions a few times a day.

Stretching Your Fingers
• Reach out with your right hand, palm facing down.
• Use your other hand to slowly pull the 5 fingers in that hand, back.
• Try and provide resistance with your other hand. Make sure to
stop if you reach a point where it hurts.
• Perform 10 repetitions for each hand.

Elbow Pain The elbow plays a vital role in the arm’s movement. Repetitive motions that can lead to pain in the elbow could be playing tennis, washing windows, or even working with a screwdriver. These stretches should be performed 3 times a day, assuming they don’t hurt, or add to existing pain.
Stretch and Straighten
joints
• Stand straight with your arms at the sides of your body.
• Bend your hands towards your chest, so that only the forearm moves.
• Perform 10-20 repetitions. Stop if it starts hurting.

Forearm Twist
• Keep your hands tight against your body.
• Bend your forearms and keep them at a 90-degree angle.
• Twist your wrists to face up, then down again.
• Perform 10-20 repetitions for each hand. Stop if it starts hurting.
 
 
THIS IS ONLY FOR INFORMATION, ALWAYS CONSULT YOU PHYSICIAN BEFORE HAVING ANY PARTICULAR FOOD/ MEDICATION/EXERCISE/OTHER REMEDIES.                                    PS- THOSE INTERESTED IN RECIPES ARE FREE TO  VIEW MY BLOG-                                                                                           https://gseasyrecipes.blogspot.com/                                                                                                                                                FOR INFO ABOUT KNEE REPLACEMENT, YOU CAN VIEW MY BLOG-                                                                       https:// kneereplacement-stickclub.blogspot.com/                                                                                                                     FOR CROCHET DESIGNS                                                                                                   
                                https://gscrochetdesigns.blogspot.com


Labels: , , , , , , , , , , , , , , , , ,