Friday, April 18, 2025

3 Exercises to Reduce Anxiety and PTSD

Coping with anxiety and PTSD is not easy, and while professional treatment is welcome, it does not always provide the relief sufferers expect, at least not in daily coping. The truth is that there is no one solution that fits everyone, and each person needs to find their way to deal with the symptoms they experience. That is why we present to you today 3 somatic exercises you can try, which many report help reduce the intensity of the feelings they experience in moments of anxiety and PTSD. These exercises involve the whole body, and before starting any of them, it is recommended to ask yourself: "On a scale of 1 to 10, how anxious am I?" Try the chosen exercise, ask yourself again, and check if that number has decreased—this way, you'll know you found the exercise that suits you

1. Joint activation 
 When your mind is preoccupied with something, it’s hard to stop the automatic thoughts that come. Any attempt to do so will fail, but what can help is occupying the mind with something else, and it’s easiest to focus on the physical sensation in your body. For this, you will activate your body slowly and calmly, starting from the bottom and gradually moving upwards until you significantly reduce the symptoms you’re experiencing.

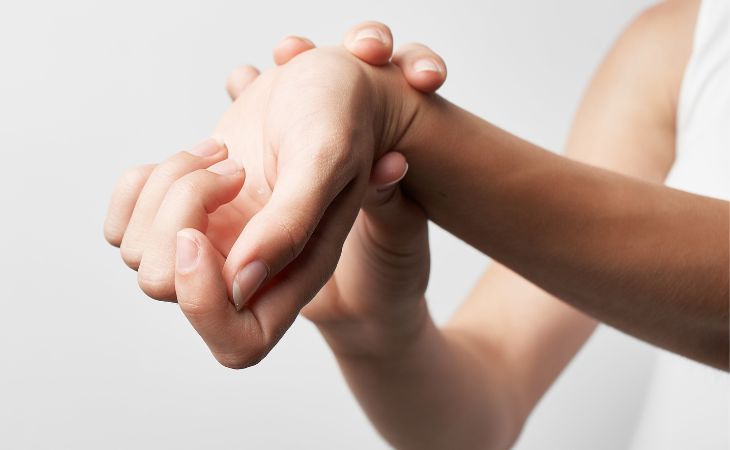
Start with one leg—slowly move your foot in circular motions 10 times in one direction and focus on the sensation created in the joint. Then do the same in the other direction, and after that, repeat with the other leg. If you are lying on your back, you can do the same with your knees while your thighs are in the air. If you’re standing, you can place your hands on your knees and rotate them together in circular motions. Also, rotate your pelvis to both sides, and then pause and try to notice the sensation in your lower body compared to the upper body—do you feel a difference? 
 Exercises for coping with anxiety and PTSD: Woman stretching her wrist joint
 
Now do the same with your wrists—one at a time or both together—then with your elbows and shoulders. Finally, rotate your head to one side and then to the other. Throughout the exercise, remember to focus on the sensation created in the joint during the rotations—this will help your mind focus on something else and move the energy around your body instead of trapping it inside.


2. Deep breathing and "voo" exhalations 
 The respiratory and cardiovascular systems are interconnected and influence each other—when one operates faster, so does the other. While we cannot directly control our heartbeat, we can definitely control our breathing. Some people find that deep breaths help restore calm to their body and bring their heart rate to a relaxed pace. If you have tried breathing exercises in the past and found them helpful, you might want to try the "voo" exhalation exercise.
 Exercises for coping with anxiety and PTSD: Woman performing a breathing exercise
 
To begin the exercise, place one hand on your chest and the other on your abdomen, and take a deep, slow breath. Then exhale the air while making a "voo" sound—try to make the sound come as much as possible from your abdomen and not your throat. This is an ancient breathing exercise that calms the vagus nerve, which runs from the brain to the diaphragm, and supports the parasympathetic nervous system responsible for relaxation when the body is at rest. Do this 10 times and see how you feel. 
 
3. Focusing on observing something calming 
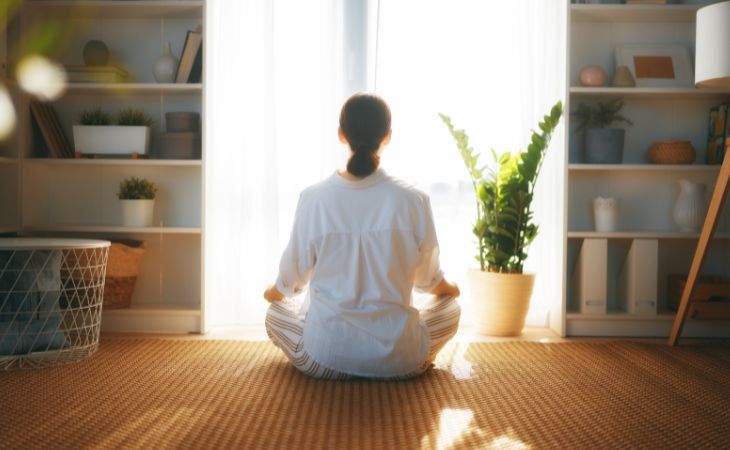
There are many things that can be calming, like the support of another person, a warm bath, or even a thick, heavy blanket resting on your body. However, such things can also be found through sight alone, and that is the goal of this exercise. Look around for something that can calm you—some people find it helpful to gaze at something sparkling and beautiful, while others prefer a natural element like a leaf swaying on a branch in the wind. 
 Exercises for coping with anxiety and PTSD: Woman meditating
 
For some people, focusing on something distant works even better—the farther away it is, the more calming its effect can be. However, you might find it helpful to concentrate on something close to you, to which you can direct your entire gaze and examine closely. Try the exercise both ways to discover what works better for you, and focus your gaze until you feel its calming effect—this might take a few minutes. If you like, you can even combine this exercise with one of the previous ones and perform them simultaneously.


To sum up 
When we suffer from PTSD or anxiety, the symptoms can be severe and exhausting. The recovery process is long and not easy, but don’t let the symptoms make you think it’s impossible. Try the exercises we suggested when you feel overwhelmed, and give yourself a chance to relax and regain functionality in moments when you feel like you’re falling apart. They will help balance your body and mind, providing quick relief when you need it most.

This is only for your information, kindly take the advice of your doctor for medicines, exercises and so on.   


Labels: , , , , , , , , , ,

Friday, October 04, 2024

5 Pressure Points to Control Feelings of Hunger

Alternative medicine practitioners use pressure points to improve the flow of energy throughout the body, which can help heal various problems and pains. While pressure points are commonly known for reducing pressure and curing pain, they can also be used to decrease appetite and hunger. To control the feeling of hunger effectively, massage the following five pressure points with light pressure for the recommended time. Consistent daily practice will help you feel the change within the first week, making it easier to maintain your weight and overall health. 
 
1. Pressure point in the ear
hunger pressure points: Pressure point in the ear
This is one of the main points that will help you control the feeling of hunger. Press with your thumb on the marked point on the face, slightly in front of the triangular cartilage part next to the auditory canal of the ear. Open and close the jaw to find the exact point where the greatest movement occurs, and press on it for 1-3 minutes, twice a day.


2. Pressure point on the upper lip
hunger pressure points: Pressure point in the upper lip

The next point you want to massage to control the sensation of appetite is between the upper lip and the nose, in the center of the face. Press it for 1-5 minutes twice a day, and in addition to reducing the feeling of hunger, it will also help you relieve anxiety and stress. 
 
 
3. Pressure point on the knee
hunger pressure points: Pressure point in the knee

Pressing on a specific point on the outer side of your leg, located 5 cm below the kneecap, can improve digestion and alleviate menstrual discomfort. Apply pressure with your index finger on both feet for two minutes daily. Another pressure point, located about a thumb's distance from the elbow joint on the outside of the forearm, when pressed with your thumb for one minute daily, can control hunger, release heat from the body, stimulate intestinal functions, and prevent fluid accumulation.


4. Pressure point on the elbow
hunger pressure points: Pressure point in the elbow

Another pressure point, located about a thumb's distance from the elbow joint on the outside of the forearm, when pressed with your thumb for one minute daily, can control hunger, release heat from the body, stimulate intestinal functions, and prevent fluid accumulation. Lastly, there is a pressure point in the ankle that can also control hunger.


5. Pressure point on your ankle
hunger pressure points: Pressure point in the ankle

To locate a certain point on the inside of your leg, place your hand just above the ankle and move it 5 fingers towards the knee. Use your thumb to apply pressure on this point for a minute each day, and then release the pressure slowly. Repeat this process on the other leg. However, if you are pregnant, it is not recommended to use this pressure point. 
 
By following these instructions regularly, you may notice changes in your body and feelings within a week.

This is only for your information, kindly take the advice of your doctor for medicines, exercises and so on.   

https://gscrochetdesigns.blogspot.com. one can see my crochet creations  
https://gseasyrecipes.blogspot.com. feel free to view for easy, simple and healthy recipes    
https://kneereplacement-stickclub.blogspot.com. for info on knee replacement
https://cancersupportindia.blogspot.com  for infor on cancer and health related topics
https://GSiyers home remedies.blogspot.com   is the latest addition to my blogs. I'm going to add posts there, do give me your valuable feed back on my blogs. Thanks a lot, take care, be healthy and be happy.

Labels: , , , , , , , , , ,

Saturday, April 30, 2022

9 Exercises for Rehabilitating and Strengthening the Hand

Many people suffer from an inability to move their hand and use it as they had in the past, often after a tendon injury, stroke, or other injuries, and sometimes just because of natural aging. People who suffer from this condition occasionally try to use their hands as before and fail, and as a result, lose hope. However, do not despair, because there are some exercises that you can start regularly, starting today, to strengthen and restore your hand, and they are all recommended by occupational therapists. Here are 9 exercises that are divided into 3 levels of difficulty, choose your set based on your hand’s strength level. In the end, you will also see a video that fully demonstrates how each exercise is performed as well as more level 1 exercises that are suitable for everyone.

Level 1 exercises for hand rehabilitation 
If you have difficulty performing simple hand movements, these are the exercises you should start with. For them, you will only need a table, and your strong hand to help you work your weak hand until it can do the exercises on its own.  
 
1. Palm up and down
hand exercisesPlace your weaker palm on the table facing downward. 
Use your stronger hand to flip your palm upward. Use only your stronger hand’s fingers when assisting. Flip your palm back with your strong hand and repeat 10 times.

2. Bend the wrist up and down
hand exercises
Place your elbow on the table and use your stronger hand to stretch the wrist up and down. 
Perform the exercise slowly 5 times.
 
3. Bend the wrist to the sides
hand exercises
Place the weak palm on the table facing downward. 
Use the stronger hand to move the weaker hand from side to side. Make sure the movement is done from the wrist. 
Repeat the exercise slowly 5 times. 
 
Level 2 exercises for palm rehabilitation 
After you’ve achieved some control over your weaker hand, proceed to level 2. For these exercises, you’ll need a table, pen and a small bottle filled with water. Note that even at this level, it is still recommended to perform level 1 exercises as a warm-up  
 
1. Finger bending
hand exercises
Place your weaker palm on the table, facing up. 
Place a small bottle filled with water on your palm and keep your fingers relaxed. 
Slowly bend your fingers to catch the bottle, then release. 
Repeat the exercise 5 times. 
 
2. Wrist curl
hand exercises
Put your elbow on the table, hold a bottle in your weak hand, and hold the weaker hand’s arm with your stronger hand. 
Bend the wrist upward and then release it slowly. 
Repeat the exercise 10 times.  
 
3. Grip and release
hand exercises
Place a pen on the table and hold it with your weak fingers. 
Then, slide the pen on the table from one side to the other, and release it. 
Make sure your fingers gently grip the pen and use as little force as possible to move it. 
Repeat the exercise 5 times. 
 
 Level 3 exercises for palm rehabilitation 
These exercises are a bit more complex, and if you can do them you can regain control of your hand. They may be a little challenging, but the results will be very good. For them, you will need a table, a pen, and 8 coins.  
 
1. Pen spin
hand exercisesPlace a pen on the table and use your thumb and index finger to spin it. 
Try not to move your shoulder during the exercise, although you will be tempted to do so. You should use only your thumb and index finger. 
If you can, try to slowly pick up the speed. 
Spin the pen quickly for 15 seconds.  
 
2. Coin drop
hand exercises
Start by placing eight coins in a row on your weaker hand’s palm. 
Use your thumb to slide one coin so you can catch it with your index finger and thumb. 
Place the coin on the table and continue to do so with the other coins. 
 
3. Finger curl
hand exercises
Place the elbow of the weaker hand on the table, and bend it so that your palm is at shoulder height. Make the OK sign by bringing your thumb and index finger together, press and release. 
Repeat this with your middle, ring and pinkie finger, and do it 7 times in total with each. 
 
As mentioned above, Level 1 exercises can be used as a warm-up for level 2 and 3 exercises.

This is only for your information, kindly take the advice of your doctor for medicines, exercises and so on.   

https://gscrochetdesigns.blogspot.com. one can see my crochet creations  
https://gseasyrecipes.blogspot.com. feel free to view for easy, simple and healthy recipes    
https://kneereplacement-stickclub.blogspot.com. for info on knee replacement

Labels: , , , , , , , , , ,