Friday, October 04, 2024

5 Pressure Points to Control Feelings of Hunger

Alternative medicine practitioners use pressure points to improve the flow of energy throughout the body, which can help heal various problems and pains. While pressure points are commonly known for reducing pressure and curing pain, they can also be used to decrease appetite and hunger. To control the feeling of hunger effectively, massage the following five pressure points with light pressure for the recommended time. Consistent daily practice will help you feel the change within the first week, making it easier to maintain your weight and overall health. 
 
1. Pressure point in the ear
hunger pressure points: Pressure point in the ear
This is one of the main points that will help you control the feeling of hunger. Press with your thumb on the marked point on the face, slightly in front of the triangular cartilage part next to the auditory canal of the ear. Open and close the jaw to find the exact point where the greatest movement occurs, and press on it for 1-3 minutes, twice a day.


2. Pressure point on the upper lip
hunger pressure points: Pressure point in the upper lip

The next point you want to massage to control the sensation of appetite is between the upper lip and the nose, in the center of the face. Press it for 1-5 minutes twice a day, and in addition to reducing the feeling of hunger, it will also help you relieve anxiety and stress. 
 
 
3. Pressure point on the knee
hunger pressure points: Pressure point in the knee

Pressing on a specific point on the outer side of your leg, located 5 cm below the kneecap, can improve digestion and alleviate menstrual discomfort. Apply pressure with your index finger on both feet for two minutes daily. Another pressure point, located about a thumb's distance from the elbow joint on the outside of the forearm, when pressed with your thumb for one minute daily, can control hunger, release heat from the body, stimulate intestinal functions, and prevent fluid accumulation.


4. Pressure point on the elbow
hunger pressure points: Pressure point in the elbow

Another pressure point, located about a thumb's distance from the elbow joint on the outside of the forearm, when pressed with your thumb for one minute daily, can control hunger, release heat from the body, stimulate intestinal functions, and prevent fluid accumulation. Lastly, there is a pressure point in the ankle that can also control hunger.


5. Pressure point on your ankle
hunger pressure points: Pressure point in the ankle

To locate a certain point on the inside of your leg, place your hand just above the ankle and move it 5 fingers towards the knee. Use your thumb to apply pressure on this point for a minute each day, and then release the pressure slowly. Repeat this process on the other leg. However, if you are pregnant, it is not recommended to use this pressure point. 
 
By following these instructions regularly, you may notice changes in your body and feelings within a week.

This is only for your information, kindly take the advice of your doctor for medicines, exercises and so on.   

https://gscrochetdesigns.blogspot.com. one can see my crochet creations  
https://gseasyrecipes.blogspot.com. feel free to view for easy, simple and healthy recipes    
https://kneereplacement-stickclub.blogspot.com. for info on knee replacement
https://cancersupportindia.blogspot.com  for infor on cancer and health related topics
https://GSiyers home remedies.blogspot.com   is the latest addition to my blogs. I'm going to add posts there, do give me your valuable feed back on my blogs. Thanks a lot, take care, be healthy and be happy.

Labels: , , , , , , , , , ,

Saturday, February 27, 2021

Improve Your Concentration with These 8 Pressure Points

We need good concentration and memory at every age and every stage of life. Regardless of whether we’re studying for an important exam or trying to remember how to get from one place to another, these abilities determine whether or not we’ll succeed in our mission. One of our strongest enemies in this struggle is stress, which negatively affects our concentration and memory.

However, you can turn this calm into a regular part of your life while focusing and refining your concentration and memory skills with 8 pressure points that will improve your mental abilities using only your hands. 
 
1.The Third Eye  
In Chinese culture, the third eye is believed to be a "mystical organ" responsible for clairvoyance. According to the Chinese, the third eye point helps improve concentration and, memory, a nd also helps to treat symptoms of influenza, such as fever, blocked nose, and nasal congestion headaches.
pressure points for memory and concentration
The point lies between the eyebrows, in the area between the bridge of the nose and the forehead. Press the spot gently for 3-4 minutes and repeat 2-3 times a day. 
 
2. The Bigger Rushing 
 The use of this pressure point is especially recommended for students preparing for tests – massaging it helps to get rid of the feeling of exhaustion that comes with memorizing a large amount of material, improves concentration and encourages mental clarity. In addition, you should massage it when facing a big and significant decision, as it will help you focus on the possibilities that are facing you.
pressure points for memory and concentration
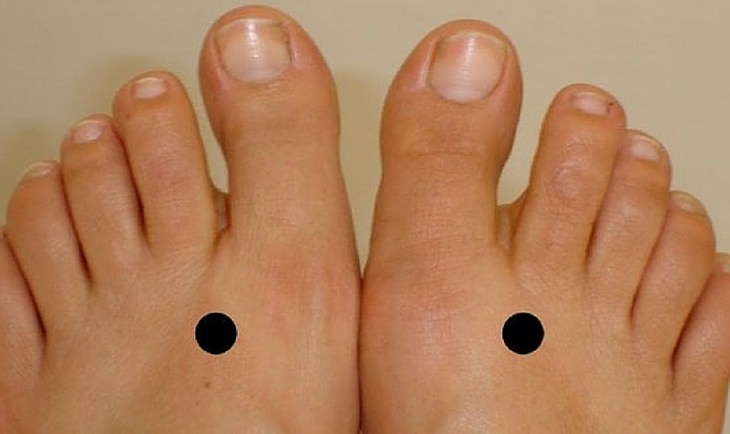
You’ll find this point at the top of the foot, where the big toe and second toe bones meet. Press gently on the point on both feet at the same time for two minutes, and repeat three times a day.

3. The Heavenly Pillar 
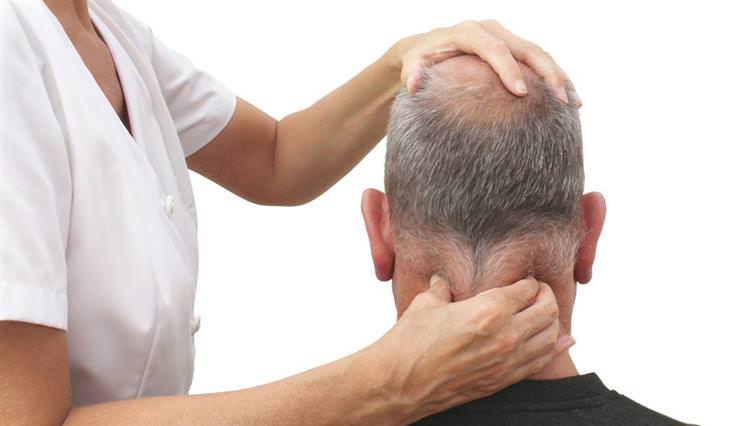
This pressure point is used to reduce the feeling of pressure and pain in the head, which results from too many thoughts "running around" inside. It’s also used to cure a sore throat, and its massage helps to loosen the neck and improve blood flow to the brain.
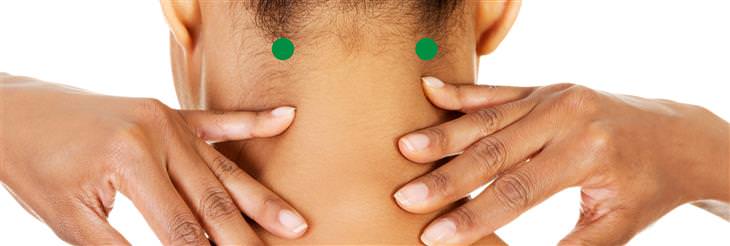
pressure points for memory and concentration
The point is about 1 cm below the base of the skull and 3 cm from the spine on both sides. Place the index and middle finger on the two points and massage them for 7-8 minutes. Repeat the process three times a day to get the best results. 
 
4. The Sun Point 
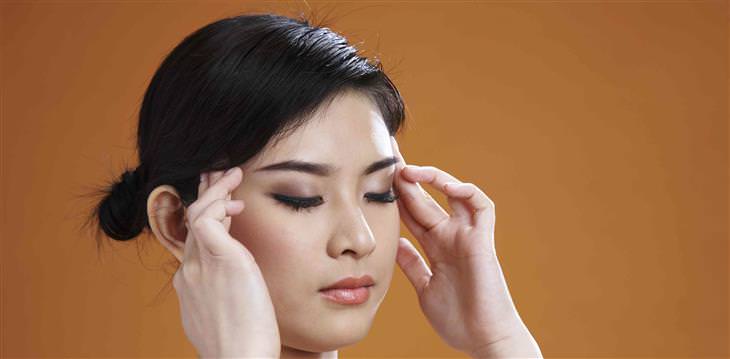
It's possible that your hands naturally massage your temples when you feel that your head is crammed with stressful thoughts or when it’s hard for you to think. Massaging these points helps improve memory and concentration, and prevents headaches, dizziness, and stress.
pressure points for memory and concentration 
Gently press on your temples with two fingers, 1 cm from the outer edge of the eyebrows – for two minutes, three times a day. 
 
5. The Three-Mile point  
Massaging this point helps to strengthen concentration and memory and provides clarity of thought. It also helps reduce symptoms of ulcers, inflammation of the small intestine, nausea,gas and swelling, and nourishes the body with energy in case of exhaustion.
pressure points for memory and concentration
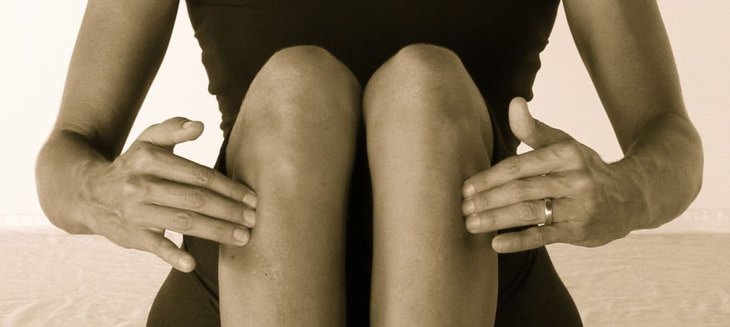
The point is at a distance of 3 fingers below the knee, on the outside of the leg. Bend your knee and you’ll be able feel it when the muscle moves under your fingers. Press it for 5 minutes, once a day.
 
6. The Middle of a Person 
You can often witness children pressing this point when they feel stressed or worried, and that's because massaging it makes us focus on our thoughts better. In addition to improving concentration and memory, massaging this point also helps reduce menstrual pain and dizziness, and it is recommended to do it especially when you feel your head is not working at its best.
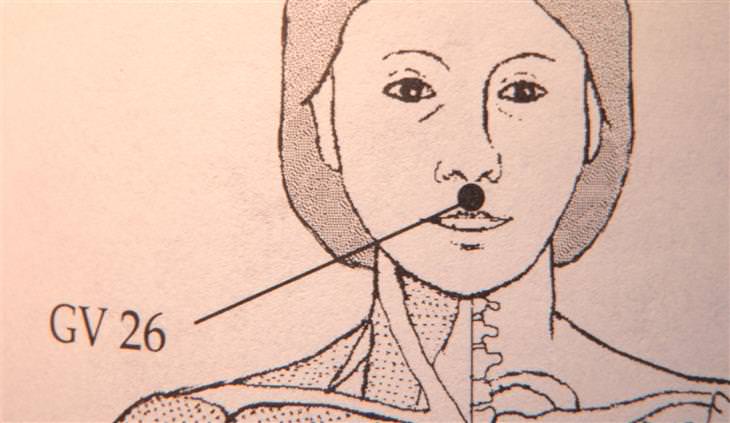
pressure points for memory and concentration
Place your finger under your nose and above the upper lip, in the center of your face. Gently press the point for two minutes every day, and if you do this regularly for four weeks, you will feel its effect noticeably.

7. The Gates of Consciousness 
If you suffer from memory problems, massaging these points is highly recommended for you. In addition to the beneficial effect of improving memory, it also helps to soothe headaches, so it is recommended to perform every time you experience pain that interferes with your daily functioning.
pressure points for memory and concentration
The points are right at the base of the skull, on either side of the spine. Place your fingers on them and feel the hollow in the skull – you’ll find them there. Rub the area gently for 2-3 minutes and repeat three times a day. 
 
8. Under side of the toe 
This point comes not from Chinese medicine, but from reflexology, and you don’t even have to use your fingers to massage it and get the benefits it provides. The left toe will affect the right side of the brain and the right toe will affect the left side, but it is recommended to massage both at the same time to obtain clarity of mind. 
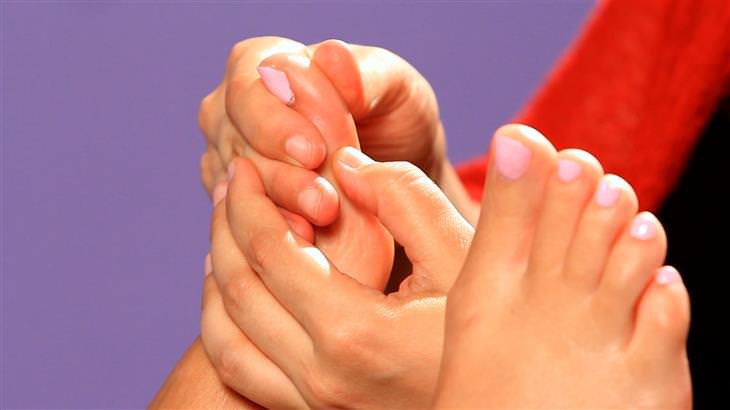
pressure points for memory and concentration
Move your thumb on the underside side of the big toe and massage all of it for 1-2 minutes. Repeat the process every day, and if you want to improve your concentration while working or learning, just rub your toe into your shoe and use the floor to resist it. 
 
If you really want to improve your memory and concentration, you may want to massage these points every day for several weeks regularly. You can feel their effect significantly after four weeks, and you’ll see how easy it is to help our body and mind be at their best. 
 
This is only for your information, kindly take the advice of your doctor for medicines, exercises and so on.     

https://gscrochetdesigns.blogspot.com. one can see my crochet creations  
https://gseasyrecipes.blogspot.com. feel free to view for easy, simple and healthy recipes    
https://kneereplacement-stickclub.blogspot.com. for info on knee replacement


Labels: , , , , , , , , , , , , , ,

Tuesday, February 23, 2021

8 Great Tips For Improving Your Posture

Good posture is important for maintaining good physical health, as well as literally helping us to put our best foot forward. In addition, we also tend to look our very best when we're standing or sitting properly. Here's everything you need to know about having good posture:

1. Creative Ways to Improve Posture 
 Posture
Posture Method A: "Think String" Try visualizing a string that emerges from the top of your head and pulls you gently upward toward the ceiling. This can help to guide your sense of proper positioning and height. 
 
Posture Method B: Tape a giant X to your back 
Posture
Have someone tape a giant X to your back, then put a straight line of tape across your shoulders to close the top of the X. Hold each shoulder back before taping and use wide, non-stretch tape. Ideally, you should change the tape each day, but you can also try a posture corrector if doing this seems a little too drastic to you. 
 
Posture Method C: Don't be a sloucher  

To avoid slouching when you walk, always imagine that you're walking along with a book balanced on top of your head. 
 
Posture Method D: 
 Posture
Focus on your calves Allow your posture and balance to rely more on your calves. You can do this by putting a bounce in your step. It'll free up the rest of your upper body and allow it to relax. In addition, assuming a more upright posture takes pressure off your back, shoulders, and neck, and helps you to work on your abdominal muscles. 
 
 2. Sitting Posture  
 Posture
Method A: Sit up straight 
Follow these basic guidelines to ensure your sitting posture is as good as can be: 
• Use an ergonomically-designed chair and adjust it properly to your height and weight. You can try using a small pillow for lumbar support if an ergonomic chair isn’t an option. 
• Keep your back aligned with the back of your office chair to stop yourself from slouching. 
• Turn the angle of your computer monitor slightly more upward, so that you force yourself to sit upright to see the screen better. 
• As with standing posture, keep your shoulders straight and squared, your head upright, and your neck, back, and heels aligned. 
• Keep both feet on the ground as often as you can. 
 
Method B: 
Posture
Take standing breaks Even if you sit with perfect posture in the best chair in the world, you still need to stand up and stretch every so often. You can do a little exercise or just stand there for a few minutes. The fact of the matter is that our bodies weren't designed to sit down all day long, so it's a must that you at least stand (and preferably move around) every so often throughout the day. 
 
3. Walking Posture 
  
All you need to do for maintaining good posture is simply viewing it as an extension of your standing posture. Keep your head up, shoulders back, your chest out and your eyes looking straight ahead. Be sure to avoid pushing your head forward. 
 
4. Sleeping Posture  
Posture
You can help your posture by doing certain things to prepare for your night's sleep. Use a firmer mattress to help maintain proper back support, and try sleeping on your back to help keep your shoulders straight. Don't worry if you try sleeping on your side - try slipping a small, flat pillow between your knees to keep your spine aligned and straight. Make sure you're using a good pillow to provide proper support to your head and shoulders. 
 
5. Driving Posture
 Posture
Keep your back against your seat and your head aligned with the headrest. Adjust your seat so that your legs are at a proper distance away from the pedals and your arms are at a proper distance away from the steering wheel. If your chin is bunched up above the steering wheel, then you're sitting too close. 
 Posture
 
Your headrest should be adjusted in such a way that the middle of your head rests against it. Tilt it as you require to achieve this. Make sure that there are no more than four inches between the back of your head and the headrest. 
 
6. Train Your Core Muscles  
 
You can keep your entire musculoskeletal system functioning optimally by doing a few simple exercises to support your posture. Try lying on your back with your legs bent at a 90-degree angle at the knee, keeping your feet on the floor. Pull your belly-button toward your spine and hold. Hold it for 10 seconds, and repeat eight times. Repeat the exercise daily. Breathe normally during the exercise. 
 
7. Standing Posture  
 Posture
Method A: Finding your center
Good posture is all about finding alignment and balance. Place your feet about a shoulder's width apart and stand up straight. Keep your weight on the balls of your feet to prevent you from slouching as a result of resting on your heels. Next, keep your shoulders squared. Although it might feel unnatural at first, you'll soon get the hang of it. Pull your head back and upward. You can make this easier by imagining that the top of your head is reaching the ceiling. Not only will doing this improve your posture, but it'll also make you look taller and leaner.

Posture
 
Method B: Teach your body what standing correctly feels like 
Stand with your back against a door or wall, and touch it with the back of your head, shoulders, and butt. Don't worry if it feels uncomfortable - that's what the training is for. With enough practice, it'll feel uncomfortable not to stand this way. 
 
8. General Posture
Posture

Good posture is about keeping your body in alignment. It's as simple as being able to draw a straight line from your earlobe through your shoulder, hip, knee and down to the middle of your ankle. Can you do that? If so, you've got it. Try using a mirror to align your ears, shoulders, and hips. These points make a straight line, but your spine should actually curve in a very slight "S".

This is only for your information, kindly take the advice of your doctor for medicines, exercises and so on.     

https://gscrochetdesigns.blogspot.com. one can see my crochet creations  
https://gseasyrecipes.blogspot.com. feel free to view for easy, simple and healthy recipes    
https://kneereplacement-stickclub.blogspot.com. for info on knee replacement


Labels: , , , , , ,

Wednesday, November 06, 2019

11 Types of Muscle Tension That May Be Caused By Bottling Your Emotions:

1. Upper Back Tension

You are holding onto something very sad, this sadness has built up to the point where you are feeling it physically. Perhaps you need to let go of past heartbreaks or things of the sort? Did you refuse to allow those feelings to ride out as they should have?

2. Shoulder Tension

The shoulder is often associated with responsibilities and with good reason. The more weight you add on without acknowledging that you need help the worse this tension is going to get. You have to be able to ask for help when you need it, pretending everything is fine when it isn’t is not helping things at all.

3. Lower Back Tension

The lower back is where our insecurities grow. Have people been making fun of you? Do you hate something about yourself? These are things we all face, you shouldn’t be ignoring them but rather working through them. Accept yourself and everything will begin feeling better.

4. Abdominal Tension

This is basically tension or cramping in the stomach. It happens when we refuse to process something important. Just because it is hard does not mean we should pretend it didn’t happen; feel the things you need to feel.

5. Neck Tension

Neck tension is basically you refusing to deal with the stress at hand. It is building up and you are not releasing it as you should be. When this happens a lot of problems occur. Do you wake up with serious neckaches on the daily?

6. Middle Back Tension

If you are feeling tension here you are most likely refusing to deal with a guilty conscience. Have you done something wrong? Is there something you need to own up to? We all make mistakes in life, there is nothing that cannot be forgiven in time.

7. Head Tension

Tension in your head stems from fear. What are you afraid of? Is something bothering you that you aren’t even aware of?

8. Wrist Tension

Wrist tension is one of the more common issues people seem to face. We deal with tension here when we are upset and angry. Anger manifests itself whether we are aware of it or not. If someone or something is pissing you off, your body knows.

9. Outer Thigh Tension

This is where your past seems to haunt. Any sense of betrayal you have experienced but ignored makes its way here. If this is happening to you, you need to figure out how to get over it.

10. Inner Thigh Tension

This is where your impatience comes in to play. Are you being too pushy? This stems from being frustrated and is something a lot of people struggle with. It is one of the easier tensions to relieve believe it or not.

11. Knee Tension

Now, tension in the knee can be a bit tricky. For the most part, it seems to stem from being afraid of showing your vulnerable side and bottling it away. There is nothing wrong with being vulnerable sometimes. Stop being afraid to feel things.

this is only for your information, kindly take the advice of your doctor for medicines, exercises and so on.     
https://gscrochetdesigns.blogspot.com. one can see my crochet creations  
https://gseasyrecipes.blogspot.com. feel free to view for easy, simple and healthy recipes    
https://kneereplacement-stickclub.blogspot.com. for info on knee replacement


Labels: , , , , , , , , , , , , , , , , ,