Friday, April 18, 2025

3 Exercises to Reduce Anxiety and PTSD

Coping with anxiety and PTSD is not easy, and while professional treatment is welcome, it does not always provide the relief sufferers expect, at least not in daily coping. The truth is that there is no one solution that fits everyone, and each person needs to find their way to deal with the symptoms they experience. That is why we present to you today 3 somatic exercises you can try, which many report help reduce the intensity of the feelings they experience in moments of anxiety and PTSD. These exercises involve the whole body, and before starting any of them, it is recommended to ask yourself: "On a scale of 1 to 10, how anxious am I?" Try the chosen exercise, ask yourself again, and check if that number has decreased—this way, you'll know you found the exercise that suits you

1. Joint activation 
 When your mind is preoccupied with something, it’s hard to stop the automatic thoughts that come. Any attempt to do so will fail, but what can help is occupying the mind with something else, and it’s easiest to focus on the physical sensation in your body. For this, you will activate your body slowly and calmly, starting from the bottom and gradually moving upwards until you significantly reduce the symptoms you’re experiencing.

Start with one leg—slowly move your foot in circular motions 10 times in one direction and focus on the sensation created in the joint. Then do the same in the other direction, and after that, repeat with the other leg. If you are lying on your back, you can do the same with your knees while your thighs are in the air. If you’re standing, you can place your hands on your knees and rotate them together in circular motions. Also, rotate your pelvis to both sides, and then pause and try to notice the sensation in your lower body compared to the upper body—do you feel a difference? 
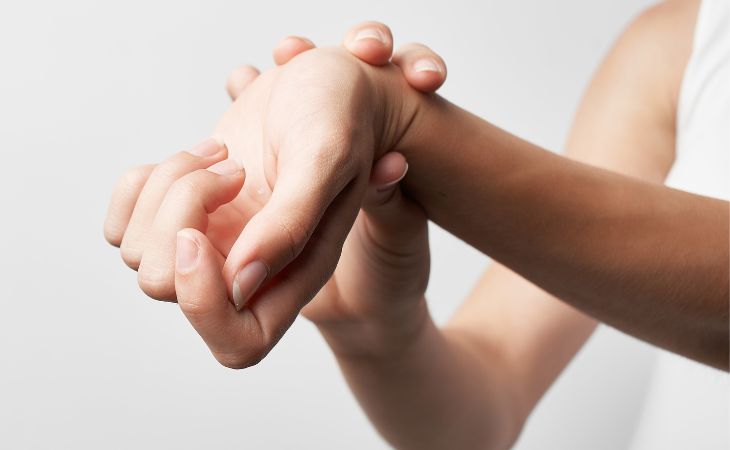
 Exercises for coping with anxiety and PTSD: Woman stretching her wrist joint
 
Now do the same with your wrists—one at a time or both together—then with your elbows and shoulders. Finally, rotate your head to one side and then to the other. Throughout the exercise, remember to focus on the sensation created in the joint during the rotations—this will help your mind focus on something else and move the energy around your body instead of trapping it inside.


2. Deep breathing and "voo" exhalations 
 The respiratory and cardiovascular systems are interconnected and influence each other—when one operates faster, so does the other. While we cannot directly control our heartbeat, we can definitely control our breathing. Some people find that deep breaths help restore calm to their body and bring their heart rate to a relaxed pace. If you have tried breathing exercises in the past and found them helpful, you might want to try the "voo" exhalation exercise.
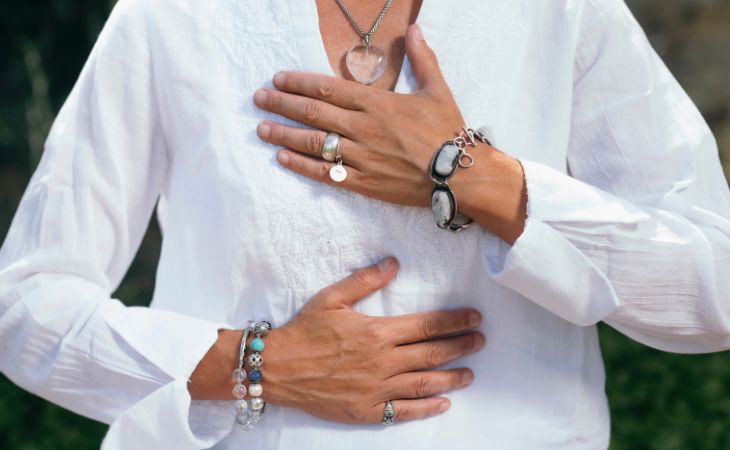
 Exercises for coping with anxiety and PTSD: Woman performing a breathing exercise
 
To begin the exercise, place one hand on your chest and the other on your abdomen, and take a deep, slow breath. Then exhale the air while making a "voo" sound—try to make the sound come as much as possible from your abdomen and not your throat. This is an ancient breathing exercise that calms the vagus nerve, which runs from the brain to the diaphragm, and supports the parasympathetic nervous system responsible for relaxation when the body is at rest. Do this 10 times and see how you feel. 
 
3. Focusing on observing something calming 
There are many things that can be calming, like the support of another person, a warm bath, or even a thick, heavy blanket resting on your body. However, such things can also be found through sight alone, and that is the goal of this exercise. Look around for something that can calm you—some people find it helpful to gaze at something sparkling and beautiful, while others prefer a natural element like a leaf swaying on a branch in the wind. 
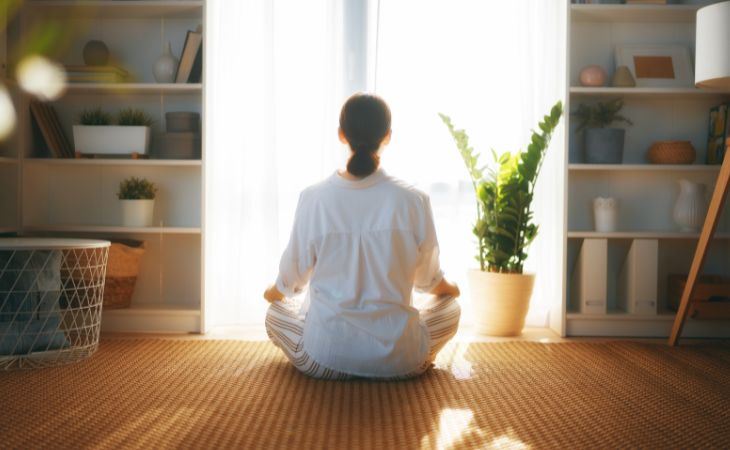
 Exercises for coping with anxiety and PTSD: Woman meditating
 
For some people, focusing on something distant works even better—the farther away it is, the more calming its effect can be. However, you might find it helpful to concentrate on something close to you, to which you can direct your entire gaze and examine closely. Try the exercise both ways to discover what works better for you, and focus your gaze until you feel its calming effect—this might take a few minutes. If you like, you can even combine this exercise with one of the previous ones and perform them simultaneously.


To sum up 
When we suffer from PTSD or anxiety, the symptoms can be severe and exhausting. The recovery process is long and not easy, but don’t let the symptoms make you think it’s impossible. Try the exercises we suggested when you feel overwhelmed, and give yourself a chance to relax and regain functionality in moments when you feel like you’re falling apart. They will help balance your body and mind, providing quick relief when you need it most.

This is only for your information, kindly take the advice of your doctor for medicines, exercises and so on.   


Labels: , , , , , , , , , ,

Thursday, March 20, 2025

Yoga Exercises to Relieve Muscle Tension

The more our muscles exert themselves during the day, the more our body craves rest - but beyond a night's sleep, there’s another way, full of benefits, to allow our body to receive its dose of calm, and that’s through performing yoga exercises. The following 8 yoga poses you’re about to discover might seem familiar at first, but in fact, each one is presented here in a unique version designed to relieve tired, tense, and sore muscles. So, if you regularly engage in sports, perform strenuous physical activity, or simply feel your muscles are exhausted, we recommend disconnecting from your surroundings for the next few minutes and recharging with renewed energy through the following poses.

Exercise 1: Squat for Ankle Strengthening (Ankle Strength Squat)
Unique Yoga Exercises: Squat for Ankle Strengthening (Ankle Strength Squat)
What’s the Benefit for the Muscles? The movements in this pose help to slightly "lubricate" the ankle joints, which tend to wear out due to intense physical activity or sports like running. Additionally, they engage the gluteal muscles and the back of the thigh, whose fitness is important and essential for our daily functioning.

How to Perform? Start by standing with a wide stance, with your feet pointing outward. Slightly bend your knees into a squat position as shown above. Press your palms together and bring them to the center of your chest - maintain as stable a stance as possible. Lift your right ankle and then lower it back down, then lift your left ankle and return it, and finally lift both ankles simultaneously and return them to the ground. Ensure full contact of each foot with the ground to avoid arch strain. Repeat the action 8 times. 
 
Exercise 2: Calf, Hamstring, and Achilles Stretch with a Yoga Block (Calf-Hamstring-Achilles Opener With Block)
 
Unique Yoga Exercises: Calf, Hamstring, and Achilles Stretch with a Yoga Block (Calf-Hamstring-Achilles Opener With Block)

What’s the Benefit for the Muscles? People who spend most of their time standing need their muscles, especially those in the lower body, to be strong enough to efficiently bear their full body weight. This pose allows you to simultaneously release the calf, hamstring, and Achilles tendon muscles while keeping them fit, ensuring stable standing. 
 
How to Perform? Start in a standing position and touch the yoga block (or any stable object) with the ball of your right foot at a 45-degree angle, with your heel securely on the ground. Step your left leg slightly back and carefully bend your upper body forward along your extended right leg, touching the ground. Hold this position for 60 seconds. Return to the starting point and perform the same action with your left leg. 
 
Exercise 3: Cat-Cow Pose with Crossed Knees (Cat-Cow With Knees Crossed)
 
Unique Yoga Exercises: Cat-Cow Pose with Crossed Knees (Cat-Cow With Knees Crossed)

What’s the Benefit for the Muscles? This pose helps relieve significant pressure from the pelvic and lower back areas, improving the spine’s daily functioning. It also slightly releases the joints and provides rest to a worn-out body.

How to Perform? Start in a position where your knees, toes, and palms are simultaneously touching the ground - ensure your shoulders align with your hands, your hips align with your knees, and your palms face the center of your body. Now cross your knees by passing your left knee behind your right knee. Both knees should be touching, and your feet should be apart - forming an X shape. Take a deep breath, carefully arch your back, and lift your head upward (Cow Pose). Then exhale while lowering your head toward the floor and gently rounding your back (Cat Pose). Perform this action 20-30 times, then repeat with the other leg. 
 
 
Exercise 4: Child’s Pose on Toes (Child’s Pose on Toes)
 
Unique Yoga Exercises: Child’s Pose on Toes (Child’s Pose on Toes)


What’s the Benefit for the Muscles? Every time we stand, walk, or run, it’s ideal for our foot’s contact with the ground to be correct and involve all possible parts. Pulling the toes will allow you to widen the foot joint, release the pressure applied to the arch during daily life, and ensure every step on the ground is stable and healthy. 
 
How to Perform? Start by sitting on both knees with an upright torso, hands resting on your knees. Pull your toes toward the center of your body and rest on them, lean your upper body forward while holding the edges of the mat with your hands, and lightly touch your forehead to the ground. Stretch your body by pulling your hips back and your hands forward. Stay in this position for a few deep breaths and release. Repeat the action 10 times. 
 
 
Exercise 5: Quad-Psoas Wall Stretch (Quad-Psoas Wall Stretch)
 
Unique Yoga Exercises: Quad-Psoas Wall Stretch (Quad-Psoas Wall Stretch)

What’s the Benefit for the Muscles? The psoas muscle is one of the most important muscles in the body, often called the "king of movement" - located deep in the upper body, it connects the pelvis to the back and thighs, significantly affecting our posture, range of motion, joint function, and core muscle activity. Strengthening this muscle will improve anyone’s stance and is especially crucial for athletes and those engaging in strenuous physical activity. 
 
How to Perform? Start in a lunge position, with your right leg extended forward and bent at a 90-degree angle, and your left knee placed at the junction of the wall and floor, with the entire section from foot to knee touching the wall (it’s recommended to use a mat or blanket between the leg and the ground to avoid knee injury). Place your hands on your right knee and push your hips forward. Then return your hips to their original position. Repeat this action 4-5 times in a slow motion for each leg.


Exercise 6: Shoulder Opener (Shoulder Opener)
 
Unique Yoga Exercises: Shoulder Opener (Shoulder Opener)
What’s the Benefit for the Muscles? During intense physical activity or sports, we need an especially large amount of oxygen, and releasing pressure from the lung area can help improve our breathing. This pose is an excellent way to "open" the chest muscles. 
 
How to Perform? Lie on a yoga mat face down, with your right elbow resting beside you on the ground at a 90-degree angle. Turn your gaze to the left and carefully roll your lower body to the right, lifting your left leg and touching the ground to your right with your left foot. Stay in this position for 5-10 breaths, then repeat the same action on the other side. 
 
 
Exercise 7: Tabletop Shin Self Massage Saw (Tabletop Shin Self Massage Saw)
 
Unique Yoga Exercises: Tabletop Shin Self Massage Saw (Tabletop Shin Self Massage Saw)
What’s the Benefit for the Muscles? Spending too much time standing, especially during intense physical activity, puts a heavy burden on the lower legs, and this pose will allow you to improve blood flow and bring calm to that area. 
 
How to Perform? Start in a position where your knees, toes, and palms are simultaneously touching the ground - ensure your shoulders align with your hands and your hips align with your knees. Place your right shin bone on your left calf muscle and begin a "massage" by moving it forward and backward while pressing. Repeat this action 3-5 times with your right leg, then switch legs and perform it with your left leg. 
 
 
Exercise 8: Yoga Toe Stretch (Yoga Toe Stretch)
 
Unique Yoga Exercises: Yoga Toe Stretch (Yoga Toe Stretch)
What’s the Benefit for the Muscles? As mentioned, the toes play an important role in maintaining our stable stance, and their contribution increases when they can utilize most of the surface they’re placed on. The action in this yoga exercise will allow you to stretch your toes, helping them spread efficiently during activity and slightly lubricating the ankle joints. 
 
How to Perform? Sit on the floor in an "Eastern" seated position, lift your right leg and cradle it at the calf with your right hand. Insert the fingers of your left hand between the toes of your right foot and begin a gentle circular motion of the ankle clockwise. Do this for a few seconds, then perform the same action on your left leg.


This is only for your information, kindly take the advice of your doctor for medicines, exercises and so on.   


Labels: , , , , , , , , , , ,

Friday, October 04, 2024

5 Pressure Points to Control Feelings of Hunger

Alternative medicine practitioners use pressure points to improve the flow of energy throughout the body, which can help heal various problems and pains. While pressure points are commonly known for reducing pressure and curing pain, they can also be used to decrease appetite and hunger. To control the feeling of hunger effectively, massage the following five pressure points with light pressure for the recommended time. Consistent daily practice will help you feel the change within the first week, making it easier to maintain your weight and overall health. 
 
1. Pressure point in the ear
hunger pressure points: Pressure point in the ear
This is one of the main points that will help you control the feeling of hunger. Press with your thumb on the marked point on the face, slightly in front of the triangular cartilage part next to the auditory canal of the ear. Open and close the jaw to find the exact point where the greatest movement occurs, and press on it for 1-3 minutes, twice a day.


2. Pressure point on the upper lip
hunger pressure points: Pressure point in the upper lip

The next point you want to massage to control the sensation of appetite is between the upper lip and the nose, in the center of the face. Press it for 1-5 minutes twice a day, and in addition to reducing the feeling of hunger, it will also help you relieve anxiety and stress. 
 
 
3. Pressure point on the knee
hunger pressure points: Pressure point in the knee

Pressing on a specific point on the outer side of your leg, located 5 cm below the kneecap, can improve digestion and alleviate menstrual discomfort. Apply pressure with your index finger on both feet for two minutes daily. Another pressure point, located about a thumb's distance from the elbow joint on the outside of the forearm, when pressed with your thumb for one minute daily, can control hunger, release heat from the body, stimulate intestinal functions, and prevent fluid accumulation.


4. Pressure point on the elbow
hunger pressure points: Pressure point in the elbow

Another pressure point, located about a thumb's distance from the elbow joint on the outside of the forearm, when pressed with your thumb for one minute daily, can control hunger, release heat from the body, stimulate intestinal functions, and prevent fluid accumulation. Lastly, there is a pressure point in the ankle that can also control hunger.


5. Pressure point on your ankle
hunger pressure points: Pressure point in the ankle

To locate a certain point on the inside of your leg, place your hand just above the ankle and move it 5 fingers towards the knee. Use your thumb to apply pressure on this point for a minute each day, and then release the pressure slowly. Repeat this process on the other leg. However, if you are pregnant, it is not recommended to use this pressure point. 
 
By following these instructions regularly, you may notice changes in your body and feelings within a week.

This is only for your information, kindly take the advice of your doctor for medicines, exercises and so on.   

https://gscrochetdesigns.blogspot.com. one can see my crochet creations  
https://gseasyrecipes.blogspot.com. feel free to view for easy, simple and healthy recipes    
https://kneereplacement-stickclub.blogspot.com. for info on knee replacement
https://cancersupportindia.blogspot.com  for infor on cancer and health related topics
https://GSiyers home remedies.blogspot.com   is the latest addition to my blogs. I'm going to add posts there, do give me your valuable feed back on my blogs. Thanks a lot, take care, be healthy and be happy.

Labels: , , , , , , , , , ,

Saturday, December 04, 2021

Massaging Certain Spots on Your Leg Will Aid Your Sleep

I sleep so much better now that I do this simple exercise each night! Acupuncture, a form of traditional Chinese medicine, has long been acknowledged for the health benefits it offers, but acupressure, which is less well-known, can offer similar benefits without the need to puncture the skin with needles. 

In the medical theory of traditional Chinese medicine, special “acupoints” are said to lie along meridians, or channels, in your body. By applying pressure to these so-called acupoints, you can improve blood flow in your body, which in turn boosts oxygen delivery and helps with healing.  
 
The San Yin Jiao Points
The San Yin Jiao Points are particularly important in the fields of acupuncture and acupressure. You have one on each leg – on the inner part of each of your tibias. 
 
Using these acupressure points can help treat abdominal distention, digestion, menstrual disorders and pain, infertility, insomnia, stress, and anxiety.
Furthermore, doing so can help cleanse and regulate the spleen and kidneys, ensuring your blood is in tip-top shape.  
 
Finding the San Yin Jiao Points
Reap all of the health benefits listed by following these super-easy steps each night before you sleep: 
 
1. Place four fingers above your ankle on the inside of your leg, just behind your shin bone. 
 
2. Massage each point by pressing your thumb on it in a circular motion for six seconds. 
 
3. Release your thumb for two seconds. 
 
4. Repeat steps 2 and 3 for five minutes, and then repeat the process on your other leg.

This is only for your information, kindly take the advice of your doctor for medicines, exercises and so on.   

https://gscrochetdesigns.blogspot.com. one can see my crochet creations  
https://gseasyrecipes.blogspot.com. feel free to view for easy, simple and healthy recipes    
https://kneereplacement-stickclub.blogspot.com. for info on knee replacement


Labels: , , , , , , , , , , , ,