Saturday, March 06, 2021

Get Rid of Turmeric Stains For Good With These Tips!

One simply cannot ignore turmeric, for its multitude of health benefits are, certainly, impressive. But we won’t focus on those in this article - you can learn all about them in our post titled Turmeric is As Effective as 14 Other Drugs Combined. Let’s talk about the annoying part of this powerful spice - the staining.

It’s no secret that cooking with turmeric is a risky business. One wrong move, and you’ll have a bright yellow stain on your T-shirt, the kitchen counter, or even cooking utensils. Turmeric stains can be quite stubborn, so much so that turmeric is frequently used as a dye. But don’t let these pesky stains stop you from using this delicious and nutritious spice. 
 
After all, for every problem, there is a solution. And in this article, we’ll show you how to get rid of those distinctive turmeric stains from various surfaces - fabrics, furniture, ceramic, and even the skin. Coincidentally, all these tips help remove stains of condiments and sauces that contain turmeric (like mustard and curries) from these surfaces too. 
 
1. How to remove turmeric stains from cookware
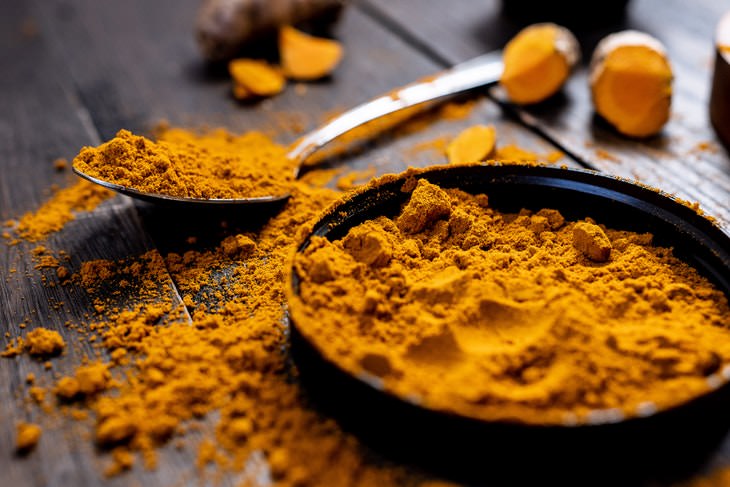
How to Remove Turmeric Stains turmeric
Turmeric can stain bowls, dishes, containers, cutting boards, and even silicone spatulas, so be careful when cooking with this spice at home. It does NOT, however, stain stainless steel and ceramic, or at least not permanently, so using metal and ceramic cookware, containers, and utensils is your best bet. 
 
When it comes to plastic, wood, silicone, glazed ceramic, or even glass kitchenware, it’s a different story altogether, and getting rid of them will require more effort. 
 
Follow these steps to get rid of persistent turmeric stains from cookware: 
 
1. Rinse the dish, utensil, or container with warm water. 
 
2. If the item is small, fill the sink with a solution of 1 part bleach (or vinegar) and 2 parts water. Soak the stained items in the solution for 12 hours or overnight. 
 
3. If the item is big, saturate a cloth with the same solution, and place it over the stain overnight. 
 
4. Rinse the item thoroughly and proceed to clean it in the dishwasher or by hand as usual. 
 
If the stain remains, here’s another method you can try.This trick works especially well for removing turmeric stains from wooden chopping boards.
 
 1. Mix baking soda and water into a thick paste. 
 
2. Massage the paste into the stain and leave it for 15-20 minutes. 
 
3. Rinse thoroughly and proceed to clean the item in the dishwasher or by hand as usual. 
 
2. How to get rid of turmeric stains from clothes and carpets
Even if you don’t cook with turmeric and need not worry about your cookware gaining a yellow tinge, you may still end up with a curry stain on your clothing, couch, or carpet when ordering takeout. But before you proclaim your shirt, kitchen towel, or carpet ruined, let us assure you that getting turmeric out of fabrics is possible, especially if you act quickly. 
 
Here’s where these step by step tips come into play: 
 
1. Remove any excess curry or turmeric from the fabric with a paper towel or spoon. 
 
2. Rinse the fabric under a stream of cold water. Do NOT use hot or warm water because this will set the stain. 
 
3. Depending on the size of the item, fill either a sink or a bathtub with cold water and add the appropriate amount of a stain remover (e.g. Vanish or Oxi Action). 
 
4. Soak the fabric in the solution for 20-30 minutes, then rinse with cold water. 
 
Fresh stains will usually be gone after you follow these steps, but if this doesn’t happen and you can still see a stain, apply more stain remover directly onto the stain and launder it in the washing machine with laundry detergent on a cold cycle. You can try to repeat these steps a few times and add some color-safe bleach in the next cycle if the stain persists. 
 
Another way you can try to remove turmeric from fabrics is with the help of glycerin. Flatten the dry fabric and work a generous amount of glycerin over the stain. Wait for 1 hour, and launder the items as usual. 
 
Note: Always be mindful of the fabric of the garment or other item and take it to the dry cleaner instead if it’s not advised to wash the item on the label. Once you’re satisfied with the results, let the item air-dry and DO NOT put it in the dryer, since the heat will set the stain completely.


3. Getting rid of turmeric stains from furniture and counters
In most cases, fresh turmeric stains will be easy to clean from the kitchen table or counter with a damp cloth or sponge. So, if you notice a fresh stain, it’s best to act fast. Older turmerics stains are trickier to remove. Try to use the baking soda paste trick we showed you earlier, provided that it’s safe to use on your specific counter or furniture. 
 
You can patch test it in an inconspicuous place first to make sure that the baking soda doesn’t scratch or otherwise damage the surface. 
 
If the stain remains, you can repeat this method a few times, or use white vinegar or a multipurpose cleaner to get rid of any traces of the stain. Small stains can also be cleaned away with a weak bleach solution or even whitening toothpaste: simply apply it on the stain, wait for a few minutes, and then wipe away with a damp cloth.
 
4. How to get rid of turmeric stains on the skin and nails

Rule number one of cooking with turmeric is to always use a spoon to measure out turmeric for a recipe. It’s also a wise decision to use disposable gloves when you’re grating fresh turmeric or massaging a dry rub spice mix when preparing meat. If you’re not careful, your fingers, nails, and even nail polish will be stained with turmeric.
 
Likewise, putting on a DIY mask that contains turmeric, while very effective at keeping the skin moisturized, may stain your face or even eyebrows if you have light hair. Luckily, there’s a way around that catastrophe, too. Here are a few things you can try:
 
Overall, try to wash the affected area of the skin or the nails as often as you can - do the dishes, take a bath to let the stain wash away more quickly. 
 
Use a scrub, loofah, or exfoliating liquid to exfoliate the top layer of the skin. Needless to say, loofahs will only work for the hands and body, and not the face. 
 
Apply body oil or just plain old olive oil to get rid of stains on the body or the hands. Oils absorb the yellow pigment and may help draw it out of your skin. Make sure to use a non-comedogenic facial oil, like the anti-aging oils we mentioned in the article 6 Beauty Oils That Reverse the Signs of Skin Aging, to remove turmeric stains from your face. Otherwise, you can end up with blocked pores and acne on the face.

Milk or yogurt is another effective remedy for turmeric stains. Dairy contains lactic acid that naturally exfoliates the skin. Apply plain white yogurt and leave it on for 10-15 minutes, then wash away. Alternatively, apply milk onto the skin with a cotton pad and then rinse with water. For stained fingernails and hands, you can even soak the hands in some milk for 15 minutes and then rinse your hands. 
 
Lastly, you can use hydrogen peroxide to naturally bleach your nails. To prevent any damage to the skin or nails, use 3% hydrogen peroxide diluted in 2 teaspoons of water. Soak a cotton pad in this solution, then apply it to the stained nails and fingers. Let this solution stay on the nails for 10 minutes - do not wash your hands at this time. You can repeat this method once a day. ​
 
We hope you found this article useful. If so, please share it with others as well!


This is only for your information, kindly take the advice of your doctor for medicines, exercises and so on.     

https://gscrochetdesigns.blogspot.com. one can see my crochet creations  
https://gseasyrecipes.blogspot.com. feel free to view for easy, simple and healthy recipes    
https://kneereplacement-stickclub.blogspot.com. for info on knee replacement


Labels: , , , , , , , , , , ,

Monday, April 01, 2019

Everyday Habits That Promote Tooth Decay

Our teeth are one of the most fragile parts of our body: most damage done to them cannot be reversed and has to be mended by a dentist. Teeth are sensitive to changes in temperature, certain foods, and even the slightest pressure during brushing can lead to enamel damage.
Apart from their role in digestion, straight, white and healthy teeth are, in many ways, about beauty, as we instinctively associate beautiful teeth with health. Still, maintaining our pearly whites can be difficult, and sometimes, we can’t put a finger on what’s causing a dental problem, be it discoloration, cavities or gum problems. To make things easier for our readers, we made a list of 11 everyday habits that could be the ones ruining your smile. I know I’m definitely guilty of a few of these myself, particularly drinking coffee and not choosing the right kind of mouthwash.


1. Taking Vitamins In Gummy Form Promotes Tooth Decay


If something tastes like candy, it’s probably bad for your teeth, even if it’s marketed to be good for you. Yes, we’re talking about the multitude of vitamins and supplements sold for both kids and adults in gummy form.


Though these vitamins are fun, colorful, and beneficial to your nutritional needs, many dentists point out that they’re one of the worst things you could do to your oral health, as parts of the sweet gummy can get stuck between your teeth and provide excellent nutrition to different bacteria, including those that cause cavities and gum disease.
Luckily, you can easily fix this problem by simply brushing your teeth after chewing on the gummy vitamin. Another alternative is, of course, to switch to traditional vitamins packaged in capsule or pill form.

2. Biting Nails Affects Your Enamel, Teeth & Jaw


It is definitely true that biting your nails can cause split nails, but did you know that it can affect your teeth as well?

In mild cases, biting your nails will make the enamel, the outermost protective coating of your teeth, crack and splinter, which provides an entry way for bacteria and can promote cavities. Furthermore, the teeth of patients that constantly bite their nails can sometimes shift over time, which creates an unsightly gap between the teeth.

In severe cases, nail biting was even associated with jaw pain and headaches caused by jaw tension, so biting your nails is definitely more serious than it may seem at first glance.

3. Snacking too Often Increases the Risk of Cavities


Eating small meals often is beneficial for weight loss and general digestive health, but dentists caution that doing it too often may make you more likely to develop cavities.

This is because eating increases the pH level in your mouth and creates a more acidic environment in the mouth, which remains for another 20-30 minutes after you eat until your saliva neutralizes it. An acidic environment is bad for your teeth, as it was linked to tooth decay.

4. Drinking Sparkling Water can Make your Teeth Sensitive


All carbonated beverages, be it soda, sparkling water or sparkling wine can affect your tooth health. Though unsweetened drinks may be less damaging than soda, they are still worse for your teeth than regular water because it creates an acidic environment that leads to demineralization, a process during which your tooth enamel breaks down.

An absence or lack of teeth enamel, in turn, can lead to discoloration, staining and cavities.

5. Smoking Can Stain Your Teeth & Promote Cavities


We’re all aware of the adverse effects of smoking on respiratory and heart health, but smoking can also be a threat to your oral health, affecting your teeth, mouth, and gums. Dentists point out that both the soft tissues and teeth can be affected by smoking, with smokers being more likely to have yellow, stained teeth, gum problems and recurrent infections.

6. Brushing Your Teeth Immediately After a Meal May Fracture Your Enamel


As we discussed above, your teeth are more vulnerable to damage right after you eat because of the acidic environment in the oral cavity. If you brush your teeth right after eating, you’re more likely to cause micro fractures in the enamel, especially if you already brush your teeth too harshly.

Instead, wait for at least 30 minutes after a meal before brushing your teeth.

7. Drinking Wine & Coffee Can Stain Your Teeth


Anything capable of staining your clothes can also stain your teeth: coffee, wine, soda, tea, balsamic vinegar, fruit juices and even tomato sauce can all alter the color of your teeth. Dark-colored drinks are the first ones to blame, of course.

For example, red wine contains a lot of tannins that, despite being excellent antioxidants, can stain your teeth. Sadly, the more pigmented beverages are not the only ones to blame, as even white wine or rose, as well as herbal teas contain fruit acids capable of discoloring the teeth.


A special mention goes to lemon water or other citrus-infused drinks. Though an occasional splash of lemon juice won’t affect your teeth, drinking highly-acidic drinks like lemon water, vinegar detox drinks and even tomato juice can deteriorate your tooth enamel.
Luckily, minimizing the damage is easy: it’s enough to rinse your mouth with water after you had one of these drinks. This will restore the pH and should get rid of the pigmented ingredients.

8. Using a Mouthwash Containing Alcohol can Increase the Likelihood of an Infection


Many mouthwash varieties contain alcohol, which can dry out your mouth and gums, wipe out the healthy bacteria that live in your mouth and, therefore, promotes infection. And though the sensation of dryness can feel satisfying at first, ultimately, it wreaks havoc in the mouth.

This doesn’t mean, however, that all mouthwashes are bad, as a good mouthwash can help saturate your teeth with fluoride (that helps fight cavities), plus it keeps your breath fresher throughout the day.

To choose the right kind of mouthwash, opt for the alcohol-free varieties and those that contain xylitol, an ingredient capable of stimulating the oh-so-necessary saliva production.

9. Whitening Products Can Wear Away Your Enamel


As it is the case with acidic drinks, harsh, over-the-counter toothpastes, whitening strips or pastes can damage your enamel, which may make your teeth look whiter at first, but will also make them look worse in the long run.

This is because by wearing off the enamel, it exposes the next layer of the tooth, the dentin, which, even when healthy, has a yellow tint to it. Remineralizing the enamel is a very long and difficult process, and your enamel may never fully restore.

All of this doesn’t mean that all whitening products are bad, but rather that you should be very careful with teeth-whitening products, especially when you decide to use them without professional oversight.

10. Storing Toothbrushes In a Cabinet or Drawer Exposes You to Infection

Do you store your toothbrushes stashed deep in a container, a drawer or a bathroom cabinet to protect them from all the nasty germs flying around in the bathroom? If germ protection is your major concern, you might want to reconsider your decision, as it turns out that storing your toothbrush in a closed container may lead to more bacteria on your toothbrush.
According to the recommendations by the American Dental Association, you should store your toothbrush in an upright container so that it is exposed to the open air. This will let it dry freely and minimize bacterial growth, because a dry and clean toothbrush is equal to a healthy mouth and teeth.

11. Using Your Teeth As a Tool Can Damage Them Without You Knowing It


This last habit is very popular and just as equally dangerous. Just imagine, it’s a hot summer day, you’re thirsty, and decide to buy yourself a bottle of water. No matter how much you try, it just won’t open, so you have no choice but to resort to “helping” yourself out a bit with your teeth, because why not?

Well, needless to say, this is not a recipe of success, at least when your teeth are concerned. Even if you think that nothing had happened to your teeth and you don’t see or feel any fractures, you could have caused a micro fracture that made your teeth so much more susceptible to cavities and breakage in the future.

Fractures like these can even hurt your jawbone or cause receding gums. Save yourself a trip to the dentist and use a more suitable tool, or simply ask for help.
THIS IS ONLY FOR INFORMATION, ALWAYS CONSULT YOU PHYSICIAN BEFORE HAVING ANY PARTICULAR FOOD/ MEDICATION/EXERCISE/OTHER REMEDIES.                                    PS- THOSE INTERESTED IN RECIPES ARE FREE TO  VIEW MY BLOG-                                                                                           https://gseasyrecipes.blogspot.com/                                                                                                                                                         FOR INFO ABOUT KNEE REPLACEMENT, YOU CAN VIEW MY BLOG-                                                  https:// kneereplacement-stickclub.blogspot.com/           

                   FOR CROCHET DESIGNS                                                                                                                                                                                                  https://gscrochetdesigns.blogspot.com

Labels: , , , , , , , , , , , , , , , , , , ,

Monday, November 12, 2018

Deodorant Stain- Home-made deo !

Till more than 2 years ago I was using deodorant spray every day for ages. Then our daughter-in-law told me,  " mom, you're putting so much info on so many things. So, why can't you find something to use instead of deodorant? As she didn't want me to get breast cancer, since I'm already a thyroid cancer survivor ". So, that made me think, do a lot of research, then came out with my own simple deo, made from what I've in my kitchen ! I found it more effective than store bought one too, as which store bought ( we live in a tropical country, with a lot of humidity), on some real humid days, by the end of the day, I used to feel terrible. But what I made at home, I found it works on all days very well, no bad smell, even when it is sultry.

Recipe of my home made deo-
baking soda  1/2 tsp
coconut oil    2 tsp
rose water   2 tsp
I mix all these in a small container with a lid. I'm a person who prefers to use God given gift, my fingers, so I apply with my fingers, and it works.

Since now I'm a COPD ( chronic obstructive pulmonary disease), due to which I can't stand any strong smell, as this is all very mild, it doesn't worsen my respiratory problem. Those who don't have my problem, can add any essential oil, instead of rose water- lavender instead.

At times, those who use deodorant find that it leaves a stain in your dress. Well, those stains can be removed at home with what we've in our kitchen itself !

Deodorant and antiperspirant can build-up on your shirts over time, leaving them to develop a thick and crusty stain that can be hard to remove. Thankfully, those ugly deodorant stains are easy to get out of your clothing with the right methods. 
But before we go into that there are a few things to keep in mind. deodorants are designed to work on the odors caused by sweating. For this to be accomplished, the manufacturers of antiperspirants and deodorants add aluminum salts to the products. As a result, the aluminum reacts with the salts in your sweat, causing the fabric to turn yellow. However, the chemicals that are found in deodorants and antiperspirants not only react with the salts in your sweat, they also cause a reaction with the fabric softener you use in your washer or dryer. This reaction can create discoloring on your favorite shirts. The techniques mentioned below will effectively remove the stains:
 
1. Lemon juice
Lemon juice contains natural bleaching properties which when combined with the sun can help antiperspirant stain to fade from light-colored clothing. Its incredible cleaning powers stem from its low pH levels and high levels of citric acid. Pour the lemon juice into a small cup or bowl. Then, soak the stained area of your shirt in the lemon juice until it is saturated completely. Then, place the garment in the sun for about 15 minutes. After, sprinkle table salt on the stain, rubbing it in gently with a cleaning brush. Once complete, rinse the area with cold water and set it in the sun to dry, or toss in the laundry and wash as usual.
2. Baking soda
Baking soda is well-known for its cleaning benefits. Baking soda effervesces, this allows it to lift any deposits from the fabric. It is also extremely absorbent, helping it to soak up most of the residue from the clothing. It is especially useful for removing dried, yellowish stains caused by antiperspirant. Combine the baking soda and water, mixing to form a thick paste. Then spread the paste over the stain. Allow it to stand for at least 30 minutes. Then, using a cleaning brush gently rub the baking soda. Remove any residue from the clothing by rinsing with water. 
3. Use laundry detergent
Liquid laundry detergent can be used as a spot treatment to remove deodorant stains from most fabrics. When you mix the laundry detergent with water, the carbonation helps to break down the deposits that are responsible for creating the stain in the first place. Mix the water and the laundry detergent and mix well to create the cleaning solution. Place the garment in the solution and allow to soak for 30 minutes. Then, use your hands, and gently rub the stained are back and forth, quickly removing the stain. Leave out in the sun to dry. 
Removing deodorant stains from a black shirt
On a black shirt, the thick layer of caked-on, whitish residue is typically caused by using an excessive amount of deodorant that can quickly build up. These wax-like stains can slowly transfer to your clothing, making it difficult to remove even after it's been thoroughly washed. Here's what you need to do: 
1. Use vinegar
The chemicals found in deodorant can leave mineral and oil deposits on the underarms of your favorite shirts. But, the acidic properties of distilled white vinegar will help break down these oils and minerals that have caused the stain. To use this method, dilute the vinegar by mixing it with water then place the stained area of the garment in the diluted vinegar letting it soak for at least 30 minutes. Remove from the vinegar solution and gently rub the stain to remove any stains that remain. Rinse the vinegar out of the fabric with water. 
2. Use rubbing alcohol
To dissolve the mineral and oil deposits that transferred to your clothing from deodorant, use rubbing alcohol. It is a great way to get rid of deodorant stains. All you need to do is saturate a cotton ball with the rubbing alcohol and gently rub the cotton ball over the stain. 
3. Use hydrogen peroxide
Hydrogen peroxide is a natural bleaching agent that is excellent at absorbing odors. Just a little bit of hydrogen peroxide solution that will work wonders to lighten and remove any ugly white marks caused by deodorant. All you need to do, in a small bowl, mix the hydrogen peroxide and dish soap thoroughly well. Then, soak the deodorant stain in the solution for 30 minutes. Remove and rinse thoroughly with warm water allowing to dry in the sun.

THIS IS ONLY FOR INFORMATION, ALWAYS CONSULT YOU PHYSICIAN BEFORE HAVING ANY PARTICULAR FOOD/ MEDICATION/EXERCISE/OTHER REMEDIES.                                                                                                                                                                                                             PS- THOSE INTERESTED IN RECIPES ARE FREE TO  VIEW MY BLOG-                                                                                           https://gseasyrecipes.blogspot.com/   

FOR INFO ABOUT KNEE REPLACEMENT, YOU CAN VIEW MY BLOG-                                                                                                    https:// kneereplacement-stickclub.blogspot.com/                              

FOR CROCHET DESIGNS                                                                                                                                                                                                                                 https://gscrochetdesigns.blogspot.com

Labels: , , , , , , , ,