Wednesday, February 10, 2021

8 Useful Stability Ball Exercises for a Full-Body Workout

It’s known by many names – exercise ball, stability ball, gym ball, balance ball, and even Swiss ball – and has several wonderful benefits. These big bouncy balls are found in every gym these days but can also be used at home to include in your exercise regimen. In fact, these balls are a great way to improve strength, cardio endurance, and balance.

Leading fitness experts say that stability balls can help train your abs, improve your posture and balance, and can strengthen your back and core. The best part about this ball is that you don’t need to be a gym expert to use it and can easily incorporate it into your workout routine at home by learning how to use it effectively. Moreover, it won’t even take much space, is cheap and lightweight, and can be quickly inflated and deflated.
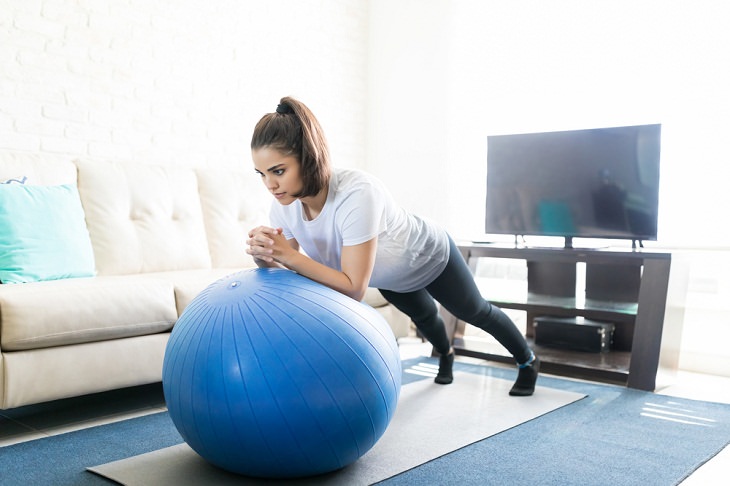
Stability Ball Exercises, woman exercising with gym ball
Before you decide on getting one of these balls, however, you must know which is the right size for you. For example, people between 5 feet and 5.5 feet should choose a 55-centimeter ball. Those who are between 5'6 and 5'11 should opt for a 65-centimeter ball. Lastly, a 75-centimeter ball would be ideal for people between 6 feet and 6'3 in height. 
 
Now, let's take a look at some common and easy stability ball workouts that will be beneficial for your whole body.
 
1. Single-Leg Bridge
Benefits: Increased posterior chain strength, improved proximal hip and core stability, and better hip dissociation. 
 
Step 1: Lie face-up on the floor behind the ball with your knees bent. Place your feet on the ball and your arms on the floor by your sides. Now slowly raise your hips off the floor until your upper back is stabilized. 
 
Step 2: Pause and then slowly raise one leg straight up. Lower the leg and then return to start. Repeat after 30 seconds and keep alternating the legs. Perform 2-3 sets on each side.

2. Incline plank
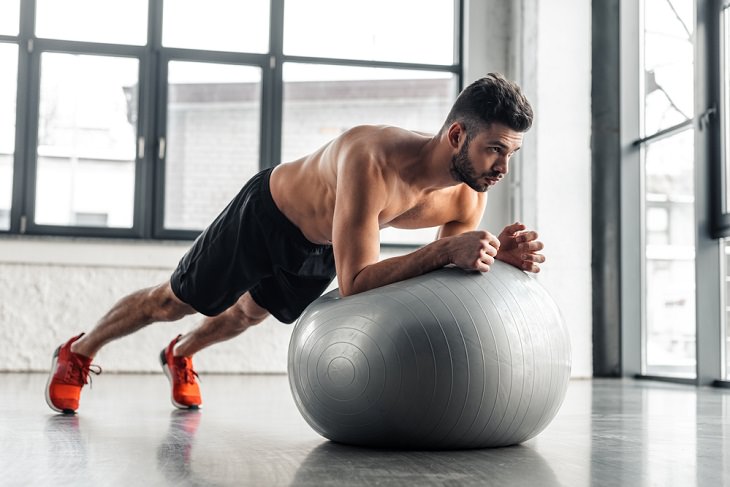
Stability Ball Exercises, plank
Benefits: Works on the abdominal muscles as well as the other ab muscles and the core muscles that run from the pelvis along the spine and up to the shoulder girdle. 
 
Step 1: Place the stability ball on the floor and get into a pushup position with your hands on it. Rest your weight on your elbows on it. 
 
Step 2: Hold your body in a straight line from head to heels. Make sure that your hips don’t sag. Maintain this position for at least 20-30 seconds. Do 3-5 sets and rest for 30 seconds after each set. 
 
3. Wall Squats
Benefits: Works your quadriceps, gluteal muscles (a set of smaller muscles located in the buttocks), hamstrings, hip flexors, and core. 
 
Step 1: Place the stability ball up against a wall and make sure it braces against your back. Now, lower down into a squat position until your legs form 90-degree angles at the knees. 
 
Step 2: Use the ball to support your back and roll it from your lower back to your shoulder blades. Squat down low to deepen the move and provide more stability. Complete 10 to 15 reps (repetitions). 
 
Note: Make sure that your knees don’t roll out to the sides during the exercise. They should be in line with the rest of your body.
 
4. Hamstring curl
Benefits: Works your gluteal muscles, hamstrings, and core. 
 
Step 1: Lie on your back and put your calves and heels on the stability ball. Your arms should be on your sides and your palms should be facing down. 
 
Step 2: Move your hips upward by squeezing your gluteal muscles and hamstrings until your body is straight. Engage your core and extend your legs straight out, moving the ball away from you. Slowly lift your hips and bend your knees.
 
Step 3: Roll the ball back in by pulling your heels towards your buttocks until the soles of your feet touch the ball. Now, stretch your knees and lower your hips and back to the floor. Repeat. Complete 12 to 15 reps.

5. Back Extension
Benefits: Strengthens the muscles of the lower back. 
 
Step 1: Place the front of your body from hips to ribs on the ball. Your legs should be extended straight behind while your toes must rest on the floor. Your body should form one, long line. 
 
Step 2: Raise your chest high and hold on to the ball for balance. Pull your shoulders back as you exhale and keep your neck in line with the spine. Return to a relaxed position. Complete 12–15 reps. 
 
6. Push-ups
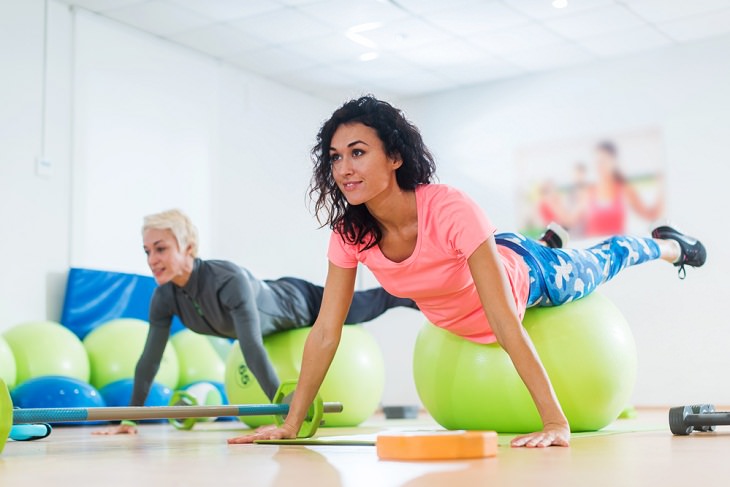
Stability Ball Exercises, Push-ups
Benefits: Works your chest and shoulder muscles. Also helps activate a number of core muscles. 
 
Step 1: Lie with your stomach on the stability ball with both feet and hands on the floor, hip- and shoulder-width apart. Place your hands on the ball at the sides of your chest and your toes on the floor with your legs straight. Now, push your body up until your arms are almost straight. Make sure that your elbows aren’t locked. 
 
Step 2: Hold and balance for two seconds. Return to the starting position slowly and continue for 8–10 reps. 
 
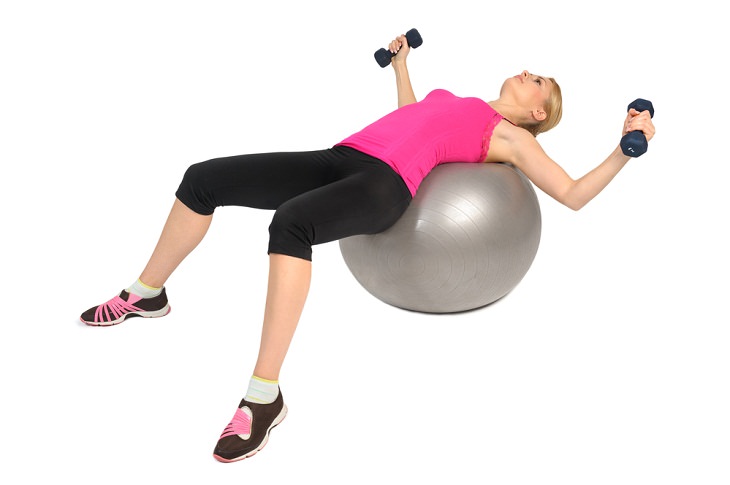
7. Chest press
 Stability Ball Exercises, Chest press

Benefits: Works your shoulders and triceps. Strengthens both your chest and core muscles. 
 
Step 1: Lie your back down on the ball while holding one dumbbell in each hand. Keep your feet flat on the floor with your ankles directly under your knees. Bring both weights up to meet your shoulders while bending your arms with your elbows out wide. 
 
Step 2: Engage your core with your hips lifted. Exhale slowly as you press the weights toward the ceiling. Make sure that you are holding the dumbbells by your chest with your palms facing forward. Hold this position for a second. 
 
Step 3: Lower the dumbbells back to the starting position slowly. Repeat while using your abs to keep your body still. Complete three sets of 10-12 reps keeping your hips lifted all through.
 
8. Mountain Climber
Benefits: Great cardio workout. Also works at your core. 
 
Step 1: Begin by resting your hands on either side of the ball. Extend your feet out behind you in a way that you are leaning on the ball in a high plank position. 
 
Step 2: With your core engaged, bring your right knee forward under your chest. Switch legs quickly, bringing the left knee forward while sending your right foot back. Return to the starting position. Complete 12 reps, alternating legs.
 
This is only for your information, kindly take the advice of your doctor for medicines, exercises and so on.     

https://gscrochetdesigns.blogspot.com. one can see my crochet creations  
https://gseasyrecipes.blogspot.com. feel free to view for easy, simple and healthy recipes    
https://kneereplacement-stickclub.blogspot.com. for info on knee replacement


Labels: , , , , , , , , , , , ,

Thursday, March 20, 2014

Exercises to ease Knee pain

Why Exercise?
If you have a knee injury, you may worry that exercising could cause more damage or pain. But the opposite is true: Strengthening the muscles that support your knee, and keeping them flexible, is the best way to prevent further injuries. Start slowly, and build your strength over time. Some muscle soreness is normal when you exercise. But you shouldn't feel more pain, especially in your knee. If you do, stop and contact your doctor.
woman stretching with chair

Warm Up Your Knee
Stretching can help your leg muscles perform better. Warm up before you stretch, though. You can ride a stationary bike for about 5 minutes, take a brisk 2-minute walk while pumping your arms, or do 15-20 wall push-ups followed by the same number of calf raises. It will help you get more out of your workout and lower your risk of injury.


straight leg raise
Straight Leg Raises
If your knee’s not at its best, start with an easy strengthening exercise for your quadriceps, the muscles in the front of the thigh. This move puts little to no strain on the knee: Lie on your back on the floor or another flat surface. Bend one knee and place your foot flat on the floor. Keeping the other leg straight, raise it to the height of the opposite knee. Repeat 10-15 times for three sets.

hamstring exercise
Hamstring Curls
Your hamstrings are the muscles along the back of your thigh. Lie flat on your stomach. Slowly bring your heels as close to your buttocks as you can, and hold that position. Do three sets of 15. You can also do this exercise standing while holding on to a chair. If this becomes easy, you can add ankle weights, slowly increasing the weight from 1 to 3 to 5 pounds.


straight leg raise
Straight Leg Raises
Lie on your stomach with your legs straight. Tighten the muscles in your bottom and the hamstring of one leg, and lift toward the ceiling. Hold 3-5 seconds, lower, and repeat. Do 10-15 lifts and switch sides. You can add ankle weights as you gain strength. You should not feel back pain. If you do, limit how high you lift up.  If it’s still painful, stop and talk to your doctor.

wall squat
Wall squats
Wall squats are “closed chain” exercises, advanced strengthening moves that keep your feet on the floor. Stand with your back against a wall, your feet about shoulder-width apart. Slowly bend your knees, keeping your back and pelvis against the wall. Hold for 5-10 seconds. Don’t bend too deeply or you could injure your knee. If you feel pressure or discomfort in your knees, adjust your position. Repeat the exercise, and try to hold the sit position a few seconds longer each time.


calf raise
Calf Raises
Stand facing the back of a sturdy chair, other support such as the back of a couch, or a wall bar at the gym. You can also do this on the stairs, holding on to the banister with your heels hanging off the edge of the step. Slowly raise the heels as high as you can, then lower. Do three sets of 10-15. If this move becomes easy, lift one foot slightly off the floor, placing all your weight on the other foot.

Step-Ups
Place one foot on a step bench, platform, or the lowest step on a staircase.  Keeping your pelvis level, bend your knee and slowly lower the opposite foot to the floor. Lightly touch your toe to the floor, then rise back up. Repeat 10-15 times, then switch legs. If this exercise becomes easy, use a higher step, or touch your heel instead of your toe.

hip abduction
Hip exercises
Lie on one side with legs stacked. Bend the bottom leg for support. Straighten the top leg (without locking the knee), and raise it to 45 degrees. Hold for 5 seconds, lower and relax briefly, then repeat 10-15 times. Switch sides and repeat. Vary the exercise by pointing the toe of your upper leg slightly toward the floor as you raise it.

Leg Presses
Sit on a leg-press machine with your back and head against the support and your feet flat on the foot plate. Adjust the seat back until you feel comfortable. Slowly push the plate away from you until your legs are extended (but do not lock your knees). Bend your knees and return to your starting position. Do three sets of 10-15 reps. (Ask a member of the gym staff for assistance the first time you do this.)


No sharp pain while exercising
No exercise should ever cause or increase pain. Remember: Muscle soreness after a vigorous workout is normal, but any kind of sharp, shooting, or sudden pain in the muscles or joints is a sign that something is wrong. If you feel pain while exercising, stop right away and check with your doctor.

Aerobic Exercise That Works for Your Knee
If you have knee pain, avoid exercises that aggravate it. This may include high-impact activities such as running or intense aerobics. Use a common-sense approach and notice what feels right for you. For example, some people find that elliptical machines hurt, while others do not. A great activity for people with sore knees is swimming: Your body in water weighs 1/6 of what it does on land.


ps- this is only for information, always consult you physician before having any particular food/ medication/exercise/other remedies.
ps- those interested in recipes are free to view my blog-
http://gseasyrecipes.blogspot.com/
for info about knee replacement, you can view my blog-
http://Knee replacement-stick club.blogspot.com/

for crochet designs


http://My Crochet Creations.blogspot.com

Labels: , , , , , , , , , , ,