Wednesday, February 10, 2021

8 Useful Stability Ball Exercises for a Full-Body Workout

It’s known by many names – exercise ball, stability ball, gym ball, balance ball, and even Swiss ball – and has several wonderful benefits. These big bouncy balls are found in every gym these days but can also be used at home to include in your exercise regimen. In fact, these balls are a great way to improve strength, cardio endurance, and balance.

Leading fitness experts say that stability balls can help train your abs, improve your posture and balance, and can strengthen your back and core. The best part about this ball is that you don’t need to be a gym expert to use it and can easily incorporate it into your workout routine at home by learning how to use it effectively. Moreover, it won’t even take much space, is cheap and lightweight, and can be quickly inflated and deflated.
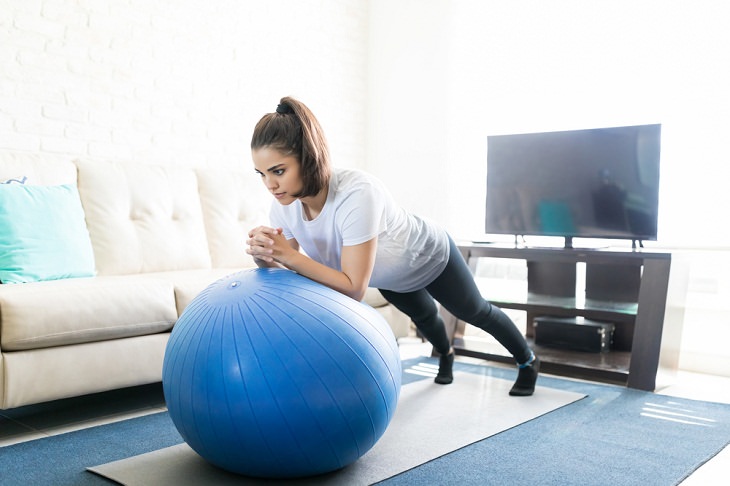
Stability Ball Exercises, woman exercising with gym ball
Before you decide on getting one of these balls, however, you must know which is the right size for you. For example, people between 5 feet and 5.5 feet should choose a 55-centimeter ball. Those who are between 5'6 and 5'11 should opt for a 65-centimeter ball. Lastly, a 75-centimeter ball would be ideal for people between 6 feet and 6'3 in height. 
 
Now, let's take a look at some common and easy stability ball workouts that will be beneficial for your whole body.
 
1. Single-Leg Bridge
Benefits: Increased posterior chain strength, improved proximal hip and core stability, and better hip dissociation. 
 
Step 1: Lie face-up on the floor behind the ball with your knees bent. Place your feet on the ball and your arms on the floor by your sides. Now slowly raise your hips off the floor until your upper back is stabilized. 
 
Step 2: Pause and then slowly raise one leg straight up. Lower the leg and then return to start. Repeat after 30 seconds and keep alternating the legs. Perform 2-3 sets on each side.

2. Incline plank
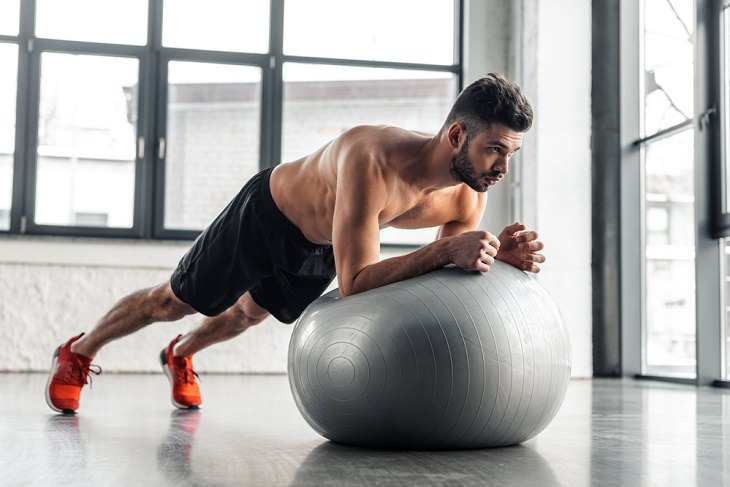
Stability Ball Exercises, plank
Benefits: Works on the abdominal muscles as well as the other ab muscles and the core muscles that run from the pelvis along the spine and up to the shoulder girdle. 
 
Step 1: Place the stability ball on the floor and get into a pushup position with your hands on it. Rest your weight on your elbows on it. 
 
Step 2: Hold your body in a straight line from head to heels. Make sure that your hips don’t sag. Maintain this position for at least 20-30 seconds. Do 3-5 sets and rest for 30 seconds after each set. 
 
3. Wall Squats
Benefits: Works your quadriceps, gluteal muscles (a set of smaller muscles located in the buttocks), hamstrings, hip flexors, and core. 
 
Step 1: Place the stability ball up against a wall and make sure it braces against your back. Now, lower down into a squat position until your legs form 90-degree angles at the knees. 
 
Step 2: Use the ball to support your back and roll it from your lower back to your shoulder blades. Squat down low to deepen the move and provide more stability. Complete 10 to 15 reps (repetitions). 
 
Note: Make sure that your knees don’t roll out to the sides during the exercise. They should be in line with the rest of your body.
 
4. Hamstring curl
Benefits: Works your gluteal muscles, hamstrings, and core. 
 
Step 1: Lie on your back and put your calves and heels on the stability ball. Your arms should be on your sides and your palms should be facing down. 
 
Step 2: Move your hips upward by squeezing your gluteal muscles and hamstrings until your body is straight. Engage your core and extend your legs straight out, moving the ball away from you. Slowly lift your hips and bend your knees.
 
Step 3: Roll the ball back in by pulling your heels towards your buttocks until the soles of your feet touch the ball. Now, stretch your knees and lower your hips and back to the floor. Repeat. Complete 12 to 15 reps.

5. Back Extension
Benefits: Strengthens the muscles of the lower back. 
 
Step 1: Place the front of your body from hips to ribs on the ball. Your legs should be extended straight behind while your toes must rest on the floor. Your body should form one, long line. 
 
Step 2: Raise your chest high and hold on to the ball for balance. Pull your shoulders back as you exhale and keep your neck in line with the spine. Return to a relaxed position. Complete 12–15 reps. 
 
6. Push-ups
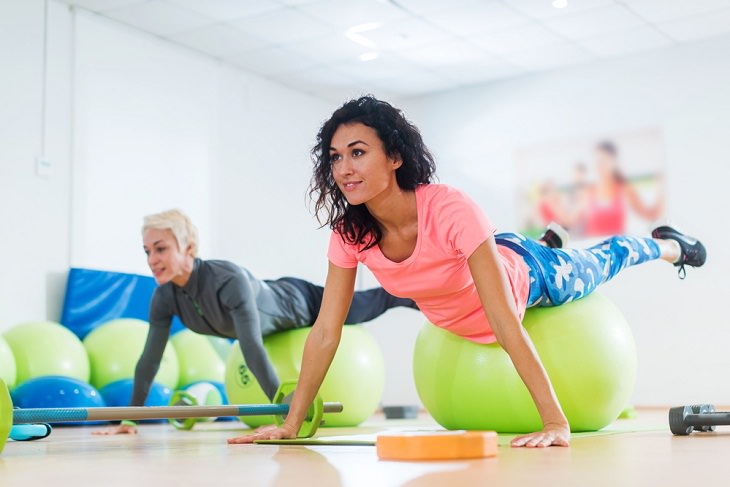
Stability Ball Exercises, Push-ups
Benefits: Works your chest and shoulder muscles. Also helps activate a number of core muscles. 
 
Step 1: Lie with your stomach on the stability ball with both feet and hands on the floor, hip- and shoulder-width apart. Place your hands on the ball at the sides of your chest and your toes on the floor with your legs straight. Now, push your body up until your arms are almost straight. Make sure that your elbows aren’t locked. 
 
Step 2: Hold and balance for two seconds. Return to the starting position slowly and continue for 8–10 reps. 
 
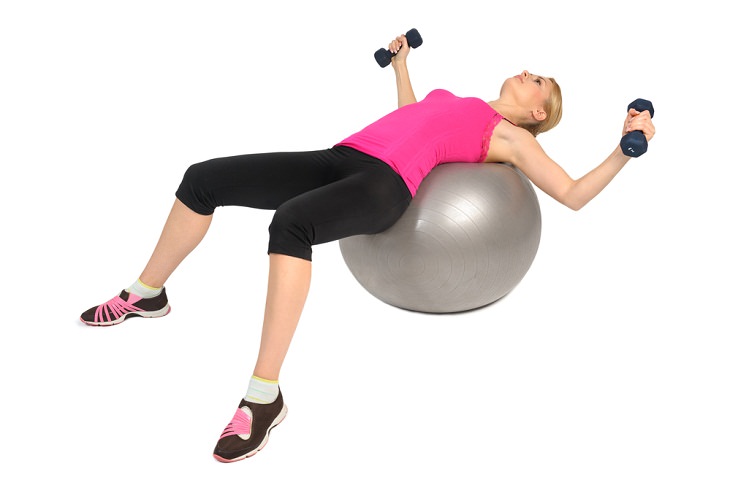
7. Chest press
 Stability Ball Exercises, Chest press

Benefits: Works your shoulders and triceps. Strengthens both your chest and core muscles. 
 
Step 1: Lie your back down on the ball while holding one dumbbell in each hand. Keep your feet flat on the floor with your ankles directly under your knees. Bring both weights up to meet your shoulders while bending your arms with your elbows out wide. 
 
Step 2: Engage your core with your hips lifted. Exhale slowly as you press the weights toward the ceiling. Make sure that you are holding the dumbbells by your chest with your palms facing forward. Hold this position for a second. 
 
Step 3: Lower the dumbbells back to the starting position slowly. Repeat while using your abs to keep your body still. Complete three sets of 10-12 reps keeping your hips lifted all through.
 
8. Mountain Climber
Benefits: Great cardio workout. Also works at your core. 
 
Step 1: Begin by resting your hands on either side of the ball. Extend your feet out behind you in a way that you are leaning on the ball in a high plank position. 
 
Step 2: With your core engaged, bring your right knee forward under your chest. Switch legs quickly, bringing the left knee forward while sending your right foot back. Return to the starting position. Complete 12 reps, alternating legs.
 
This is only for your information, kindly take the advice of your doctor for medicines, exercises and so on.     

https://gscrochetdesigns.blogspot.com. one can see my crochet creations  
https://gseasyrecipes.blogspot.com. feel free to view for easy, simple and healthy recipes    
https://kneereplacement-stickclub.blogspot.com. for info on knee replacement


Labels: , , , , , , , , , , , ,

Sunday, May 10, 2020

Best exercises for new moms

Pregnancy brings with it many changes. But the major changes happen in your body. When you get pregnant, your body adapts itself for your baby. As the baby grows, the muscles in your abdomen stretches to make room for your baby. Sometimes, it also causes the separation of the two main muscles in your abdomen. Your pelvic floor also undergoes many changes. This may lead to problems like urinary and fecal incontinence. That is why it is so important to exercise after delivery. But any exercises will not do for you. You need to choose those exercises that are best for you. This will resolve problems quickly and also help you avoid any injuries and complications. The wrong exercises may sometimes cause complications especially after delivery. As we get ready to celebrate Mother’s Day, let us take a look at a few exercises that you can perform. 

Pelvic Tilt

This is a great exercise that helps you tighten and strengthen your abdominal muscles and pelvis.

Lie on your back, with your knees bent and soles on the floor.

Your lower must be flat on the ground.

Inhale deeply through your nose and feel your tummy expanding.
Exhale slowly and while doing so roll your pelvis back.

Inhale and roll the pelvis forward.

Repeat 10 times.


Head Lifts

This will make your back muscles strong.

Directions

Lie on your back with your arms along your sides.

Keep your lower back on the floor and bend your knees.

Your soles must be flat on the floor.

Relax your abdominal muscles as you inhale.

Now exhale and slowly lift your head and neck off the floor.

Inhale and lower your head back down.

Repeat 10 times.


Shoulder lifts

They tone the tummy and abs and burn calories.

Directions

Lie on your back with your arms along your sides.

Keep your lower back on the floor and bend your knees.

Your soles must be flat on the floor.

Relax your belly.

As you exhale, raise your head and your shoulders off the floor.

Reach your arms and hands toward your knees.

Inhale as you lower your head and shoulders back down.


Curl-ups

These moves will also tone the tummy and abs and burn calories.

Directions

They tone the tummy and abs and burn calories.

Relax your tummy.

Lift your torso until it’s about halfway between your knees and the floor behind you.

Reach toward your knees and hold this position for 2 to 5 seconds.

Slowly lower yourself down.

Repeat 10 times.


Kegels

This helps tone bladder muscles and reduces risks of incontinence associated with childbirth.

Directions

Here, you have to contract and hold the muscles that control the flow of urine.

Start by doing the exercise when you use the bathroom.

As you urinate, stop the flow in the middle. Hold for some time.

Release and let the urine flow again.

You can also do this anytime, anywhere, once you get the hang of it.

Repeat 10 times at a time.

Ideally try to do this as many times as you can throughout the day. It will help.


This is only for your information, kindly take the advice of your doctor for medicines, exercises and so on.     

https://gscrochetdesigns.blogspot.com. one can see my crochet creations  
https://gseasyrecipes.blogspot.com. feel free to view for easy, simple and healthy recipes    
https://kneereplacement-stickclub.blogspot.com. for info on knee replacement

Labels: , , , , , , , , , ,

Sunday, January 26, 2020

What exercises burn belly fat, and how to do them at home

image.png

  • Core exercises that burn belly fat include side planks, hollow holds, and straight leg-toe touches.
  • Full-body exercises like rowing, push-ups, and squats can also help burn belly fat. 
  • Here's how to do these exercises, with a full example workout that you can do at home or at the gym. 
  • This article was reviewed by Joey Thurman, CSCS, CPT, FNS, a Chicago-based fitness expert and MYX Fitness coach.
If firming up your midsection is on your to-do list, you're not alone. Getting rid of stubborn belly fat is one of the most common goals for people looking to lose weight and get fit. 

And while targeted fat loss or spot reduction does not work, you can tighten and tone this area — along with the rest of your body — by exercising and following a healthy diet. 

Belly fat is hard to eliminate

Reducing belly fat is often more challenging than dropping inches from other parts of the body because doing so relies heavily on diet, says Caley Crawford, NASM CPT, and Direcctor of Education For Row House.
 
"We often think if we do enough sit-ups, then we'll get a flatter stomach; however, abs also happen in the kitchen," says Crawford. "So, if you're looking to lose belly fat, it's crucial that you partner a strong and healthy diet with your exercise routine," she says. 

You'll also need to consider your age and genes. According to the Mayo Clinic, they can play a small role in where you store fat. That's why adhering to a healthy, balanced diet (with little or no processed carbohydrates) along with your exercise program is critical to get rid of stubborn belly fat. 

Full-body strengthening will fire up your core

While it's true that core-specific exercises are a great way to fire-up your abs, performing strength training moves for your entire body may help you reach your goal of torching belly fat faster than if you just focus on abdominal exercises. 

"Doing core-focused exercises like sit-ups and flutter kicks are always a great way to get some extra definition in your abdominals; however, functional, full-body movements strengthen and tone your core just as much," says Crawford. 

For example, doing a squat works your quads, but it also involves maintaining a stable trunk, which requires your abdominal muscles to contract. Other exercises like lunges, rows, and push-ups also require your abdominal muscles to work in a coordinated fashion with the other muscles you're stressing. So, in all, you're still getting a core exercise even though you may feel it more in the glutes, back, or chest.

Exercises to help strengthen and tone your core

Firm abs don't just happen by accident. In addition to full-body workouts, there are several ways to target your abdominal muscles. Three popular exercises to start with include side planks with a knee drive, hollow holds, and alternating straight-leg toe touches. Advanced fitness levels can swap out the alternating straight-leg toe touches for Turkish get-ups.

Here's a core workout you can perform at home or at the gym, including moves that target your upper and lower body. 

How to do it: Crawford says to complete each exercise for the recommended amount of reps before moving to the next move. For a complete workout, do 3 rounds total. For an extra challenge, consider adding a set of dumbbells.

Warm-up: 3 to 5 minutes of rowing without the foot straps (this fires up the core even more). Start slow, and be sure to keep your toes connected to the footplate. If you don't have access to a rowing machine, warm-up with a stationary bike, treadmill, or walking in place. 

Exercise 1: 15 to 20 reps of squats + arms reach up overhead 
Exercise 2: 10 to 15 reps of temp push-up (3 counts down, 1 count up)
Exercise 3: 10 to 15 reps each leg of side plank + knee drives (In a side plank, bring the top knee to meet the elbow and lengthen)
Exercise 4: 10 to 15 alternating straight-leg toe touches
Exercise 5: 30 seconds of a hollow hold 
If you do this workout three times a week, Crawford says you should start to feel results in about six to eight weeks. "You'll feel stronger first, then you'll start to see progress in your performance, and then you'll start to see results," says Crawford. 
If you're unfamiliar with these exercises, here's how to do them: 
Side plank + knee drive
  1. Lie on your left side. 
  2. Press into the floor and push your body into a side plank position. Left forearm will be on the floor, elbow underneath your shoulder, hips and feet stacked. 
  3. Keep your abs contracted and drive the top knee (right knee) to meet the elbow, then lengthen. 
  4. Complete 10 to 15 reps before switching sides.
Alternating straight-leg toe touches
  1. Lie on your back and lift one leg up to 90-degrees. The other leg will hover a few inches off the ground. 
  2. Reach up and touch your toe three times with both hands. Make sure your shoulder blades are off the ground and keep your neck long. 
  3. Complete 10 to 15 reps before switching sides. 
Hollow Hold 
  1. Lie on your back with your legs straight, knees together, and your arms extended overhead. Press your low-back into the floor. 
  2. Contract your abs. This will allow you to lift your shoulders and arms a few inches off the floor. Keep your knees together and lift your legs a few inches off the floor. 
  3. Hold this position for 30 seconds.                                      

    This is only for your information, kindly take the advice of your doctor for medicines, exercises and so on.     
    https://gscrochetdesigns.blogspot.com. one can see my crochet creations  
    https://gseasyrecipes.blogspot.com. feel free to view for easy, simple and healthy recipes    
    https://kneereplacement-stickclub.blogspot.com. for info on knee replacement
     

Labels: , ,

Tuesday, November 20, 2018

How To Save Yourself If You Are Alone And Choking

It’s probably safe to say many of us have had a moment of panic when we think we might be choking on food.

Usually, it turns out OK and we can either cough it up or swallow it on our own, but that’s not always the case.

If you’re in public or eating with other people, you’d hope someone either knows how to help or can call 911 if you really are choking.

For people who eat many of their meals alone, however, the danger of choking can be much greater.
“I have noted over those years that there is really no effective means for someone to rescue themselves should they be choking and nobody is there to help them,” he says.

He recommends a basic push-up motion to create suction to hopefully dislodge the object that is blocking your throat.
First, get on your knees in the push-up position, then let go of your arms, essentially letting your stomach and chest smack on the ground.

The air that moves out from this technique should be enough to remove whatever is stuck in your airway.

He warns this won’t work while pregnant and says while nothing is 100 percent effective, “This is certainly a lot better than what we’ve been taught so far.”
Interesting to note, the maneuver actually came from his boxing days and was something his coach taught him to tighten up his abdominal muscles, but he realized there was a better use for it and applied it to his years as a paramedic.

We certainly hope you’ll never need to know this, but there is no such thing as being too prepared.
As always, be sure to use caution if using this or any medical technique.

THIS IS ONLY FOR INFORMATION, ALWAYS CONSULT YOU PHYSICIAN BEFORE HAVING ANY PARTICULAR FOOD/ MEDICATION/EXERCISE/OTHER REMEDIES.                                                                                                                                                                                                                                                                                        PS- THOSE INTERESTED IN RECIPES ARE FREE TO  VIEW MY BLOG-                                                                                           https://gseasyrecipes.blogspot.com/                                                                                                                                                                             FOR INFO ABOUT KNEE REPLACEMENT, YOU CAN VIEW MY BLOG-                                                                                                                             https:// kneereplacement-stickclub.blogspot.com/                                                                                       FOR CROCHET DESIGNS                                                                                                                                                                                                                                 https://gscrochetdesigns.blogspot.com   

Labels: , , , , , , , , , , , ,