Wednesday, February 10, 2021

8 Useful Stability Ball Exercises for a Full-Body Workout

It’s known by many names – exercise ball, stability ball, gym ball, balance ball, and even Swiss ball – and has several wonderful benefits. These big bouncy balls are found in every gym these days but can also be used at home to include in your exercise regimen. In fact, these balls are a great way to improve strength, cardio endurance, and balance.

Leading fitness experts say that stability balls can help train your abs, improve your posture and balance, and can strengthen your back and core. The best part about this ball is that you don’t need to be a gym expert to use it and can easily incorporate it into your workout routine at home by learning how to use it effectively. Moreover, it won’t even take much space, is cheap and lightweight, and can be quickly inflated and deflated.
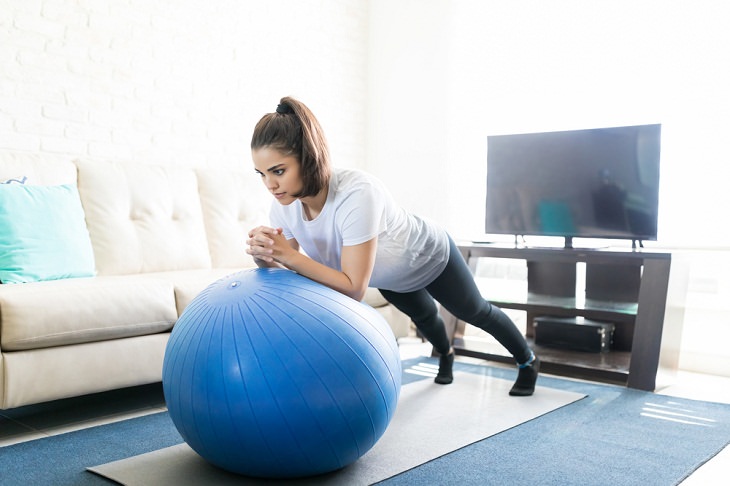
Stability Ball Exercises, woman exercising with gym ball
Before you decide on getting one of these balls, however, you must know which is the right size for you. For example, people between 5 feet and 5.5 feet should choose a 55-centimeter ball. Those who are between 5'6 and 5'11 should opt for a 65-centimeter ball. Lastly, a 75-centimeter ball would be ideal for people between 6 feet and 6'3 in height. 
 
Now, let's take a look at some common and easy stability ball workouts that will be beneficial for your whole body.
 
1. Single-Leg Bridge
Benefits: Increased posterior chain strength, improved proximal hip and core stability, and better hip dissociation. 
 
Step 1: Lie face-up on the floor behind the ball with your knees bent. Place your feet on the ball and your arms on the floor by your sides. Now slowly raise your hips off the floor until your upper back is stabilized. 
 
Step 2: Pause and then slowly raise one leg straight up. Lower the leg and then return to start. Repeat after 30 seconds and keep alternating the legs. Perform 2-3 sets on each side.

2. Incline plank
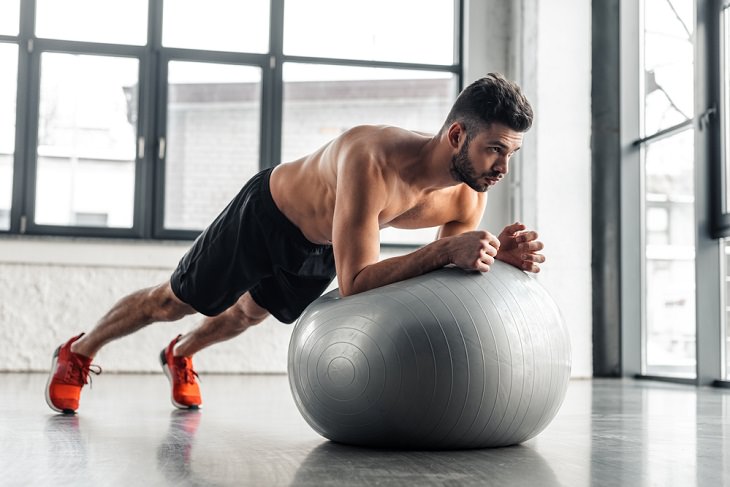
Stability Ball Exercises, plank
Benefits: Works on the abdominal muscles as well as the other ab muscles and the core muscles that run from the pelvis along the spine and up to the shoulder girdle. 
 
Step 1: Place the stability ball on the floor and get into a pushup position with your hands on it. Rest your weight on your elbows on it. 
 
Step 2: Hold your body in a straight line from head to heels. Make sure that your hips don’t sag. Maintain this position for at least 20-30 seconds. Do 3-5 sets and rest for 30 seconds after each set. 
 
3. Wall Squats
Benefits: Works your quadriceps, gluteal muscles (a set of smaller muscles located in the buttocks), hamstrings, hip flexors, and core. 
 
Step 1: Place the stability ball up against a wall and make sure it braces against your back. Now, lower down into a squat position until your legs form 90-degree angles at the knees. 
 
Step 2: Use the ball to support your back and roll it from your lower back to your shoulder blades. Squat down low to deepen the move and provide more stability. Complete 10 to 15 reps (repetitions). 
 
Note: Make sure that your knees don’t roll out to the sides during the exercise. They should be in line with the rest of your body.
 
4. Hamstring curl
Benefits: Works your gluteal muscles, hamstrings, and core. 
 
Step 1: Lie on your back and put your calves and heels on the stability ball. Your arms should be on your sides and your palms should be facing down. 
 
Step 2: Move your hips upward by squeezing your gluteal muscles and hamstrings until your body is straight. Engage your core and extend your legs straight out, moving the ball away from you. Slowly lift your hips and bend your knees.
 
Step 3: Roll the ball back in by pulling your heels towards your buttocks until the soles of your feet touch the ball. Now, stretch your knees and lower your hips and back to the floor. Repeat. Complete 12 to 15 reps.

5. Back Extension
Benefits: Strengthens the muscles of the lower back. 
 
Step 1: Place the front of your body from hips to ribs on the ball. Your legs should be extended straight behind while your toes must rest on the floor. Your body should form one, long line. 
 
Step 2: Raise your chest high and hold on to the ball for balance. Pull your shoulders back as you exhale and keep your neck in line with the spine. Return to a relaxed position. Complete 12–15 reps. 
 
6. Push-ups
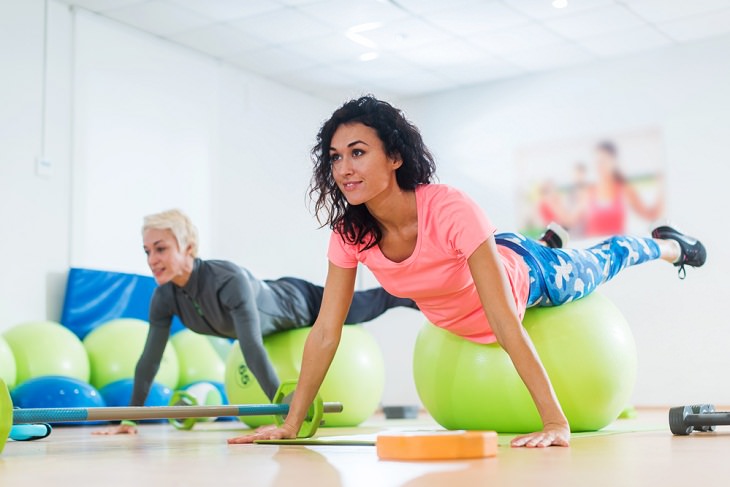
Stability Ball Exercises, Push-ups
Benefits: Works your chest and shoulder muscles. Also helps activate a number of core muscles. 
 
Step 1: Lie with your stomach on the stability ball with both feet and hands on the floor, hip- and shoulder-width apart. Place your hands on the ball at the sides of your chest and your toes on the floor with your legs straight. Now, push your body up until your arms are almost straight. Make sure that your elbows aren’t locked. 
 
Step 2: Hold and balance for two seconds. Return to the starting position slowly and continue for 8–10 reps. 
 
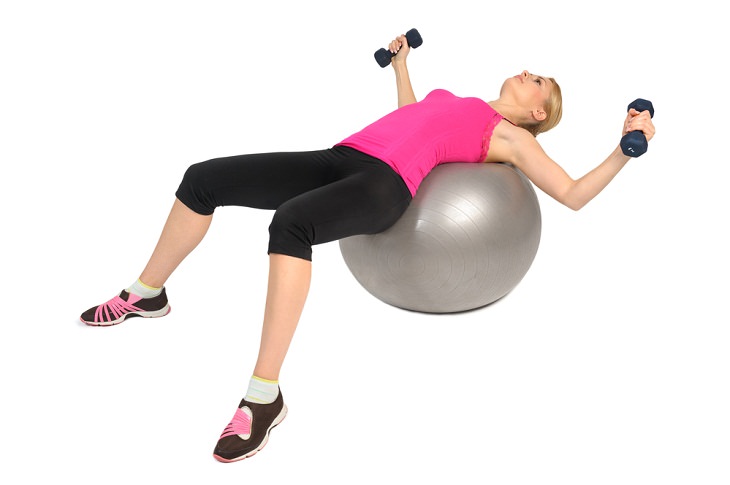
7. Chest press
 Stability Ball Exercises, Chest press

Benefits: Works your shoulders and triceps. Strengthens both your chest and core muscles. 
 
Step 1: Lie your back down on the ball while holding one dumbbell in each hand. Keep your feet flat on the floor with your ankles directly under your knees. Bring both weights up to meet your shoulders while bending your arms with your elbows out wide. 
 
Step 2: Engage your core with your hips lifted. Exhale slowly as you press the weights toward the ceiling. Make sure that you are holding the dumbbells by your chest with your palms facing forward. Hold this position for a second. 
 
Step 3: Lower the dumbbells back to the starting position slowly. Repeat while using your abs to keep your body still. Complete three sets of 10-12 reps keeping your hips lifted all through.
 
8. Mountain Climber
Benefits: Great cardio workout. Also works at your core. 
 
Step 1: Begin by resting your hands on either side of the ball. Extend your feet out behind you in a way that you are leaning on the ball in a high plank position. 
 
Step 2: With your core engaged, bring your right knee forward under your chest. Switch legs quickly, bringing the left knee forward while sending your right foot back. Return to the starting position. Complete 12 reps, alternating legs.
 
This is only for your information, kindly take the advice of your doctor for medicines, exercises and so on.     

https://gscrochetdesigns.blogspot.com. one can see my crochet creations  
https://gseasyrecipes.blogspot.com. feel free to view for easy, simple and healthy recipes    
https://kneereplacement-stickclub.blogspot.com. for info on knee replacement


Labels: , , , , , , , , , , , ,

Tuesday, July 16, 2019

Tone Your Upper Arms with These 6 Exercises

One of the pitfalls of aging is flabby upper arms, which makes wearing sleeveless shirts and dresses a less attractive option. As we age, our upper arms appear more flabby because of the loss of skin elasticity. While part of this is caused by aging, another part of this is caused by body weight.

To minimize the loose flesh and feel more comfortable in sleeveless clothing, you can tone your muscles with resistance exercises. Here are 6 different exercises that can be done at home to tone the tricep muscles, the large muscles at the back of your upper arm. Some will require you to use hand weights (a.k.a. dumbbells). However, you can use full food cans instead.

1. Tricep dips
exercises, flab
You will need a chair for this exercise. Put your hands on the chair, shoulder-width apart, and your buttocks in front of the chair. Your back should be close to the chair and your legs bent, hip-width, on the floor. Straighten out your arms, keeping the elbows slightly bent. Slowly bend your elbows and your lower body towards the floor. When your arms are at a 90-degree angle, press your arms, pushing yourself back up to the starting position. Do this 10-15 times.


2. Push-ups
exercises, flab
This is a floor exercise you may be familiar with. Lower yourself to the floor and place your hands under your shoulders. Keeping your elbows close to your side, lower your body towards the floor. Return to the starting position and repeat 10-15 times. If you find this difficult it might help to change your starting position - let your knees bend and touch the floor.


3. Tricep kickbacks

exercises, flab

This exercise requires 1-2 kg weights (2-4 lbs.). Get on the floor, have both your knees and toes touching the floor. Holding the weights, bend your upper body forward from the hips and bend your elbows at a 90-degree angle. Extend your arms backwards, with your palms facing each other. You should feel tension in your triceps. Return to the starting position and complete 3 sets of 8-10 repeats.

4. Tricep extensions

exercises, flab
You’ll need 1-2 kg (2-4 lbs.) weights for this exercise. You can do this exercise in two ways: standing or lying on the floor.
If you lie on the floor: Lie on your back, raising your arms above your chest, keeping your elbows slightly bent but not locked. Bend your elbows at a 90-degree angle, so that the weights reach the floor. Your elbows should now align with each side of your head. Lift back to the starting position and repeat this motion 12-15 times in 3 sets.
exercises, flab

If you stand up: Stand with your knees, making sure they are soft and not locked. Straighten your arms. Your elbows should be next to your ears. Bend your elbows at a 90-degree angle. Squeezing your triceps, straighten your arms. Repeat this movement 15 times in 3 sets.


5. Bend-over row

exercises, flab
This exercise requires the use of weights. Stand with your feet shoulder-width apart, and bend your knees and upper body forward from the hips up. Make sure to keep your spine neutral and not to bend your lower back. Keep your hands straight under your shoulders. Bend your elbows back and lift your arms towards the sides of your chest. At this stage, your shoulder blades should be pulled towards each other. Slowly lower the weights, feeling the tension in your triceps. Repeat this exercise 15 times.


6. One arm push-up
exercises, flab
This is a floor exercise. Lie on your left side, with your knees slightly bent. Place your left hand on your right shoulder and press your right palm against the floor until it is straight. Now lift your upper body. Repeat this exercise 10 times and then switch to your right side and repeat another 10 times.


THIS IS ONLY FOR INFORMATION, ALWAYS CONSULT YOU PHYSICIAN BEFORE HAVING ANY PARTICULAR FOOD/ MEDICATION/EXERCISE/OTHER REMEDIES.                                    PS- THOSE INTERESTED IN RECIPES ARE FREE TO  VIEW MY BLOG-                                                                                           https://gseasyrecipes.blogspot.com/                                                                                                                                                FOR INFO ABOUT KNEE REPLACEMENT, YOU CAN VIEW MY BLOG-                                                  https:// kneereplacement-stickclub.blogspot.com/                                                                      FOR CROCHET DESIGNS                                                                                                    
                                https://gscrochetdesigns.blogspot.com

Labels: , , , , , ,

Tuesday, November 20, 2018

How To Save Yourself If You Are Alone And Choking

It’s probably safe to say many of us have had a moment of panic when we think we might be choking on food.

Usually, it turns out OK and we can either cough it up or swallow it on our own, but that’s not always the case.

If you’re in public or eating with other people, you’d hope someone either knows how to help or can call 911 if you really are choking.

For people who eat many of their meals alone, however, the danger of choking can be much greater.
“I have noted over those years that there is really no effective means for someone to rescue themselves should they be choking and nobody is there to help them,” he says.

He recommends a basic push-up motion to create suction to hopefully dislodge the object that is blocking your throat.
First, get on your knees in the push-up position, then let go of your arms, essentially letting your stomach and chest smack on the ground.

The air that moves out from this technique should be enough to remove whatever is stuck in your airway.

He warns this won’t work while pregnant and says while nothing is 100 percent effective, “This is certainly a lot better than what we’ve been taught so far.”
Interesting to note, the maneuver actually came from his boxing days and was something his coach taught him to tighten up his abdominal muscles, but he realized there was a better use for it and applied it to his years as a paramedic.

We certainly hope you’ll never need to know this, but there is no such thing as being too prepared.
As always, be sure to use caution if using this or any medical technique.

THIS IS ONLY FOR INFORMATION, ALWAYS CONSULT YOU PHYSICIAN BEFORE HAVING ANY PARTICULAR FOOD/ MEDICATION/EXERCISE/OTHER REMEDIES.                                                                                                                                                                                                                                                                                        PS- THOSE INTERESTED IN RECIPES ARE FREE TO  VIEW MY BLOG-                                                                                           https://gseasyrecipes.blogspot.com/                                                                                                                                                                             FOR INFO ABOUT KNEE REPLACEMENT, YOU CAN VIEW MY BLOG-                                                                                                                             https:// kneereplacement-stickclub.blogspot.com/                                                                                       FOR CROCHET DESIGNS                                                                                                                                                                                                                                 https://gscrochetdesigns.blogspot.com   

Labels: , , , , , , , , , , , ,

Thursday, October 18, 2018

8 Great Exercises You Can Do in The Office Too!

The last thing we think of when we get to work is exercising, and it's a pity that this is the case. After all, long hours of prolonged sitting plus the time it takes us to commute there and back, certainly do not provide us with an opportunity to stretch our muscles and bones. This is twice as true in the winter when there is less opportunity to get outdoors and move around. But what would you say if we told you that you can turn your desk into a small gym that will provide an effective solution to the problem without affecting your working hours? This is the time to reduce the chances of unnecessary back pain, muscle cramps, poor posture, or just a general feeling of frustration and idleness, with the following 8 simple and easy stretching and fitness exercises.

1. Seated desk child’s pose

This is an excellent way to apply child’s pose, taken from yoga, in the workplace without leaving your chair. The exercise retains its various health benefits, including improving the flexibility of the back muscles, expanding shoulder range, stretching the spine and activating the abdominal muscles.

How to:
  • Sit on a chair 1-2 feet away from your desk and keep your back straight.
  • Suck your stomach in and lean forward as you move your arms forward and look with your head toward the floor.
  • Be sure to keep the arms straight and parallel to the floor. 
  • Walk your hands to the right so you can feel a stretch on your left side, hold for 20 seconds and repeat on the other side.
  • The exercise can be performed up to 3 repetitions per side.

2. Neck stretch

Pain from cramped neck muscles is one of the most common symptoms in an office environment that indicates harmful stress applied to the shoulder and head area. Don’t let pain be part of your routine and treat the area with a simple, short stretch that will ease muscle stiffness and quickly reduce pain. 

  How to:
  • Sit on a chair with your back straight and your head up.
  • Turn your head to the right and tilt it downward.
  • While tilting, hold the top of your head with the palm of your hand and pull it down toward your armpit to intensify the stretch. 
  • Hold your neck in this position for 15-30 seconds and then move to the left side.
  • Assign up to 3 repetitions for each side.
 

3. Seated spinal twist

A lot of tightness accumulates in the back area both out of the lack of proper posture and from the many pressures exerted on us in the workplace that leave their marks on our bodies. The following exercise provides a great way to relieve aching muscles, improve posture, and slightly restore flexibility to the back. 

How to:
  • Sit on a chair while keeping your back, compressing your abdominal muscles and placing both feet parallel on the floor.
  • Turn to the right side while placing your right hand at the base of the chair just behind your buttocks and your left hand on your right knee.
  • During the rotation, take a deep breath and try tilting your upper body slightly to the right side to maximize the stretch.
  • Stay in this position for up to 5 seconds and do the exercise again to the left.
  • Perform 10-15 repetitions per side.

4. Desk shoulder and hamstring stretch 

All of us have a natural tendency to bend our shoulders forward during the many hours of sitting at work, but that doesn’t mean that this is the recommended posture for our bodies. It’s actually really bad for your back and turns into quite the harmful habit. With the next position, you can maintain posture and even stretch your hamstring muscles which often suffer from inactivity at work.

How to:
  • Stand about 2-3 feet from your desk, keeping your back straight, legs straight and arms parallel to the sides.
  • Bend forward while keeping your back and legs as straight as possible and rest your hands on the table stretched.
  • Stay in this position between 15-30 seconds.
  • This stretch can be repeated about 3 times.

5. Chest opener

Not only is the chest opener easy to perform, but they also have quite a few health benefits, which makes it particularly worthwhile. With this exercise, you can stretch your spine and keep it flexible, relieve tension in the upper back and shoulders, stretch your chest muscles and increase your breathing capacity, which promotes a sense of calm and peace despite the accumulated mental stress. 

How to:

  • Stand with your back straight and place both hands behind your head with your fingers crossed together.
  • Lean backward and arch your upper back.
  • Stay in this position 15-30 seconds.
  • The exercise can be repeated between 2-3 times.

6. Toe raises 

Standing on tiptoes does seem like a relatively negligible exercise, but during the working day, we rarely perform any action with our legs so that this exercise is certainly a proper answer to the problem. By incorporating this exercise into your office routine, you can strengthen your ankle and calf muscles, improve your posture and balance. 

How to:
  • Stood straight behind a chair and placed both hands on the backrest.
  • Lean forward carrying most of your weight onto the balls of your feet.
  • Squeeze the muscles of the buttocks and legs and stand on tiptoes for 3-5 seconds.
  • Return to the starting position, wait another 5 seconds and repeat the exercise, up to 20 sets in total.

7. Chair squat

Doing squats in your office chair is a simple and effective way to work the lower body and to sculpt the leg and buttock muscles which are barely moved during the working day. In addition, this exercise is known to burn many calories. 

How to:
  • Stand upright with your chair behind you.
  • Hold your hands by your sides and keep your legs straight, exhale slowly, and bend your knees to a 90-degree angle where the buttocks touch the chair without actually sitting.
  • While bending, be sure to keep your back straight and lift your hands parallel to the floor.
  • Take a deep breath and return to your starting position.
  • The exercise can be performed in 3 sets with a rest of one minute between each set.
  • Each set consists of 10-15 repetitions.

8. Desk push-up

Push-ups are a great, effective and effective way to work on your upper body at work. It is enough to repeat this exercise several times a week so that you can strengthen the core muscles and shoulder muscles, increase the size of your chest muscles and work on your back muscles.  

How to:
Stand about 2 feet away from your desk. 
Bend forward and place both palms on the edge of the table (make sure it is stable) while keeping your back and legs straight and creating a 60-degree angle with the floor. 
Keep your elbows close to your chest area 
Exhale slightly and bend to create a 90-degree angle with your elbows. 
Take a deep breath and push yourself back up to the starting position. 
Do 3 sets of 15 repetitions with a minute break between each set.
 THIS IS ONLY FOR INFORMATION, ALWAYS CONSULT YOU PHYSICIAN BEFORE HAVING ANY PARTICULAR FOOD/ MEDICATION/EXERCISE/OTHER REMEDIES.                                                                                                                                                                                                                                            PS- THOSE INTERESTED IN RECIPES ARE FREE TO  VIEW MY BLOG-                                                                                           https://gseasyrecipes.blogspot.com/   

  FOR INFO ABOUT KNEE REPLACEMENT, YOU CAN VIEW MY BLOG-                                                                                                                                https:// kneereplacement-stickclub.blogspot.com/                              

FOR CROCHET DESIGNS                                                                                                                                                                                                                                 https://gscrochetdesigns.blogspot.com


Labels: , , , , , , , , ,