Thursday, September 27, 2018

8 Pressure Points For Self Defense

Today all over the world, everyone needs to learn some form of self defense to protect themselves from their attackers- kidnappers / rapists / robbers / or anyone else. The areas vividly shown in the pictures are real strategic points which one should remember to fight against the attacker.

While most of us would like to believe that we're going to experience a serene and peaceful existence, there are plenty of bad people in the world who can end using violence against us to get what they want. While it's horrible to think about, it's better to be safe than sorry, which is why we've gathered a list of pressure points that can be used to help you escape from any potential aggressors.

1. JawSelf Defense
Hitting the jaw with the back of your hand with enough force can cause an attacker to lose consciousness for a while. This is because such an impact will turn the head so sharply that it will end up shaking the brain.
2. Sciatic NerveSelf Defense
The sciatic nerve can be found on the midline of the inner thigh between the knee and the groin. Hitting this pressure point with enough force will cause dizziness, shock, a great deal of pain, and even possible temporary immobility of the foot.
3. BicepsSelf Defense
A blow to the biceps can inflict temporary paralysis of the arm, as well as extreme pain. Often, there is also an involuntary relaxation of the fingers, which may result in the attacker losing their grip.
4. GroinSelf Defense
The groin is an area that's full of sensitive nerves, and slightly above it, you will also find the bladder and genitals. A weak blow to this sensitive area will often result in a very severe reaction from the person on the receiving end. A heavy blow can actually even cause shock and rupture the bladder.
5. Brachial Plexus
Self Defense
Blows to the brachial plexus will cause a great deal of pain as well as a numb sensation in the hand. If the impact is hard enough, you could actually end up breaking the collarbone, causing a rupture of the nerves of the brachial plexus.
6. Tibialis Anterior MuscleSelf Defense
A heavy blow to this region may end up breaking it, leading to pain that may immobilize and nauseate anyone on the receiving end. If the fracture is very grievous, then blood vessels may become torn.
7. HandsSelf Defense
Human hands are brimming with sensitive nerve endings that you can use against your opponent. That's why pressing against the area between a person's fingers will cause them to loosen their grip and lose their composure.
8. EyesSelf Defense
Only ever use this one as a final resort, since a strong press to both eyes or a hard blow against at least one of them can cause a person to permanently go blind. However,  a light press to the eyes will be enough to make an attacker temporarily lose his sight, giving you ample time to get to safety.

THIS IS ONLY FOR INFORMATION, ALWAYS CONSULT YOU PHYSICIAN BEFORE HAVING ANY PARTICULAR FOOD/ MEDICATION/EXERCISE/OTHER REMEDIES.                                                                                                                                                                                                       PS- THOSE INTERESTED IN RECIPES ARE FREE TO  VIEW MY BLOG-                                                                                           https://gseasyrecipes.blogspot.com/   

 
FOR INFO ABOUT KNEE REPLACEMENT, YOU CAN VIEW MY BLOG-                                                                                                                                https:// kneereplacement-stickclub.blogspot.com/                              

FOR CROCHET DESIGNS                                                                                                                                                                                                                                 https://gscrochetdesigns.blogspot.com


Labels: , , , , , , , , , , ,

Tuesday, October 15, 2013

10 Muscle Moves to Help Tame Diabetes

Why Do Strength Training?
If you have diabetes, you know the importance of controlling your blood sugar. But did you know that strength training can play a starring role? Simple moves done regularly can prompt your muscles to absorb more sugar. You'll also burn more calories around the clock when you take up strength training. Your mood, cholesterol levels, and blood pressure may improve, too.

Beginning an Exercise Program
Most people with diabetes can work out safely, but check with your doctor first. You should aim for strength training at least twice a week and regular cardio, either five days a week for 30 minutes, or three days for 50 minutes. Always exercise caution, and if a move doesn't feel right, check with a fitness expert. Flexibility work can be helpful, too, especially if you haven't broken a sweat in a while.

Your Strength Training Routine
Get ready to learn 10 at-home exercises that work your major muscle groups. For each one, begin with one set of 10-15 reps. Rest 30-120 seconds before the next move. Start with resistance bands or light dumbbells that allow you to focus on form. When you can do two or three sets easily, grab heavier weights. You should eventually use weights that you can only lift 8-10 times in the first set.

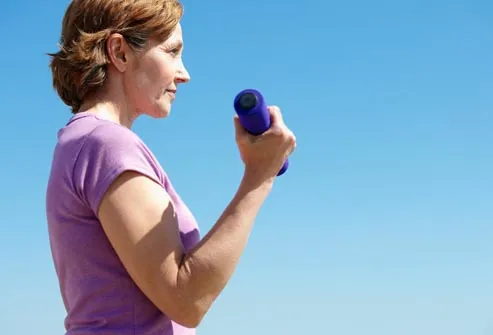
Upper Body: Standing Biceps Curl
Grab a dumbbell in each hand and stand with your palms facing your thighs. Squeeze your biceps as you lift the weights. On the way up, your forearm should rotate so your palms end up facing your shoulders at the top. Lower the weights slowly to starting position. Try to avoid using momentum on the way down.biceps curl

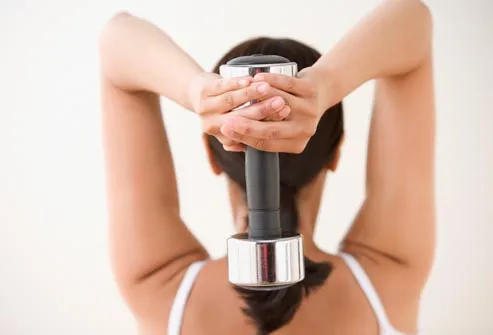
Upper Body: Triceps Extension
Stand with one foot slightly in front of the other, and hold a single dumbbell with both hands wrapped around the handle. Slowly raise the dumbbell overhead. Straighten your elbows as you raise the weight toward the ceiling. Slowly bend your elbows and lower the weight behind your head. Keep your upper arms still and vertical to the floor. Keep your shoulder blades down and back as you repeat.triceps extension

Upper Body: Shoulder Press
You can do the shoulder press while sitting or standing. Hold a dumbbell in each hand and raise them until they are level with your ears. Your elbows should be bent at a 90-degree angle. This is your starting position. Now push the weights up, until your arms are fully extended. Slowly lower to the starting position.
shoulder press

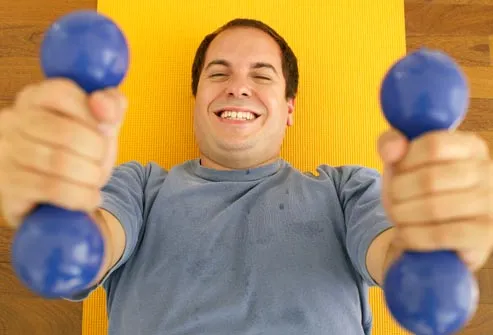
Upper Body: Chest Press
Lie on your back with your knees bent and your feet flat on the floor. Hold a dumbbell in each hand at chest level and raise them above your chest until your elbows are straight but not locked. Pause a second and then slowly lower the weights toward your chest.
chest press

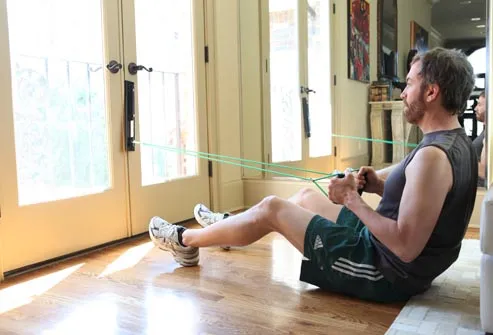
Upper Body: Seated Row
Sit on the floor with your feet together and your knees bent. Hold a dumbbell or the end of a resistance band in each hand with your arms straight in front of you, palms facing each other. Keeping your back straight, bend the elbows as you pull the weights/bands to your sides. Keep your elbows close to your body and slowly straighten your arms.
dumbbells, mat and resistance band


Classic Crunch
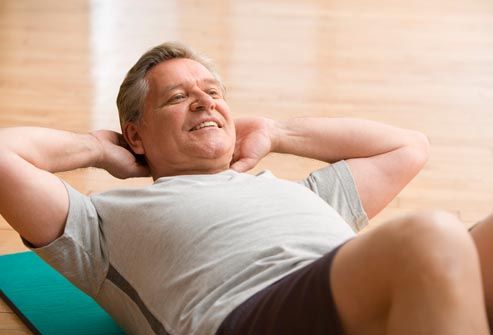
Lie on your back, feet flat on the floor, knees bent. Put your hands behind your head. Pull your shoulder blades together and your elbows back. The elbows should aim sideways and stay there throughout the exercise. Squeeze the abs and curl your shoulders and upper back off the floor. Lower down slowly, keeping your lower back pressed to the floor at all times.
crunch

Plank
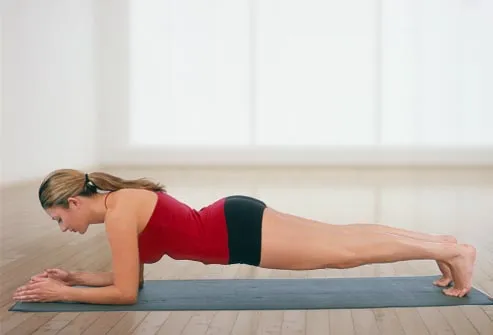
Lie face-down with your elbows directly under your shoulders, palms down, and your toes tucked under. From this starting position, tighten your abs as you lift your torso and thighs off the floor. You'll be supported only by your toes and forearms. Hold this position for 5 seconds or more. Keep the back straight as you slowly lower to the starting position
plank

Lower Body: Squat
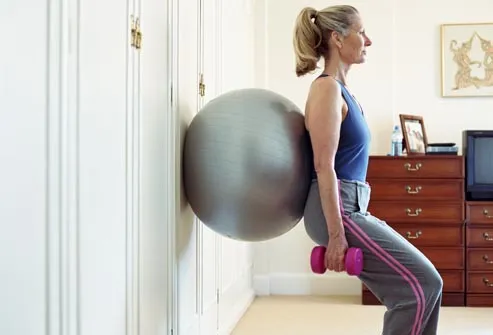
Stand with your feet shoulder-width apart. Bend your knees and lower yourself as if you were sitting in an imaginary chair. Your thighs should be parallel to the ground and your knees should not push forward past your toes. Lean forward slightly as you stand back up. You can also do squats while leaning against a stability ball placed between your back and a wall.
squat with medicine ball


Lower Body: Lunges
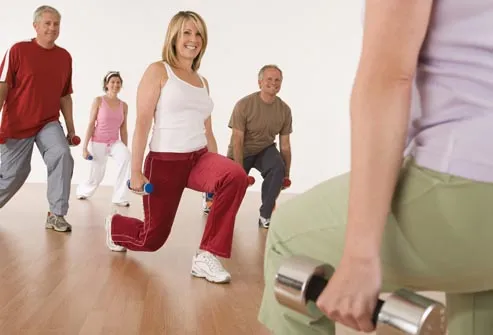
Stand with your legs shoulder-width apart and step your right leg back, bending the knee toward the floor without allowing it to touch. Your left thigh should be nearly parallel with the floor. Press down on the left heel and bring the right leg back to a neutral stance. Do 8-12 reps and then change sides, stepping back on the left leg. To make the lunges more challenging, hold a dumbbell in each hand. 
group lunge


Lower Body: Hamstring Curl
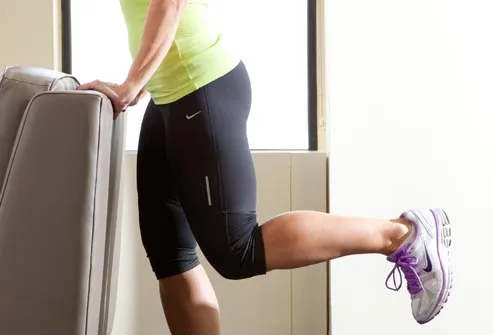
Hold onto the back of a chair. Flex your left foot and bend the knee, bringing your heel toward your buttocks. Keep your right leg slightly bent. Lower your left foot back to the floor. Do 8-12 reps and then repeat with the right leg. To make this exercise more challenging, ask your doctor if it is safe for you to wear ankle weights.
hamstring curl

Strength Training and Blood Sugar
If you take certain diabetes medications, you may need to take precautions to avoid a dangerous drop in blood sugar (hypoglycemia). Ask your doctor if you should check your blood sugar or eat a snack before working out. Keep snacks or glucose tablets with you when you're exercising in case you develop symptoms of low blood sugar, such as shaking or weakness.

Strength Training and Insulin
If you take insulin, you may need to adjust the dose before and after exercise. Begin with a gentle workout to see how it affects your blood sugar. Check your levels before, during, and after exercise. If you work out within an hour or two of a meal, you may need to reduce your meal-time insulin dose. Check with your doctor before making any insulin changes. Oral diabetes medicines may also need to be lowered when you exercise.

Who Should Not Lift Weights?
Weight-lifting is not recommended for people with diabetes-related eye problems (such as retinopathy) that are not being treated. Likewise, very intense cardio work is not a good idea with untreated retinopathy. Both can increase pressure in the eyes. If you have nerve damage in your feet, sitting or lying on the floor may be a better bet. Remember, check with your doctor before beginning a fitness program.

ps- this is only for information, always consult you physician before having any particular food/ medication/exercise/other remedies.
ps- those interested in recipes are free to view my blog-

http://gseasyrecipes.blogspot.com/


for info about knee replacement, you can view my blog-


http://Knee replacement-stick club.blogspot.com/


for crochet designs


http://My Crochet Creations.blogspot.com

Labels: , , , , , , , , , , , , , , ,