Monday, July 11, 2022

How to Apply an Improvised Splint to an Injury

From a very early age, we master different life skills that serve us throughout our life. We learn how to sew, change a light bulb, hang shelves, and mend a sock. We also pick up many potentially life-saving skills and information, like not touching electric sockets with wet hands, avoiding the circuit breaker with bare feet, and steering clear of fallen power lines. Knowing how to give basic first aid is also a life-saving skill anyone should have, and so, in this article, we'll learn how to splint an injury at home or outside. 
 
What is a splint?
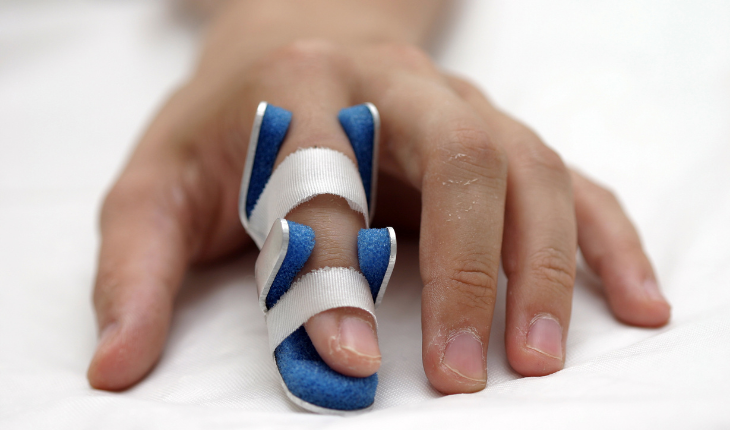
finger splint
A splint is a medical device meant to immobilize an injured body part to protect it from further damage until the patient can reach a medical care center. It's mainly used for broken bones but also for severe strain or sprains in the limbs. Apart from protection from further damage, the splint will also help ease the pain of the injury. 
 
Outside of the doctor's office, a splint can be made from a stick (such as a walking stick or even a piece of a broomstick), stiff cardboard, or a rolled-up towel or newspaper. It can be tied with medical tape, shoelaces, rope, a necktie, or a belt. If you're out in nature, you can use your clothing, towels, a walking stick, a branch, a rolled-up camping mattress, or some rope to fashion a splint.  
 
How to splint
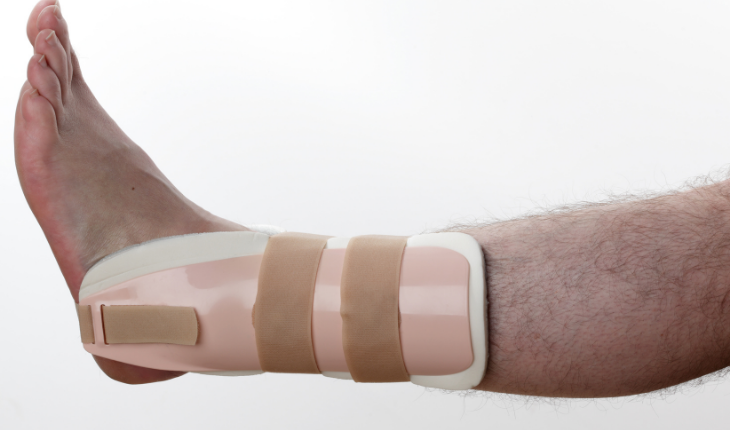
ankle splint
Keep in mind before you start: 
A splint should be applied to the body part in the position it was injured. Do not move the body part. 
 
If using wood or anything with a rigid surface, wrap it in cloth to avoid scratching and splinters. 
 
The splint shouldn't interfere with blood circulation. 
 
General splinting: 
 
1. If there's bleeding or an open wound, tend to it and stop the bleeding. Apply a bandage, and only then start applying the splint. 
 
2. Place the splint over the injury. It should extend and reach all the way to the joints above and below the injury. So if your calf is injured, the splint would extend to the ankle and the knee. 
 
3. Tie the splint around the body without over-tightening. Allow circulation. 
 
4. Call 911 or head to the ER. Check periodically for signs of poor circulation, as the swelling can cause the ties to be too tight. 
 
5. In case of numbness, tingling, pale limbs, faint pulse, or swelling, loosen the ties.

Palm splinting: 
As this is an anatomically complex area, the splint would look a little different. 
 
1. Place a soft ball (could also be a sock) in the palm of the hand. From this point on, the injured person should not move their fingers anymore. 
 
2. Place padding in-between the fingers. 
 
3. Wrap a cloth or gauze around the whole hand from the fingertips to the wrist, leaving the fingertips exposed to check on the pulse. 
 
4. Secure with tape or ties.  
 
Know how to self-check your splint
How can you tell if you applied the splint effectively? 
A proper splint should: 
- Insulate from the cold
- don't forget padding!
- Be padded all around. 
- Be rigid and supportive on all parts. 
- Be lightweight so that it doesn't apply more strain.
- Allow access to fingers, feet, or hands to allow frequent pulse checking.


This is only for your information, kindly take the advice of your doctor for medicines, exercises and so on.   

https://gscrochetdesigns.blogspot.com. one can see my crochet creations  
https://gseasyrecipes.blogspot.com. feel free to view for easy, simple and healthy recipes    
https://kneereplacement-stickclub.blogspot.com. for info on knee replacement


Labels: , , , , , , , ,

Wednesday, February 05, 2020

Engineering Students Create Waterproof and Lightweight Arm Cast to Replace Plaster Casts


If you've ever had to wear a plaster cast, you'll know what a pain it is. They're heavy, you have to put a plastic bag over them when you shower, and when they're eventually taken off the smell is something else.

But if a Chicago-based startup has its way, the pain of plaster would be a thing of the past. Cast21 is looking to change the way we mend broken bones and it's about time.

Cast21's wide mesh sleeve can be slipped onto the patient's wrist and is then filled with a liquid resin that quickly hardens and sets the bone in place.

Jason Troutner, biomedical design engineer Ashley Moy, and electrical engineer Justin Brooks from the University of Illinois came up with the idea after partnering up for an engineering design class according to ZME Science.

They want to replace the plaster cast, which can make a patient's skin feel itchy. Itching underneath the unhygienic plaster cast can cause sores and even lead to infection.

This wouldn't be an issue with Cast21 as it's far more breathable and hygienic.

Veronica Hogg, Cast21's vice president of engineering, told the Daily Mail: "We have this radical notion that you can enjoy your healing experience. You don't need to be restrained from daily activities."

According to the Daily Mail, fitting a cast could take as little as ten minutes.

First, a doctor or nurse would measure the limb. Once they've selected the right sized cast, they put it on the limb and fill it with a mix of resins. After the sleeve is full, it only takes about three minutes for the cast to become malleable.

Doctors can then mold the cast to fit the patient's limb, and then wait another five minutes for the resin to harden fully.

It's also far easier to remove than traditional casts, which requires doctors to use a circular saw.

Hogg added: "The majority of fractures happen in children, adolescents and the elderly."

"Those saws are very loud and all this debris flies off and it's very messy, it can be extremely frightening. The cast saw also presents a risk of burns to the patient."

"Our product does not require that at all. It's designed so that a physician can take clinical shears, snip through the tabs and pull it open easily."

"It was designed to completely eliminate the use of a cast saw and make the healing process far more pleasant for the patient."

Hogg explained that the device isn't painful to apply, and the resin hardening can even provide benefits.

 "It feels soothing," Hogg added. "It reaches about the same temperature as a hot tub."

"Another bonus is that no electricity or water is needed to apply our cast, so it's very portable."

"It has potential for use in the military and for at-home first aid."

"I'm from Colorado and I like to go hiking, the equipment needed to administer our cast is so small and lightweight that hikers and climbers could carry it with them in their backpacks."

The cast is still a ways off, with the company only designing a forearm model in a medium size. They hope to be able to create casts for legs as well.

Hogg added: "The idea is to prove that this technology works right now, we are past the prototype stage and have a fully functioning model in place for the forearm."

"We hope this technology can span across the entire body. We are looking forward to having a lower limb model for ankle fractures soon."

"With the technology, we can also do a longer arm model or a model that goes up to the fingers as well."

While there's currently no price, they hope to be able to make it as available to as many people as possible.

"We don't want this to be a luxury product," Hogg explained. "We are still conducting research in price sensitivity, and the final cost to the patients will be depending on their insurance and doctor."


cast21_600px-1574775012659.jpg                     

This is only for your information, kindly take the advice of your doctor for medicines, exercises and so on.     
https://gscrochetdesigns.blogspot.com. one can see my crochet creations  
https://gseasyrecipes.blogspot.com. feel free to view for easy, simple and healthy recipes    
https://kneereplacement-stickclub.blogspot.com. for info on knee replacement
 

Labels: , , , , , , , ,

Friday, January 25, 2019

First Aid Facts You Need to Know

Quite often we meet with some injuries or someone known to us suffer from injuries. While some injuries do merit an immediate ambulance ride, there are countless others that can be helped with a few simple precautions taken before the professionals arrive. Even if you went through some first aid training in your younger years, chances are that you're probably in need of a refresher. Rediscover these 10 basic first aid skills:
 
1. Relax a muscle cramp
If you've ever experienced a muscle cramp, you know just how painful they can be. The best way to resolve the issue is to gently massage and stretch the affected muscle group, rest and drink water, or ideally, an electrolyte-filled sports drink to calm your muscles. 
2. Be extra cautious about spinal injuries
With any first aid injury that involves a head or neck injury, be extra wary of moving the victim. Especially if you did not witness the injury, or you are not sure if a spinal injury has occurred, assume that it did and encourage the person to stay as still as possible until medical professionals arrive, stabilizing the head and neck if necessary. 
 
3. Treat a sprain
If you've fallen or injured yourself during a sports activity, you may end up with a swollen sprained ankle or wrist. If this occurred for you, follow the RICE method: Rest (sitting down and not exerting yourself), Ice (apply an ice pack to your injury for 15 to 20 minutes at a time), Compression (using an elastic bandage to reduce swelling, but not wrapping it too tightly) and Elevation (keeping it lifted above your heart, particularly at night). This should be enough to help you recover. If not, seek medical treatment. 
4. Heal a bruise
If a blow or some kind of impact causes blood vessels to burst near the skin's surface, it can look unsightly and hurt badly. More often than not, leaving it alone to heal is sufficient, but if you're looking to speed up the healing process, follow the same strategy as above, using the RICE method. If the bruising persists, consult a doctor. 
5. Splint a broken bone
If a more serious injury occurs, like breaking an arm or leg, stop the bleeding and reduce the swelling using ice, and call for medical assistance as soon as possible. You should also find a way to immobilize the injured appendage using a makeshift splint. To do this, simply roll up newspaper, or use a ruler or solid branch, and attach it to the arm or leg using tape or rope. The goal is to hold the appendage in place to avoid any further pain or damage. 
6. Deal with a larger object stuck in the eye
If you've been struck by an object with rough edges, or one that contains chemicals, makes it hard to close your eye, or which remains stuck after taking those basic first aid steps, then be sure to seek medical treatment. Bandage the eye with a clean gauze and restrict movement. If the object is in another person's eye, cover their uninjured eye as well to prevent the affected eye from moving before you head to the doctor. If there's a large object in the eye, cover it with a paper cup to keep it from moving and get to the hospital. 
7. Treat shock
Shock creates a sudden drop in blood flow through the body which can result from blood loss, trauma, poisoning, severe burns, or a wide range of other injuries or ailments, and is generally accompanied with symptoms such as rapid breathing or a racing pulse. If someone is suffering from shock, elevate their legs and feet slightly, loosening tight clothing and checking for any bleeding or other more serious injuries. 
8. Deal with a severe cut
A little cut that requires a band-aid is no big deal. But when you get a more serious wound, you need to go through a couple of steps. Firstly, rinse the wound and apply pressure using a sterile gauze or clean cloth. If the blood soaks through, then apply another bandage on top of the first one. Raise the injured part of the body to slow the bleeding and continue to apply pressure until the bleeding stops. 
9. Relieve heat exhaustion
If you have been hiking for several hours in the sun and suddenly start feeling faint or ill, you could be suffering from heat exhaustion. The best solution would be to rest in a cool place, ideally, an air-conditioned building, with your legs elevated higher than your heart. Be sure to drink cool fluids, loosen any tight clothing and take a cold shower. If that doesn't work, seek medical attention. 
10. Handle heatstroke
If someone's body overheats, they may get hit by heatstroke, which may cause all kinds of nasty side effects, including nausea and vomiting, fast breathing and an altered mental state. Those suffering from heat exhaustion should be moved to a cool place and immersed in cool water, a cold or even icy bath should be helpful, or pack them in a cooling blanket until medical professionals can be reached. 
11. Refresh your first aid kit
You hopefully have a first aid kit around the house with a handful of bandages and ointments. If you have one be sure that you've got all the items recommended by the American Red Cross, including tweezers, an instant cold compress, and non-latex gloves. 
12. Deal with dehydration
Dehydration tends to be very common, but it is often misunderstood. Dehydration is caused by not replacing both the water and salt that make up a sizable amount of our bodies. It can cause a wide range of symptoms, from headaches to muscle cramps, to dark-colored urine. Rehydrating is an immediate way to help counter the effects of dehydration, but also consider having a sports drink to help replenish electrolytes. Letting dehydration persist for too long can cause you to break out in a fever, or develop a rapid heartbeat or low blood pressure, in which case you should seek medical attention. 

THIS IS ONLY FOR INFORMATION, ALWAYS CONSULT YOU PHYSICIAN BEFORE HAVING ANY PARTICULAR FOOD/ MEDICATION/EXERCISE/OTHER REMEDIES.                                    PS- THOSE INTERESTED IN RECIPES ARE FREE TO  VIEW MY BLOG-                                                                                           https://gseasyrecipes.blogspot.com/       
                                                                                                                                                                      FOR INFO ABOUT KNEE REPLACEMENT, YOU CAN VIEW MY BLOG-                                                  https:// kneereplacement-stickclub.blogspot.com/           
                                                                           FOR CROCHET DESIGNS                                                                                                                                                                                                  https://gscrochetdesigns.blogspot.com    
 

Labels: , , , , , , , , , , , , , , , , ,