Sunday, October 18, 2026

5 Ways to Get Rid of Blackheads at Home the Right Way

 Funny greeting cards Solve Puzzles Humor Blackheads and whiteheads can be extremely annoying, as the unsightly dots can become inflamed and cause full-blown acne, which can take a serious toll on one's confidence. They can appear everywhere - on the face, neck, and even on the back. But worst of all, people of all ages are susceptible to these pesky little skin problems. In this article, we'll teach you to get rid of these annoying spots by using 5 easy and effective at-home methods, as well as provide you with other important tips and information about blackheads.

Is it blackheads or something else?
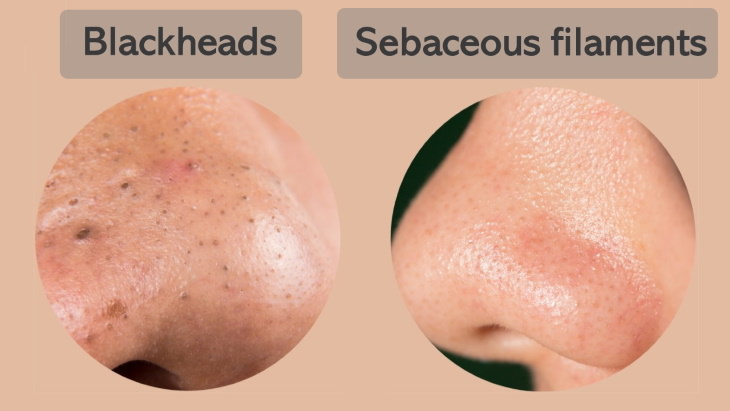
 Blackhead Removal blackheads sebaceous filaments

 We’re used to calling any pimple and sometimes just any enlarged pore a blackhead, but not all clogged or enlarged pores are blackheads. Blackheads are a type of acne that appears as dark spots that stretch out and clog up the pores, and their cousins are whiteheads - essentially the same spots, but located deeper in the pore. There are many causes of blackheads and whiteheads, ranging from poor diet, skin that's producing too much oil, hormonal changes, and even sebum (skin oil) oxidation by the sun. Importantly, blackheads should not be confused with other skin conditions that should be treated differently to blackheads, such as: 

Comedones - skin-colored bumps on the skin common on the forehead. 

Acne vulgaris - large red bumps or pus-filled pimples. 

Sebaceous filaments - small transparent or slightly greyish dots on the skin that are normal and should not be removed to prevent acne formation. 

Dermatologists and estheticians suggest easier to prevent blackheads by maintaining a basic skincare routine than treat them once they appear, namely: 

1. Cleansing the face daily or twice a day if you have combination or oily skin. 

2. Using products that contain AHA or BHA (e.g. salicylic acid, glycolic acid, lactic acid, azelaic acid, and mandelic acid) on the skin twice or 3 times a week. 

3. Moisturizing the skin daily each time you wash the face. 

4. Wearing sunscreen daily to prevent the oxidation of sebum. 

That being said, there are several extra at-home treatments you can do to get rid of and prevent blackheads (and whiteheads). Below, we featured 5 excellent natural treatments that use common household ingredients like green tea, turmeric, ice, and more. If you're struggling with clogged pores, whiteheads, or blackheads, we recommend you try out any of these useful and effective DIY recipes: 

1. Green Tea Rinse
Green tea is an excellent ingredient for the skin: its anti-oxidant, antimicrobial, and anti-inflammatory benefits are known to reduce the amount of oil in the skin, hence reducing blackheads and whiteheads, and calm down any redness or inflammation in the skin, making it beneficial for acne overall. If used regularly, you can even brighten the overall complexion with green tea. 

When putting green tea on the face, make a stronger brew than you normally would, putting 3-4 teaspoons of tea or 3 teabags per glass of hot water. Let the tea cool down, the colder the better, before putting it on the face, as the cold will make your pores look smaller. You can either splash some of the tea directly onto your face or apply some using a cotton pad. It's important to wash your face before using the green tea rinse. 

For best results, use daily, and follow up with a moisturizer. You can store this homemade green tea toner in the refrigerator for up to 3 days. 

2. Tea Tree Oil Spot Treatment
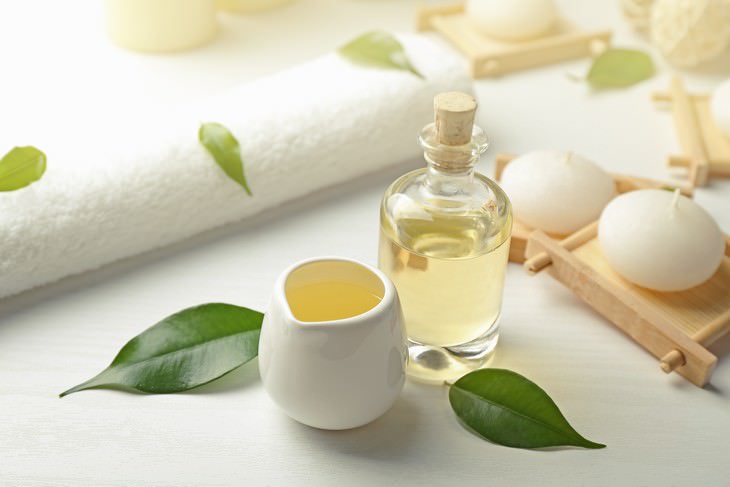
Blackhead Removal tea tree oil
Similarly to green tea, tea tree oil has anti-inflammatory and antimicrobial properties, and it's even used to treat fungal skin and nail infections, psoriasis, dandruff, and promotes wound healing. The same properties make tea tree oil an excellent treatment for acne, blackheads, and whiteheads as well, and many people do manage to treat these issues with tea tree oil. 

Do keep in mind, though, that tea tree oil is an essential oil, which means that it's extremely concentrated and so needs to be diluted with a carrier oil to avoid skin burns. The best way to use tea tree oil is as a spot treatment, applying it directly onto the blackheads. To do so, mix 1 tablespoon of any base oil of your choice (e.g. jojoba oil, rosehip oil, sunflower seed oil, grapeseed oil, but NOT coconut oil because it can further clog up the pimple) with 5 drops of tea tree oil and apply this mixture to spot 1-2 times a day.

3. Clay mask
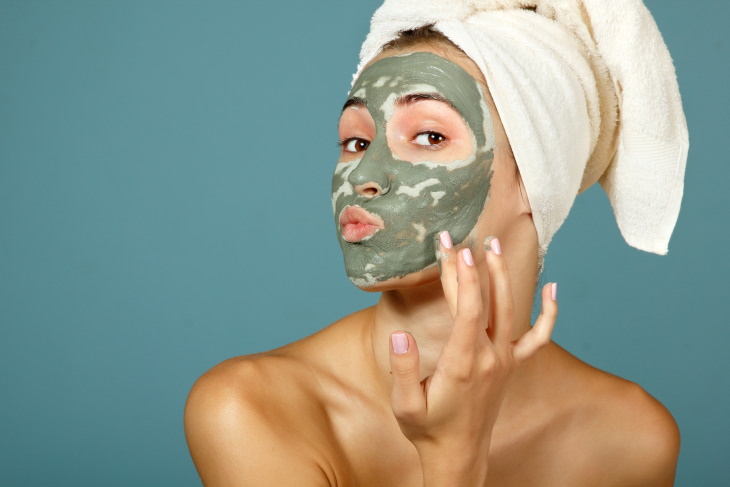
 Blackhead Removal Clay Mask

Clay is another super ingredient when it comes to acne and blackhead and whitehead removal and prevention, as it acts like a sponge, absorbing the excess oils from your skin and giving your pores a deep clean. Any type of clay will do the job, with kaolin clay being possibly the most popular for the skin. 

To make a clay mask, all you'll need to do is mix the clay with a tiny amount of water so that the clay powder forms a thick paste, and then apply the mask on clean skin. You can keep the mask on for about 10-15 minutes, keeping it on for any longer will dry out your skin. Wash off the mask completely with lukewarm water, and follow up with a moisturizer. 

If you have combination, normal, or dry skin, you can only apply the clay mask to the area where you have blackheads or where your skin gets oily, typically the T-zone or just the nose, and keep the other areas bare not to dry out your skin. You can do this mask 1-2 times a week. 

4. Facial Oil Massage

People who have blackheads or oily skin are typically afraid to use oils on their face, but they really shouldn't, as oils can really help them erase the blackheads from their skin for good. Do keep in mind, however, that you shouldn't use coconut oil on your face, since it can be comedogenic for some people, meaning that it can be pore-clogging. 

Instead, use neutral oils like grapeseed oil, jojoba oil, rosehip oil, sunflower seed oil, or others on the skin. We have previously written about oils beneficial for the skin, so to see more oil options and read about the benefits of each oil, follow this link: 6 Beauty Oils That Reverse the Signs of Skin Aging.

For this specific method, you will be washing off the oil and cleansing your face afterward, so no need to use an expensive facial oil, any oil cleanser or inexpensive carrier oil will do the job. All you will have to do is apply the oil on the skin and start massaging the face in small circular motions, focusing on the areas where you have clogged pores and blackheads. Massage for several minutes until you see small black lines - oil plugs and blackheads - start emerging from the skin. When all of these are gone, wash off the oil with warm water and a cleanser. Follow up with a moisturizer. 

5. Turmeric and Oatmeal Mask

We hardly need to remind you of the amazing anti-inflammatory and antioxidant properties of turmeric, but when it comes to the use on the skin, it has one drawback - it can stain. However, some beauty experts point out that one specific variety, namely Kasturi turmeric, doesn't stain the skin. We'd still be careful if we were you, though, so we recommend wearing gloves and clothes you don't mind staining when applying this mask. 

The second ingredient in this mask is a calming and anti-inflammatory ingredient as well - oatmeal. In addition, the ground oatmeal will provide a gentle exfoliation on the skin, which also benefits clogged pores. 

To make this mask, combine 1 tablespoon of ground oatmeal, half a teaspoon of Kasturi turmeric powder, and about 1 teaspoon of water to create a thick paste. If necessary, add more water. Apply the mask on the entire face or just the area that's prone to blackheads and whiteheads and leave on for about 7-10 minutes. Wash the face before and after using this mask and follow up with a moisturizer.


This is only for your information, kindly take the advice of your doctor for food, medicines, exercises and so on.   


Labels: , , , , , , , ,

Friday, March 17, 2023

5 Turmeric-Based Facial Masks For Removing Hair

Some people go to a beautician every single week for hair removal, but there’s actually a much simpler and cheaper way of removing hair in the comfort of your own home. These four methods will show you how to use turmeric, the Indian spice, in a face mask for hair removal purposes:


Turmeric for hair removal mask No. 1 
turmeric
Ingredients 
• ½ cup of milk 
• ½ cup of flour 
• 2 tablespoons of turmeric powder 
• 1 teaspoon of salt 
 
Method 
1. Stir the mixture in a bowl until smooth. Add more turmeric to the mixture if it’s runny. 
2. Apply the paste to the area that you want to remove hair from. Rub it into the area in a circular motion for 10 minutes. 
3. Allow the paste to dry for 10-15 minutes, then wash off with warm water. Both turmeric and salt dissolve hair by thinning them.


Turmeric for hair removal mask No. 2

Ingredients 
 
 • ½ bowl of sugar 
 • 1 cup of water 
• 2 tablespoons of turmeric 
• 2 tablespoons of lemon extract 
5 Turmeric-Based Facial Masks For Removing Hair
Method 
1. Boil the water and add sugar. Leave the sugar to boil with the water until you’re left with a sticky syrup. 
 
2. Allow the sugar syrup to cool, then add the turmeric and lemon extract. Stir the ingredients until the mixture becomes thick. 
 
3. Apply the paste on the area that you wish to remove hair from and scrub it in a circular motion. Do this for five minutes and rinse off the paste. 
 
4. Repeat this three times per week for the best results.


Turmeric for hair removal mask No. 3 
 
Ingredients 
 
• 1 teaspoon of turmeric 
 • 1 tablespoon of flour 
• 2 tablespoons of milk 
 
 Method
1. The ingredients for this mask are the same as the ones for the first mask, minus the salt. Simply add the ingredients to a bowl and whisk until you get a thick paste. 
 
2. Apply the mask in the same direction as the hair growth in the area that you wish to remove, then scrub in the opposite direction. 
 
3. Scrubbing will disturb hair growth, making it fall out at the root. You can also replace flour with oats for this particular face mask. 


Turmeric for hair removal mask No. 4 
 
Ingredients  
 
• 1 cup of chickpea flour 
 
• ½ tablespoon of turmeric 
 
• ½ cup of milk 
 
Method  
1. Add the chickpea flour to a small mixing bowl, then add the turmeric and stir for a just a few seconds. 
 
2. Add the milk and stir the mixture until it turns into a thin paste. 
 
3. Apply a thin layer of the mixture to the area you wish to remove hair from, applying in the same direction as the hair growth, and leave to dry for 20-25 minutes. 
 
4. Use a washcloth and rub the area in the opposite direction to the hair growth. Use warm water to remove any remaining residue from the mask and apply moisturizer to soothe the area.


Turmeric for hair removal mask No. 5 
 
Ingredients  
 
• 3 teaspoons of turmeric

• 1 teaspoon of milk  
 
Method 
 
1. You don’t need to worry too much about the measurements for this one, other than that you’re using three parts turmeric to one part milk. Mix the two ingredients into a paste and spread it on your skin. 
 
2. Allow the mask to dry on the area you wish to remove hair from for 20 minutes. 
 
3. Use a dry washcloth and scrub your skin in a circular motion to remove the mask. 
 
4. Repeat this process every two to three days for the best results. 


Bonus Tips  
1. It’s possible that your face might turn a little yellowy after using these masks, but you can use an apple cider vinegar toner to correct this. Coconut oil is also good for moisturizing the skin after hair removal. 
 
2. Don’t repeat the treatment two days in a row, because it’s too much for your skin to handle. 
 
3. Baking soda and soap are also good for removing yellow turmeric stains from your skin. Watch this video to find out more:


This is only for your information, kindly take the advice of your doctor for medicines, exercises and so on.  

https://gscrochetdesigns.blogspot.com. one can see my crochet creations  
https://gseasyrecipes.blogspot.com. feel free to view for easy, simple and healthy recipes    
https://kneereplacement-stickclub.blogspot.com. for info on knee replacement
https://GSiyers home remedies.blogspot.com     is my latest addition to my blogs. I'm going to add posts there, do give me your valuable feed back on my blogs. Thanks a lot, take care, be healthy and be happy. 

Labels: , , , , , , , , ,

Sunday, February 26, 2023

Suffer From Dizziness? These Home Remedies Can Help

We all experience dizziness from time to time - a feeling categorized by light-headedness, unsteadiness or loss of balance that may potentially cause fainting. Dizziness that is accompanied by a feeling of spinning is known as vertigo - slightly different from the nonspecific light-headedness. 
 
Generally, dizziness tends to be a symptom of other conditions like low blood pressure, heart muscle disease, neurological disorders, anemia, allergies, hypoglycemia (low blood sugar), tinnitus, ear infections, heart stroke, vision-related disorders, migraines, anxiety disorders and head injuries. 
 
Dizziness may also occur as a result of dehydration, motion sickness, stress, exercise, hormonal changes in the body, or possible side effects from medications. Dizziness tends to be accompanied by symptoms like a false sense of motion, vision changes, blind spots, headaches and slow or irregular pulse. If you experience dizziness regularly, consult with your doctor. Otherwise, you can try some natural home remedies to sort the issue out or try these useful exercises. 
 
1. Deep breathing
 dizziness
Inhaling and exhaling deeply is one of the best remedies to combat dizziness as it will help provide an adequate amount of oxygen to the brain, relaxing the nervous system and reducing dizziness.
 
 Here's How: 
 
• Sit or lie down in a comfortable position, placing one hand on your abdomen, and the thumb of the other hand against one nostril and close your mouth. 
 
• Inhale slowly through the open nostril, filling your belly with air. Hold the breath in, closing both nostrils and purse your lips. 
 
• After 2 to 3 seconds exhale slowly, extracting air from the belly. Repeat for a total of 10 breaths. Then sit quietly for 5 minutes to avoid getting dizzy again. 
 
2. Drink water
Dehydration tends to be a common cause of dizziness. This can often occur due to not drinking water for a long time, or failing to rehydrate your body during and after exercise. Dehydration may also cause vomiting or diarrhea that causes excessive fluid loss. So, whenever you feel dizzy, try drinking a glass of water to keep you hydrated and keep dizziness at bay. Alternatively, you may also drink herbal tea with some honey. Soups, broths or fruit juices should also work.  
 
3. Eat
dizziness
Low blood sugar levels may also increase the likelihood of feeling dizzy. Hunger can also make you prone to dizziness. So, whenever you feel dizzy, try to eat something. If you are prone to dizziness, it is a good idea that you avoid remaining hungry for a long period of time. Opt for snacks that are high in carbohydrates or sugar, like a chocolate bar or a banana. Fruit high in water content ought to do the trick too. Yogurt is also a good option, as is a handful of roasted nuts like cashews, almonds or walnuts. 
 
4. Ginger 
 dizziness
This time-tested recipe works wonders for dizziness and nausea that often occurs as a result. It stimulates the blood flow to the brain and other parts of the body, which helps reduce dizziness. Try chewing on a small slice of fresh ginger root, or suck on it to alleviate the symptoms. Alternatively, you may also sip on ginger ale or ginger tea throughout the day. As another option, you can take ginger supplements, just be sure to consult your doctor for the appropriate dose.  
 
5. Lemon
dizziness
Lemon is an excellent remedy for dizziness. The vitamin C in lemon boosts the immune system and helps the body to fight illness. Several other nutrients in lemon also make it naturally energizing. Just squeeze the juice of 1/2 a lemon into a glass of water and stir in 2 teaspoons of sugar, to get relief from dizziness. 
 
6. Indian Gooseberry/ amla/ nellikai
 dizziness
Also known as amla, this popular Ayurvedic remedy for dizziness provides a rich source of vitamins A and C, boosting your immunity, improving blood circulation, helping to treat and prevent dizziness. 
 
Here's How:  
• Grind 2 amla fruits (de-seeded) into a paste. 
• Mix in 2 teaspoons of coriander seeds and a cup of water. 
• Let it sit overnight then strain and drink the water the next morning. Repeating the process daily for a few days. 
 
 7. Honey
dizziness
The natural sugars found in honey can give you an energy boost and alleviate dizziness. Honey can also help prevent low blood sugar - a common cause of dizziness. 
 
Here's How: 
• Mix 2 teaspoons each of honey and raw, unfiltered apple cider vinegar in a glass of cold or hot water. Drinking it 2 times per day. 
• Alternatively, you can combine 1 tablespoon of honey and lemon juice with a glass of warm water. Drink it to get immediate relief from dizziness.  
 
8. Gingko Biloba
dizziness
Gingko biloba is another effective home cure that'll combat dizziness. It helps improve blood flow to the brain, preventing dizziness. This herb is also effective in treating tinnitus, which may also cause dizziness.

9. Feverfew
dizziness
Feverfew is another beneficial herb that can treat dizziness. It can also treat accompanying symptoms like headaches, nausea, and vomiting and may also improve blood circulation. Chew on a few, fresh feverfew leaves when you feel dizzy. Alternatively, you may steep 1 teaspoon of dried feverfew leaves and peppermint leaves in a cup of hot water for 15 to 20 minutes, then strain and drink. 
 
10. Eat healthily  
 dizziness
A healthy diet can prevent dizziness by eliminating many of the conditions that contribute to it. For instance, you can prevent dizziness that is related to anemia, low blood pressure, and low blood sugar by eating foods that are high in iron, vitamin A, folic acid and fiber. You should also choose foods that are low in sugar and fat. 
 
Include: 
 
• Iron-rich foods like liver, tofu, spinach, almonds, dates, lentils, fortified breakfast cereals, and asparagus. 
 
• Foods rich in vitamin C such as oranges, lemons, bell peppers, broccoli, grapefruit, and spinach. 
 
• Foods rich in folic acid like green leafy veg, liver, sprouts, fortified cereals, peanuts, bananas, and broccoli.
 
This is only for your information, kindly take the advice of your doctor for medicines, exercises and so on.   

https://gscrochetdesigns.blogspot.com. one can see my crochet creations  
 
https://gseasyrecipes.blogspot.com. feel free to view for easy, simple and healthy recipes    
 
https://kneereplacement-stickclub.blogspot.com. for info on knee replacement

https://GSiyers home remedies.blogspot.com     is my latest addition to my blogs. I'm going to add posts there, do give me your valuable feed back on my blogs. Thanks a lot, take care, be healthy and be happy.


Labels: , , , , , , , , , , , ,