Wednesday, June 03, 2026

Box Breathing: A Healthy Technique

 Over the years, we have encountered many breathing techniques that help calm the mind and body, and are even capable of helping us improve our ability to fall asleep, concentrate, and restore the balance our body needs. If you have tried such breathing techniques in the past and found them beneficial, you will probably be happy to discover a new technique – box breathing – which helps improve concentration, reduce stress, and is recommended for daily practice when you feel your mind is starting to wander or your work is taking a toll on your mental health. How do you do it, what are its benefits, and are there people who should avoid it? We will answer all these questions and more right now.

How to Perform Box Breathing? 

Box breathing is done in 4 simple steps, each lasting exactly 4 seconds: 

1. Inhale – Sit with your back straight, ensure your feet are flat on the floor, close your eyes, and take an inhale for 4 seconds through your nose. Feel how the air fills your lungs.

2. Hold the breath – Count to 4 at the same pace as your inhalation. 

3. Exhale – Fully exhale the air from your lungs through your nose for 4 seconds. 

4. Hold the breath – Wait for another 4 seconds.

You should repeat this at least 3 more times (4 in total), and it is recommended to continue for 4 minutes or until you feel calm. If this is difficult for you, you can try counting for 3 seconds instead of 4, and if you find this technique helpful and easy to perform, you can even count for 5-6 seconds. 

Since this breathing technique is very easy to perform in any situation, people in high-pressure jobs find many benefits in it, including soldiers, police officers, and even office workers under significant stress. This technique is actually relevant for everyone, and anyone who wants to balance their mind and regain control and focus can use it. 

Why is Box Breathing so Essential for Mental and Physical Health?
Box breathing helps reset your breathing, and in moments of severe stress, this is important for both your physical and mental health. Our body undergoes processes that we do not consciously control, like the autonomic nervous system, which determines, among other things, heart rate and breathing and even affects digestion. 

When the body feels threatened, it enters "fight, flight, or freeze" mode, releasing hormones like adrenaline and noradrenaline, leading to a chain reaction that causes the heart rate and breathing to become faster and also increases blood sugar levels. Prolonged stay in such a stress state can negatively affect health and wear out the body very quickly. Among the long-term effects, you can include: 

High blood pressure 

Headaches 

Heart attack 

Stroke 

We cannot directly control blood sugar levels or heart rate, but we can control our breathing, and calming it will affect all other body systems accordingly. Thus, box breathing helps us achieve control and balance, beneficial both in the short and long term.
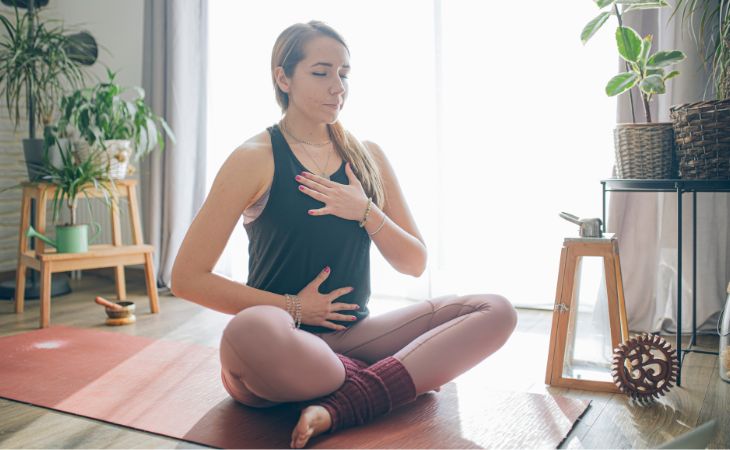

Box Breathing: A woman practicing breathing exercises
The Benefits of Box Breathing 

Mark Divine, an author and lecturer who was formerly a commander in the U.S. Navy SEALs, shares that this technique helped him in very stressful and challenging moments during his career. "I used it daily during training, and it helped me finish with excellence and in first place. Today, I use it in any challenging situation I encounter in daily life." Here are some of the benefits of this breathing method:


This is only for your information, kindly take the advice of your doctor for food, medicines, exercises and so on.   


Labels: , , , , , , , , ,

Saturday, July 03, 2021

5 Relaxing Yoga Exercises for Just Before Bedtime

You're already in bed and there's nothing you want more than a deep sleep, but you know that today you haven’t gotten in any exercise to help you maintain your body and mood, and you probably aren’t going to. It’s likely that you’ve often had such thoughts and were sure that there is no solution to the problem, but it turns out that this isn’t true.

Just before you turn off the lights and try to sleep, we have great news for you! Nutritionist and yoga teacher Liel Cheri has a series of great yoga exercises that can be done in bed before bedtime, and they’ll help you relax, do some fitness and improve your health and appearance! We have prepared a detailed guide for 5 of these exercises that’ll make you sleep well and feel great. 
 
1. The child's pose 
 yoga poses
The child's pose is a wonderful way to start with stretching your whole back and releasing the waist. Use deep breaths to relax and connect to the regular posture in the exercise to get yourself into the right mood.

How to: 
Start with sitting on your knees - bring your feet together and your knees apart. 
 
Move your hands away and continue to stretch your buttocks toward your heels, as shown above. 
 
Place your head down on the mattress and close your eyes. 
 
Relax the muscles of the jaw and face, and draw deep breaths through the nose. 
 
Stay in this position for a few minutes. 
 
2. Cow and cat pose  
yoga poses
The next exercise consists of two positions that we move between while we imagine the concave stance of a cow and the convex stance of a cat. The exercise is great for those who have back pain and it can also help reduce stress.

How to: 
Start in the tabletop pose, shoulders above palms, waist above knees, and back straight. 
 
Take a breath, let your stomach fall, and curve your back. 
 
Turn your head and eyes upward to the cow position, as illustrated in the image above.
yoga poses
After about a minute, suck your stomach in, arch your back outwards and bring your gaze toward your navel to the position of a cat, as illustrated in the image above. 
 
Alternate between the poses 5 times each while deeply inhaling and exhaling.

3. Downward facing dog 
yoga poses
Downward facing dog lengthens and relaxes the spine, helps breathing and opens the chest. The posture strengthens the muscles of the lower back and provides the necessary release to enter sleep.
How to: 
From the last step of the previous exercise (cow and cat pose), fold your toes inward and lift your buttocks upwards, placing your palms and feet on the mattress. 
 yoga poses
Put your head between your arms and look at your stomach, as shown in the image above.
 
Bend one leg while deepening the tread of the heel on the other leg as in a stepping motion) 
 
Switch between the legs, and bend the other leg as well. 
 
Repeat the exercise several times. 
 
To increase the traction, lift one leg toward the ceiling while maintaining a stable, upright second leg, head down, and palms supported by the mattress. 
 
Repeat the lift with the other leg and try to stay in position for a few minutes.

4. Pigeon Pose   yoga poses
The pigeon pose is called this because during the exercise we fill our chest, just as the pigeon does. The pose is good for stability, back strengthening, and hip joints.

How to: 
Sit on the mattress with one straight leg stretched back, and your other leg bent with a heel close to the groin, or a little more forward – whatever is comfortable for you. (You can enter this position from the downward facing dog pose.) 
 
Place your foot in a flex position and balance the weight at the waist evenly with the palms placed on the mattress. 
 
Inhale, fill the chest with the air and lift it, using your palms, as Liel demonstrates in the picture above.
yoga poses
Exhale and send your arm back toward the heel, placing your hand on your right calf and turning your head toward the shoulder of the outstretched arm as seen above. 
 
Return to the starting position, refill your chest and lift it. 
 
Bend your arms forward, lean them on the mattress, and lower your back to them, as can be seen in the picture above. 
 
You may feel that the pose is difficult for you – don’t push yourself past your endurance limit, and make sure that you’re mostly feeling tension rather than pain.
yoga poses
If you can challenge your body more, reach your hands straight forward making your chin come into contact with the mat - for a deeper stretch. After a few minutes, lift your back to the starting position. Perform the exercise on the other side as well – switching the bent leg. If you continue to the next position, do the two poses (4 + 5) one by one, on one side of the body and then do them both on the other side of the body. 
 
5. Mermaid Pose 
yoga poses
The Mermaid pose should continue from the point at which you stopped the previous exercise. Because the position may be challenging for beginners, it is recommended to use a rubber exercise band with a loop, which will allow you to get a good stretch, when you first start practicing this pose.

How to:  
From the final position of the previous exercise, lift the straight leg from the mattress and bring it to your bottom. 
 
You can use your hand, or a band, around the arch of the foot, so that you can pull it with your hand, as Liel demonstrates in the picture above. 
 
Observe the stretch in the quadriceps, and try to bring the foot into the inside of your elbow (this stage is suitable for someone who can perform the stretch without the help of a band).
yoga poses
Send the other hand up, bend it and join both hands behind the neck, as shown above. 
 
Close your eyes, concentrate on your breath, and stay in position for a minute to several minutes. 
 
Repeat the exercise with the other leg.
 

This is only for your information, kindly take the advice of your doctor for medicines, exercises and so on.   

https://gscrochetdesigns.blogspot.com. one can see my crochet creations  
https://gseasyrecipes.blogspot.com. feel free to view for easy, simple and healthy recipes    
https://kneereplacement-stickclub.blogspot.com. for info on knee replacement


Labels: , , , , , , , , , ,