Tuesday, August 10, 2021

6 Homemade Shampoos For Various Hair Types and Conditions

Shampoo is one of those essential items most of us pick up at the store without giving it a second thought. Making homemade shampoo sounds like a tedious task for some people, but the ability to control and customize the exact ingredients that go into your shampoo has many benefits. It allows you to create a custom-made product that’s perfectly suited for your hair and scalp using natural ingredients at a budget price. This article offers guidance to those who want to start making their own shampoo at home.

Who will benefit from homemade shampoo? 
Anyone who isn’t happy with their current shampoo can try making homemade shampoo. Like store-bought shampoo formulas, homemade shampoo concoctions have different properties: some nourish and moisturize the hair whereas others clarify the scalp or relieve an itchy and irritated scalp. People sensitive to harsh chemical ingredients may actually find that homemade shampoo makes their hair healthier and shinier than store-bought shampoo.

If you’re usually using a medicated shampoo that keeps a specific skin or hair issue at bay, it’s important that you consult a dermatologist to make sure that using homemade shampoo is right for you. Patch testing any shampoo on a small skin area will help prevent adverse skin reactions. Note that preparing liquid homemade shampoo usually yields a runnier consistency because store-bought shampoos usually have special thickening agents added. 
 
Most of the ingredients we feature in this article contain Castille soap as the main lathering ingredient. The recipe for this soap was first made in the Castile region of Spain. Castille soap is a natural, biodegradable soap made from vegetable oils. This natural soap is great at gently clarifying and has a very low risk of scalp sensitivity, but it may make hair dye fade a bit faster because it has a slightly higher pH level. 
 
To learn more about the uses of Castile soap, read my next post titled Not Using Castile Soap Yet? Here Are 10 Reasons You Must. Generally speaking, though, homemade shampoo is a good choice for any hair type, even though it may take a few weeks for some hair types to adjust to the new, natural hair care routine. 
 
Homemade Shampoo Recipes 
 
The basis for any homemade shampoo is a lathering ingredient, water, and a few drops of natural oil. It’s best to use distilled or boiled water because it will allow you to extend the shelf life of a liquid shampoo to about 2 weeks if kept refrigerated. Depending on your hair type and hair care needs, you’ll need a different balance of these three basic ingredients. 
 
Certain hair types will also benefit from essential oils and plant-based ingredients. Essential oils will also extend the shelf-life of your homemade shampoo, and allow you to customize the scent of your shampoo. Below, we list 6 shampoo recipes that address different hair concerns, such as an oily scalp, thinning hair, or brittle and dry hair.  
 
1. Stimulating shampoo for volume and growth
Homemade Shampoos aloe
If your hair is looking a bit flat or limp, or your goal is to stimulate hair growth, it’s useful to customize the formula with peppermint oil, aloe, and carrot seed oil. Peppermint oil and aloe have a pleasant cooling sensation that stimulates the scalp without irritating it, whereas carrot seed oil has been shown to stimulate hair growth and gently cleanse the scalp due to its antifungal properties. This recipe also contains green tea and honey, which are beneficial for cleansing and nourishing the scalp.  
 
Ingredients: 
- ¼ cup castile soap 
- ½ cup strong green tea 
- 1 teaspoon aloe vera juice (or aloe gel)
- 1 tablespoon honey 
- 7 drops carrot seed oil
- 10 drops of peppermint essential oil
- Bottle. 
 
Instructions:  
1. Brew a strong cup of green tea and let it cool. 
2. Whisk in the remaining ingredients and transfer them to a bottle. Shake well before use.

2. Moisturizing shampoo for dry and brittle hair
Homemade Shampoos bottle
If you have brittle, dry, curly, or color-treated hair, using Castille soap every wash may be a bit too much for your hair. If that is the case, you can easily alternate between a stronger shampoo and this moisturizing version that’s free of Castille soap. This shampoo doesn’t lather and it contains plenty of restorative and moisturizing ingredients like honey and coconut milk. 
 
Ingredients: 
- ½ can coconut milk 
- 1 tablespoon vinegar 
- 1 tablespoon honey 
- ½ teaspoon jojoba oil 
- ½ teaspoon castor oil 
- ½ teaspoon vanilla essential oil 
- Bottle.  
 
Instructions: 
1. Combine all the ingredients in a bowl, blending them together in an even mixture. 
2. Transfer into a bottle. Make sure to shake the mixture well before use.

3. Tea tree and rosemary shampoo for itchy scalps
Homemade Shampoos rosemary
Both tea tree oil and rosemary have potent antimicrobial and restorative properties. This shampoo will fit any hair type, but it’s especially soothing for an itchy or slightly flaky scalp. 
 
Ingredients: 
- ½ cup water 
- ¼ cup liquid unscented Castile soap 
- ½ teaspoon grapeseed or sweet almond oil 
- 3 stalks of lemongrass (or 1 tablespoon of lemongrass powder) 
- 3 sprigs of rosemary (or 1 tablespoon dried rosemary) 
- 2 teaspoons tea tree oil 
- 1 teaspoon vanilla essential oil 
- Bottle. 
 
Instructions: 
 
1. Bring the water to a boil, add the rosemary and lemongrass, and boil at low heat for 20-30 minutes. 
2. Let the mixture cool down, then strain the leaves. You should be left with about ¼ cup of liquid. 
3. Transfer the liquid into your shampoo bottle and add in all the remaining ingredients. Use as you would any shampoo, store in a cool place. 
 
4. Chamomile shampoo for sensitive scalp
Homemade Shampoos chamomile
Castille soap is quite a nice soothing ingredient on its own, but you can boost its calming properties with chamomile and lavender essential oil. Lastly, this homemade shampoo contains glycerin, a wonderfully soothing, softening, and conditioning ingredient.  
 
Ingredients
- ¼ cup water 
- ¼ cup Castille soap 
- 2 chamomile tea bags 
- 2 teaspoons glycerin 
- Bottle.  
 
Instructions: 
1. Bring the water to a boil, add the chamomile teabags, and step for 20-30 minutes. 
2. Discard the tea bags and let the liquid cool to room temperature. 
3. In a bottle, combine all ingredients and shake well to blend in the glycerin.
 
5. Clarifying rinse 
Clarifying rinses and shampoos are used to remove product and mineral buildup from the hair. If you use hair styling products or live in an area with hard water, it’s beneficial to use a clarifying shampoo or rinse once every two weeks to restore a healthy shine to your hair. 
 
If you have a store-bought clarifying shampoo, you can use it in place of your usual shampoo. But you can make your own clarifying rinse with just 2 ingredients that you can use after washing and conditioning your hair. 
 
Ingredients: 
- 2 cups water 
- 3-4 tablespoons vinegar 
- Bottle.  
 
Instructions: 
1. Shake to combine ingredients. Use as the last step of your hair washing routine. 
 
6. DIY shampoo bar
 
Not all homemade shampoo recipes are liquids. Shampoo bars are becoming increasingly popular these days, as they're more portable, last for a long time, and are more environmentally friendly since they don't require any packaging. Here is a basic solid shampoo recipe suitable for all hair types. The recipe uses a Castile melt-and-pour soap base that can be easily purchased online. 
 
Ingredients: 
- 1 cup Castile melt-and-pour soap base, cut into cubes 
- 1 teaspoon sweet almond oil 
- ½ teaspoon castor oil 
- 15 drops rosemary or vanilla essential oil 
- 1 soap mold (you can also use any plastic container or a yogurt cup).  
 
Directions
1. In a double boiler or any metal bowl in a bigger pan half-filled with water, melt the soap base on low heat. 
2. Stir continuously and add in the almond and castor oils. 
3. Take the mixture off the heat and let it cool only slightly. Then add in the essential oils. 
4. Pour the mixture into your mold and let cool for a day. Then store in a cool dry place for up to 2-3 months.

This is only for your information, kindly take the advice of your doctor for medicines, exercises and so on.   

https://gscrochetdesigns.blogspot.com. one can see my crochet creations  
https://gseasyrecipes.blogspot.com. feel free to view for easy, simple and healthy recipes    
https://kneereplacement-stickclub.blogspot.com. for info on knee replacement


Labels: , , , , , , , , , , , , , , ,

Tuesday, March 24, 2020

Get rid of your dark circles naturally

Dark circles can make you look tired and old. This is a common problem faced by almost all women. Lack of sleep, stress, unhealthy diet and lifestyle all contribute to this problem. There are many beauty products in the market that promise to help you get rid of this condition. But most often than not, these products are of no help. Nor are the many procedures and techniques that offer the same of any help. Even after shelling out a small fortune you are still left with those ungainly dark circles under your eyes. But there are some natural remedies that are very effective. Here we reveal a few common ingredients that can easily help you get rid of your dark circles.

Almond oil: Just apply it under your eyes and you will be amazed at the difference it makes. You can also mix it with vitamin E oil for better results.

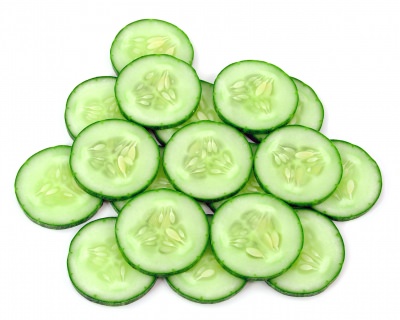
Cucumber:
It will lighten the area under your eyes and help you get rid of those dark circles. It will also refresh your eyes with its cooling property.

Raw potato: This is a natural bleaching agent. It will help in lightening dark circles and lessening extra puffiness around your eyes.

Rose water: It will repair and freshen your skin while reducing dark circles. It will rejuvenate tired eyes too.
 

Tomato: This is also a natural bleach. It can effectively lighten your skin and help you get rid of the dark patches under your eyes.


This is only for your information, kindly take the advice of your doctor for medicines, exercises and so on.     

https://gscrochetdesigns.blogspot.com. one can see my crochet creations  
https://gseasyrecipes.blogspot.com. feel free to view for easy, simple and healthy recipes    
https://kneereplacement-stickclub.blogspot.com. for info on knee replacement

Labels: , , , , , , , , , , ,

Saturday, March 21, 2020

10 Natural Ways to Fix Brittle Nails

No matter whether you wear nail polish or not, or if you like your nails long or short, strong and shiny nails always look good and indicate that you are in good health in general. However, some of us are luckier than others. Thankfully, there are ways you can continually improve your nails, making them better and stronger. Here are 10 natural remedies that you can try to help strengthen your nails:
 

1. Vitamin E
This oil improves the nail condition as well as the nail bed. Vitamin E helps repair and straighten damaged and brittle nails, as well as healing the cuticles. It also improves blood circulation and nail growth.
What to do: Apply the Vitamin E directly onto your nails and nail beds.
 

2. Coconut oil
This antioxidant protects the nails from the negative effects of free radicals. Coconut oil also has very good antibacterial and antifungal characteristics.

What to do: Apply warm coconut oil on the nails and the skin around them, massaging until absorbed.
 

3. Apple cider vinegar
Apple cider is an excellent ingredient to help straighten nails, soften cuticles and it also helps the nails to grow faster.

What to do: Just add one tablespoon to a glass of warm water and soak it for a few minutes. You may also repeat this daily until you are happy with the results.
 

4. Tea tree oil
This is a very strong antiseptic and antifungal agent. Dilute it with a carrier oil like olive oil, before applying it to your skin and nails. Essential oils should never be applied directly to the skin.

What to do: Combine two drops of tea tree oil with 1/2 a teaspoon of olive oil, almond oil or coconut oil. Apply to the nails and skin around them, massaging for a couple of minutes.
 

5. Lemon juice
Lemon is high in Vitamin C, this accelerates collagen production which makes nails stronger. The lemon juice also contains alpha-hydroxy acid which lightens the nails and heals any micro-cracks in them.

What to do: Simply squeeze half a lemon and mix with 1 cup of warm water, soaking for 5 to 10 minutes.
 

6. Olive oil
This fantastic ingredient is great for moisturizing and nourishing the nails. It is high in Vitamin E, which repairs any damage to the nails and stimulates their growth.

What to do: Apply warm olive oil to the nails and massage for 5 to 10 minutes.
 

7. Egg yolk and honey
Egg yolk contains a high amount of Vitamin A and fatty acids which makes it effective for strengthening weak, thin and brittle nails. It also helps to smoothen and moisturize the cuticles. You can add some honey too as it contains antifungal properties.

What to do: Mix one yolk with 1/2 a teaspoon of warm honey then apply the mixture to the nails and the skin around them, leaving for 15 minutes before rinsing.
 

8. Flaxseed oil
Flaxseed oil is high in fatty acids, minerals, and antioxidants which makes this oil really effective for boosting nail growth.

What to do: Apply flaxseed oil on the nails and massage for a few minutes.
 

9. Almond oil
Almond oil is high in vitamins A, B and E. It repairs, moisturizes and nourishes the nails, softening the cuticles.

What to do: Apply warm almond oil to your nails and the skin around them, massaging for 2 to 3 minutes. Almond oil can also be used as a carrier oil.
 

10. Jojoba oil
Jojoba oil contains a few types of fatty acids, antioxidants, vitamins and minerals, which makes the oil exceptionally effective for stronger and thicker nails.

What to do: Apply warm jojoba oil onto your nails and the skin around your nails, massaging for two to three minutes. You can also use almond oil as a carrier oil as well. 


This is only for your information, kindly take the advice of your doctor for medicines, exercises and so on.     

https://gscrochetdesigns.blogspot.com. one can see my crochet creations  
https://gseasyrecipes.blogspot.com. feel free to view for easy, simple and healthy recipes    
https://kneereplacement-stickclub.blogspot.com. for info on knee replacement


Labels: , , , , , , , , , , ,