8 Flexibility Exercises for Pain Relief
No matter how old you are, you should still
perform flexibility exercises regularly, whether you also go to a gym
or exercise at home. At a more advanced age, flexibility has a major
role in increasing your range of motion, making it easier to move about
and improve your general posture. Also, there are flexibility exercises
that help reduce pain and stiffness, which greatly increases your
quality of life. Below you will find the eight most effective exercises
for dealing with the pain and discomfort that many of us encounter on a
daily basis.
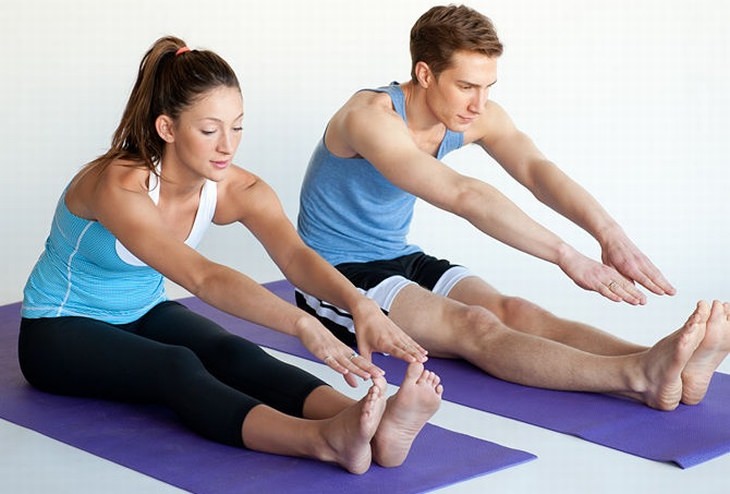
When should these exercises be performed?
The best time to do these exercises is when your muscles have warmed up,
which will make the stretches themselves painless. If you plan on only
performing the flexibility exercises, make sure you warm up the muscles
by taking a brisk walk for a few minutes. If you consider adding these
exercises to your stamina or strength workout, make sure you perform
them at the end of the session.
The correct way to perform flexibility exercises
The most important thing to remember when performing flexibility
exercises is that they are only effective if you’re feeling a slight
stretch in the area you’re working on. Many people try and stretch to
the point where they feel some pain, but you have to remember that pain
is the body’s response to a potentially damaging action. The moment you
feel a light stretch, maintain that level and remain in the position for
10 to 30 seconds.
1. Stiffness in the lower back
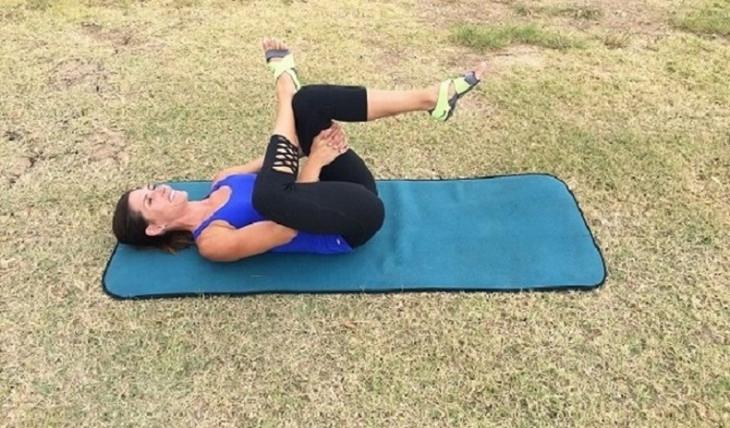
Exercise: Lying down ankle stretch
This exercise uses the ankle to stretch the lower back, freeing the
vertebrates and relieving stress and spinal stiffness.
Instructions:
• Lie on your back, bend your left knee and raise your leg.
• Lift your right ankle and cross it over your raised left thigh.
• Grab your thigh with both hands and pull it towards your chest,
keeping your knee bent.
• Hold for 30 seconds and slowly release, and then alternate legs.
2. Pain and stiffness in the shoulders
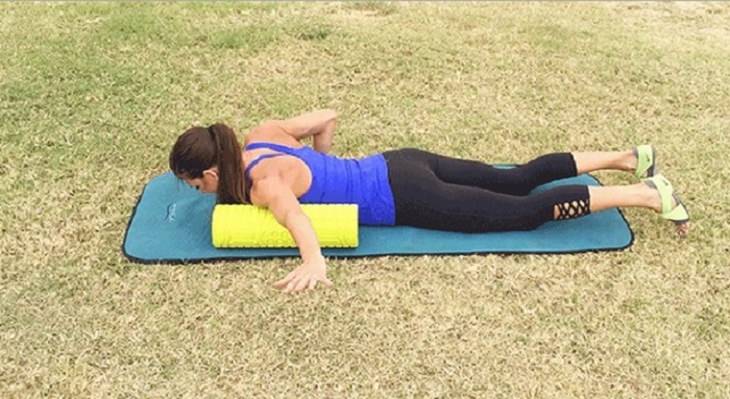
Exercise: Stretching your arms
Pain or stiffness in the chest and shoulder regions are common in people
who spend many hours in a sitting position. This exercise releases the
stiffness that forms because of the sitting posture, and stretches your
hands to restore their full range of motion. You will need a rolled up
mat or towel for this exercise.
Instructions:
• Lie down on your stomach with the roll on your left-hand side.
• Raise your head slightly, extend your left arm to the side and over
the roll, without touching the floor.
• Move your hand over your head, and then return it to the side.
• Repeat 5 times per arm, and make sure you do not move the roll during
the set.
flexibility-exercises
3. Stiff knees
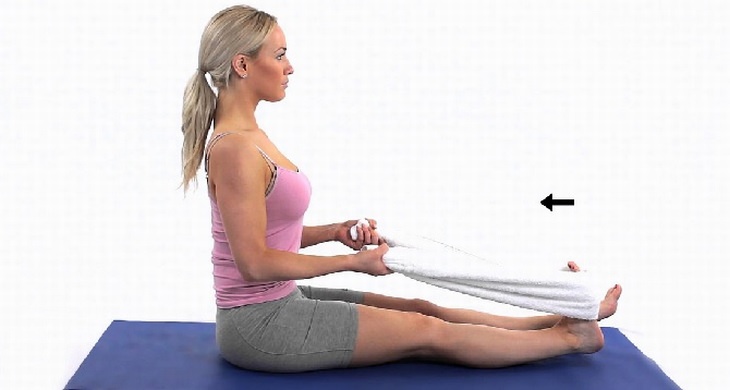
Exercise: Sitting towel stretch
This is a great flexibility exercise for people who suffer from
stiffness in the knees, and cannot perform stretches that require
reaching down to your feet. In addition, using the towel aids in
stretching the correct areas without damaging your back.
Instructions:
• Sit on the floor with your legs stretched forward.
• Place a towel under your feet and grab both ends with your hands,
pulling both sides.
• Inhale and try to pull the towel as much as you can without causing
yourself pain.
• Exhale and ease the pull, and then repeat.
• Maintain this position for 30 seconds.
flexibility-exercises
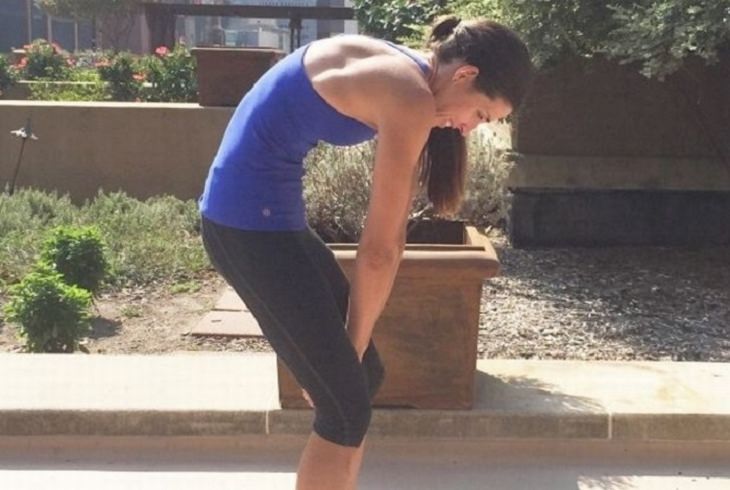
4) Exercise: The “Angry Cat” exercise
This exercise is nicknamed the “Angry Cat”, and it allows you to release
your shoulder blades, which are the source of most upper back pain.
Instructions:
• Stand up straight, then bend your knees a little, lean forward and
hold your inner thighs with your hands.
• Arch your back to resemble an angry cat and pull yourself up, using
your hands as an anchor.
• Hold this position for 30 seconds.
5. Pain or burning sensation in the knee
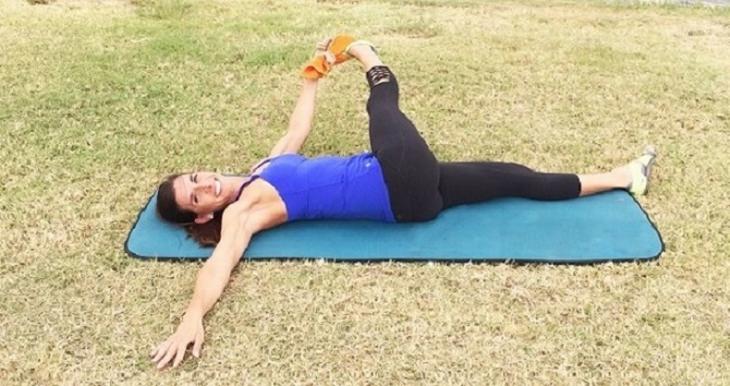
Exercise: Sideways towel stretch
Experiencing pain or a burning sensation in the side of either knee is a
typical issue for people who have suffered a knee injury in the past.
This stretch will help in reducing the load on the knees and relieve
much of the pain in the region.
Instructions:
• Lie down on your back, with your legs flat on the floor.
• Wrap one foot with a towel, raise it up in the air and move it across
your other leg, at knee-height.
• Grab the ends of the towel with the opposite hand. If you can’t keep
your knee straight, it's okay to bend it.
• Stretch your other hand to touch the floor, palm up, and turn your
head to face that hand.
• Hold this position for 30 seconds, then switch sides.
6. Outer thigh pain
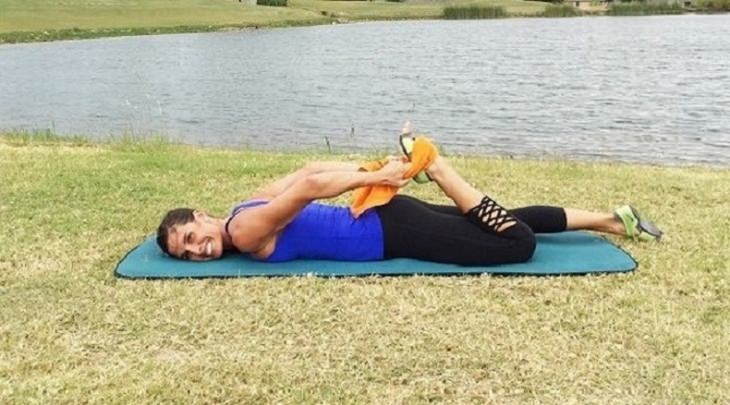
Exercise: The heel bend stretch
Pain in the thigh region is quite common, and can often be solved
through exercises that increase your flexibility without having to see
an orthopedist. Try this exercise for a couple of weeks and you’ll
notice the difference too.
Instructions:
4
• Lie on your stomach, while bending one leg up.
• Wrap the raised leg in a towel.
• Gently pull the towel back to help you bend the heel down towards the
buttocks.
• Maintain the stretch for 30 seconds, then switch legs.
7. Slouching
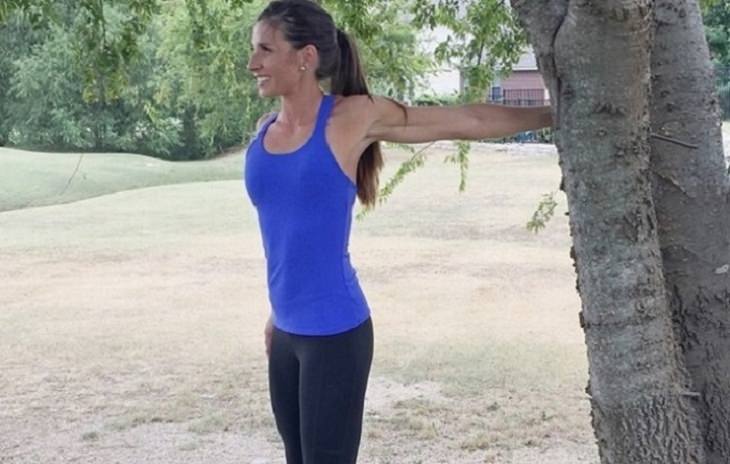
Exercise: Resistance stretch
If you feel like you’re slouching and have a hard time holding your back
straight for a prolonged period of time, this chest-expanding exercise
may be what you need.
Instructions:
• Stand by a doorway or a tree (if you’re outdoors).
• Place one hand on the tree or doorway to maintain balance, and turn
your body away from it until you feel the stretch in your arm and chest.
• Maintain this position for 30 seconds, then switch hands.
8. Prolonged sitting damage
Exercise: Sideways roll stretch
This exercise is perfect after a long day at the office, and will help
prevent pain in the lower back and buttocks. You will need a long, hard
pillow, or a rolled up yoga mat or towel.
Instructions:
• Lie on your back and place the pillow/towel under your buttocks.
• Stretch your hands to your sides, and lay them on the floor.
• Bend and lift one knee, and turn the other leg away from it (If you’ve
lifted the right knee, turn your left leg to face left) until you feel a
stretch in the buttocks, as well as a slight twist in your spine.
• Hold this position for a few seconds, then return to lying down.
• Repeat three times per leg.