Wednesday, October 12, 2022

5 Yoga asanas to ease Arthritis, manage its symptoms

An inflammation of the joints is called arthritis that adversely affects one joint or multiple joints and leads to joint pain, stiffness and swelling and since the onset of arthritis can be daunting for many as it affects the hands, shoulders, hips and knees, doing exercises regularly over the day will ensure that you go about your daily activities almost pain-free. While there are several medicines, rehabilitation and physiotherapy methods to help in treating the arthritis patients, the health condition can be improved if one is being physically active, maintaining their weight and indulging in Yoga and joint relaxing.

In an interview with HT Lifestyle on World Arthritis Day 2022, Himalayan Siddha Akshar, Founder of Akshar Yoga Institutions, shared, “Joint inflammation characterises arthritis, which is commonly accompanied by joint discomfort. As one of the rheumatic diseases, arthritis can affect numerous internal body parts in addition to joints, muscles, ligaments, cartilage, and tendons. There are currently more than 100 known forms of arthritis and that number is steadily rising. The different varieties of arthritis range from those connected to inflammation brought on by an overactive immune system to those connected to cartilage wear and tear (like osteoarthritis or rheumatoid arthritis).”

He revealed 5 Yoga asanas and that you can add to your daily fitness routine to ease Arthritis and manage its symptoms:

1. Samasthithi/Tadasana – Mountain Pose
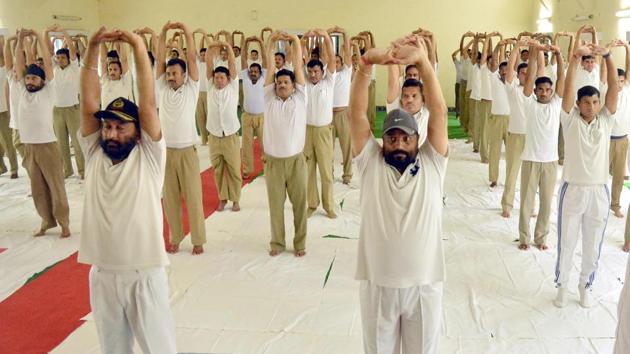
Tadasana(Sameer Sehgal/HT) 

Method: With your toes and heels touching, stand tall and straight. Keep your shoulders relaxed and your abdominal muscles contracted. Stay and breathe for 5-8 breaths in this position. Pay attention to evenly distributing your weight between both feet. To maintain a tall, strong posture, this asana can be of tremendous assistance.

2. Paschimottanasana - Seated forward bend
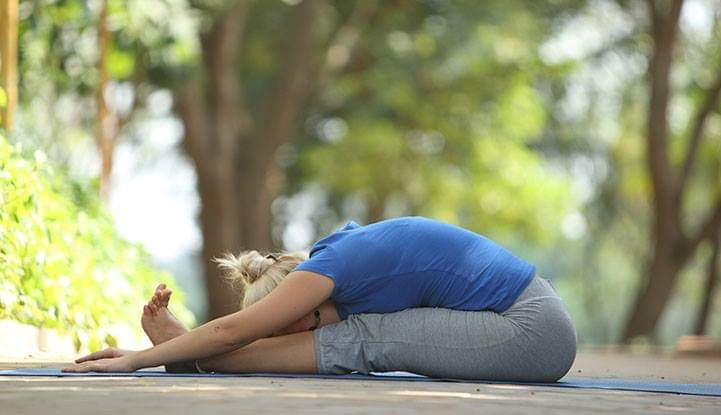
Paschimottanasana or seated forward-bend of Yoga(Twitter/aol_chennai) 

Method: Stretching your legs forward is the first step. Make sure your knees are slightly bent when you do this. Keep your spine upright while extending your arms upward. By bending forward at the hips while exhaling, you can place your upper body on your lower body. Try to hold your big toes with your fingers, or if that's impossible, hold any other accessible area.

3. Dhanurasana – Bow Pose
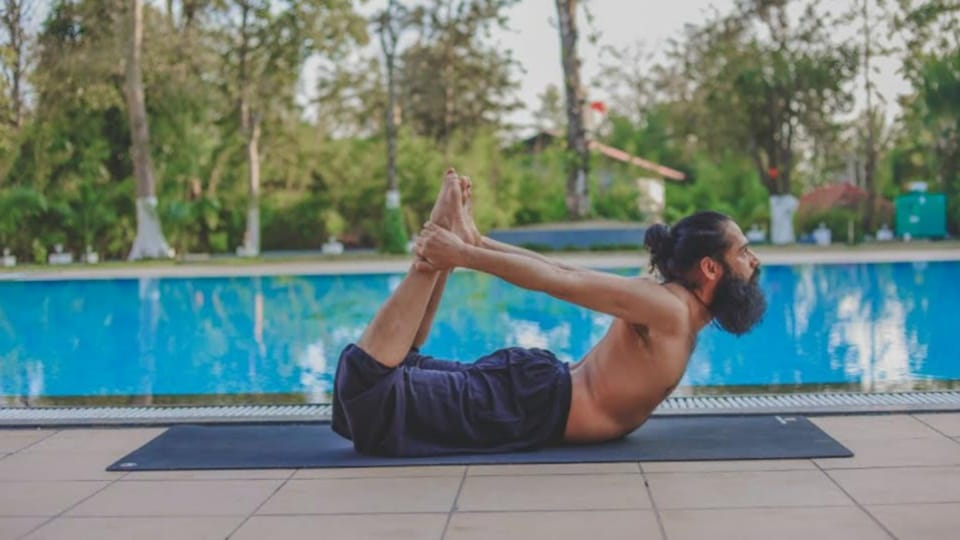
Dhanurasana(Grand Master Akshar) 

Method: Lay on your stomach with your knees bent and parallel to each other. Now, grasp your ankles firmly with your palms. As high as you can, raise your arms and legs. Hold the pose while looking up for a bit.


4. Hasta uttanasana - Raised Arm Pose
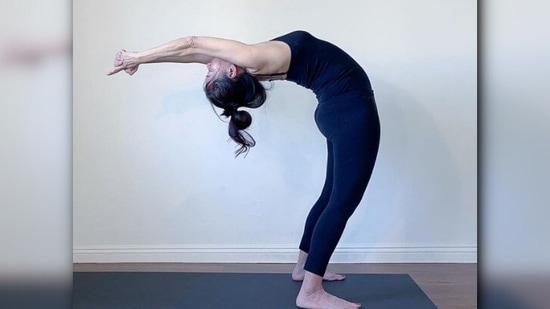
Hasta Uttanasana or raised arm yoga pose(Instagram/@nikkiwellsyoga) 

Method: This backbend can also be performed at a 30 degree angle to help your spine become more flexible and strong. Begin by standing straight in Tadasana, lifting both arms high. As you take a breath in, gradually bend backwards while keeping your head between your arms.

5. Vajrasana - Thunderbolt pose
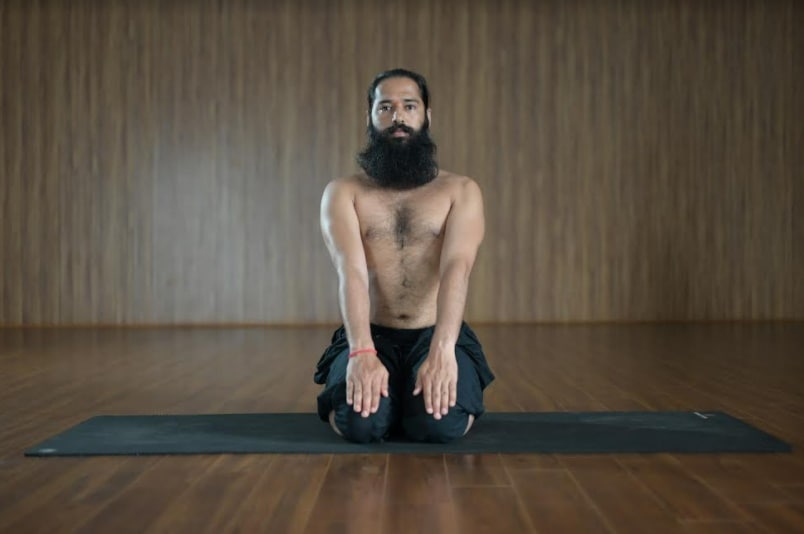
Vajrasana(Grand Master Akshar) 

Method: Start by standing straight with your arms by your sides. Lean forward and slowly lower your knees on your mat. Place your pelvis on your heels and point your toes outward. Your thighs should press your calf muscles here. Keep your heels slightly apart. Put your palms on your knees facing upward. Straighten your back and face forward while performing this pose.

Meditation Technique: Super Power Meditation

To practise, take a seat in Sukhasana or another relaxed position that shapes your body into a pyramid on top of a mountain peak. The goal is to sit atop a mountain in the shape of a mountain. To meditate while in this position, picture a reverse triangular shield in your chest. With each breath you take while meditating, this shield enables you to let all the uplifting energy of the world enter you. And when you exhale, you let go of internal toxins, sufferings and negativity.

This is only for your information, kindly take the advice of your doctor for medicines, exercises and so on.   

https://gscrochetdesigns.blogspot.com. one can see my crochet creations  
https://gseasyrecipes.blogspot.com. feel free to view for easy, simple and healthy recipes    
https://kneereplacement-stickclub.blogspot.com. for info on knee replacement

https://GSiyers home remedies.blogspot.com     will be latest addition to my blogs. I'm going to add posts there, do give me your valuable feed back on my blogs. Thanks a lot, take care, be healthy and be happy.


Labels: , , , , , , , ,

Wednesday, July 13, 2022

Lung health: 5 Amazing yoga asanas for healthy lungs

Yoga is an excellent way to strengthen your lungs

The advent of the COVID-19 pandemic in 2020 proved to be the worst year for respiratory health. The virus directly attacked the lungs making the body incapacitated and was fatal in some cases. Due to the rising toxicity in the air, it is getting harder to breathe, which is why, taking care of your lungs should be prioritized. Yoga can be a remedy for the same. Yoga asanas can improve the efficiency of lungs, making them stronger and healthier. It helps to strengthen the capacity of lungs thus clearing the nasal passages. The best time to practice yoga is early morning as it keeps the body agile, energetic and rejuvenated for the rest of the day.

Yoga warm-up

Just like warming up is essential before practicing calisthenics and other forms of exercises, it is required before yoga asanas as well, according to a yoga expert. Yogic warm-up comprises slow rotations of the neck, arms, wrists, hips and ankles to warm-up the joints. Brisk walk and stretching exercises are good for mobilizing the muscles. A sufficient warm-up eases the body and prepares it for difficult asanas. Practice these 5 yoga poses for strengthening the chest muscles and improving the health of the lungs.

Sukhasana

It is also called the cross-legged sitting pose. To perform this yoga asana, you must sit comfortably and hold your left wrist with your right hand behind your back. Breathe in the air while keeping your shoulders straight and expanding your chest. Now bend forward, breathe out and try to touch your forehead to your right knee. Breathe in and return to the original position.

This asana improves blood circulation in the lungs and successfully cleans the toxins from the lung muscles. This posture improves concentration and treats respiratory problems. It also reduces stress and anxiety.

Bhujangasana

This is also called the cobra pose. It calms the brain, strengthens lungs and is helpful in curing sciatica pains. This posture gives a lot of respite to asthmatic patients.

Lie flat on your stomach and place your head on the ground. Now keep both the hands on either side of the shoulders, gradually put pressure on the palms and lift up the body from the torso while stretching the back and belly muscles. Straighten the arms and keep shoulder blades pressed against the back.

Matasyasana

This asana is popularly known as the fish pose. It helps to open the chest making the body active and refreshed throughout the day.

Lie on your back, placing the hands under the hips and keeping the palms down. Now lift the head and neck up and elevate your chest. Touch the top of the head to the ground. Breathe deeply in this position as long as you can.

Dhanurasana

Bow pose is easy to perform. Lie down on your stomach and bend the knees towards the hips while holding the ankles with your hands. Now lift the legs and arms as high as possible keeping the face up. Remain in this posture as long as possible.

It is the best pose for removing the toxins from the lungs and can be done anytime. It also makes the chest muscles strong and healthy.

Ardha Matsyendrasana

The sitting half spinal twist pose remarkably solves breathing problems, stress and anxiety. It also improves the immune system and relieves backache.

Sit with your legs stretched and feet together. Bend the right leg and then the left foot should go to the corner of the right knee. Now take the left hand backward, stretch the right hand and apply pressure on the knee while using your elbow, holding tightly the right foot. Put the left hand on the knee and look at the back over the left shoulder. Hold on to the pose for a few seconds while keeping the back straight.


This is only for your information, kindly take the advice of your doctor for medicines, exercises and so on.   

https://gscrochetdesigns.blogspot.com. one can see my crochet creations  
https://gseasyrecipes.blogspot.com. feel free to view for easy, simple and healthy recipes    
https://kneereplacement-stickclub.blogspot.com. for info on knee replacement


Labels: , , , , , , ,