Tuesday, January 03, 2023

A Podiatrist Recommends This Massage to Ease Foot pain

It's astounding to think that a whopping 2 million people are treated for the painful heel condition known as plantar fasciitis, according to the American Academy of Orthopaedic Surgeons. The pain is caused by inflammation of the plantar fascia - the thick band of tissue that supports the arch and joins the toes to the heel bone. The condition can be triggered by a number of activities including running, walking or standing for long periods of time. In addition to being very painful, plantar fasciitis can become chronic if left untreated.
If you do suffer from plantar fasciitis pain, then you may already be aware of a number of treatment options. Some of which include wearing podiatrist-recommended shoes, adding insoles to your shoes, sleeping with a night splint, and taking over-the-counter pain relievers.

But should you want to get instant relief after a long day on your feet, giving yourself a quick and easy foot massage is one simple, and non-invasive way to treat plantar fasciitis pain. In fact, Jacqueline Sutera, DPM, a podiatric surgeon at City Podiatry in New York City, recommends a technique known as a cross-fiber massage to help treat heel pain. It's very easy to do and is very effective in treating pain. 
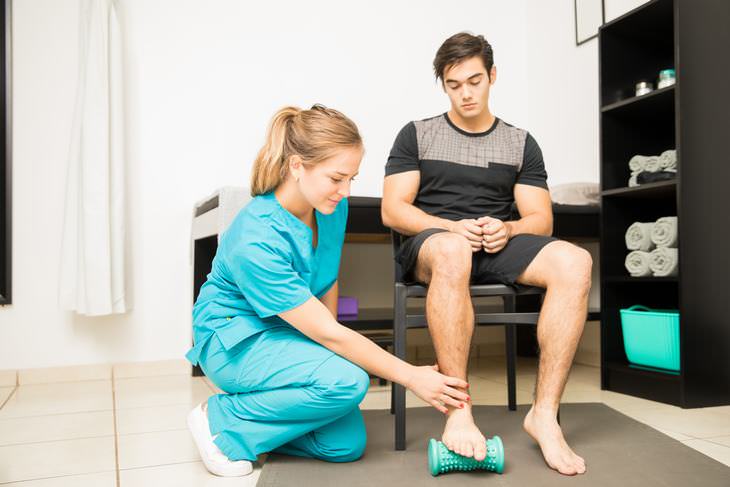
foot pain massage
What to do:  
1. The ideal time to perform a foot massage is after a bath, shower, or a foot soak, because the foot tissues are already warmed up.  
 
2. To complete the massage think of your foot as a tic-tac-toe board. Use medium-to-firm pressure and massage your foot along the full length of the arch, from the heel to the toes.  
 
3. Then, go across the entire width of the arch, massaging each foot for two minutes. 
 
“Doing this provides fascial release, increasing circulation and reducing tension as well as tightness to the plantar fascia,” Dr. Sutera explains. After you're done massaging each foot, apply ice to the area for about 15 minutes.


This is only for your information, kindly take the advice of your doctor for medicines, exercises and so on.   

https://gscrochetdesigns.blogspot.com. one can see my crochet creations  
https://gseasyrecipes.blogspot.com. feel free to view for easy, simple and healthy recipes    
https://kneereplacement-stickclub.blogspot.com. for info on knee replacement

https://GSiyers home remedies.blogspot.com     is my latest addition to my blogs. I'm going to add posts there, do give me your valuable feed back on my blogs. Thanks a lot, take care, be healthy and be happy.

Labels: , , , , , , ,

Saturday, March 17, 2018

6 First-Aid Steps for a Sprained Ankle

A sprained ankle is the most common ankle injury, and it occurs when one or more of the ligaments have been twisted, torn, or stretched. With a minor sprain, some of the fibers within the ligament are stretched – but with more serious sprains, the ligament might be torn.
 
Most minor sprains can be treated at home, but anything more than that needs prompt medical attention and might even require surgery. If you’re in doubt, you should get yourself to the hospital for an X-ray.
Below are 6 first aid steps that you should take if you suspect that you have sprained your ankle.

1. Rest the Leg
You should immediately stop the activity that caused the injury, sit down, and rest the ankle. Make sure to support it in a raised position.
2. Cool with Ice
Cool your ankle with some ice to help reduce swelling and pain. Ideally, you should wrap a bag of ice or frozen peas in a cloth and place it on your ankle. Don’t put the ice straight onto the skin, as this will cause a cold burn. Leave the ice in place for around 20 minutes.
3. Apply Pressure
Leave the compress in place if it’s small, or wrap a layer of soft padding, such as some cotton wool, around your ankle. Apply pressure with a compression support or compression bandage to help limit the swelling. This should extend from the toes to the knee.
4. Elevate the Ankle
Raise and support your ankle so that it’s higher than your hip to help prevent swelling – and make sure to get adequate rest. If your injury seems serious, get to the hospital.
5. Check Circulation
Make sure that the bandage is not too tight. Press on one of your toenails until it turns white, then let go. The color should return very quickly. If it doesn’t, the bandage is too tight; remove it and reapply. Recheck every ten minutes.
6. Reapply the Cold Compress over the Bandage Every 2-3 Hours
Remove the bandage at night and don’t sleep with an ice pack on the injury.
 

THIS IS ONLY FOR INFORMATION, ALWAYS CONSULT YOU PHYSICIAN BEFORE HAVING ANY PARTICULAR FOOD/ MEDICATION/EXERCISE/OTHER REMEDIES.                                                                                                                                                                                                                         PS- THOSE INTERESTED IN RECIPES ARE FREE TO VIEW MY BLOG-                                                                                           https://gseasyrecipes.blogspot.com/   

FOR INFO ABOUT KNEE REPLACEMENT, YOU CAN VIEW MY BLOG-                                                           https:// kneereplacement-stickclub.blogspot.com/                              
FOR CROCHET DESIGNS                                                                                                                                                                                                                                         https://my crochet creations.blogspot.com/
 

Labels: , , , , , , , ,