7 Pressure Points to Improve Your Vision Within Weeks
By applying pressure to specific points and
making use of acupuncture, we are able to relieve pain and heal quite a
number of illnesses. The magic in acupressure and acupuncture is in
their simplicity, as they work by assisting the body in overcoming
different health conditions on their own. Eye health and quality of
vision can also be improved by recognizing the pressure points that
affect them, as eye pressure is usually caused by pressure on the neck
muscles that affect blood flow to the eyes. Whether you suffer from poor
eyesight or teary eyes, these 7 pressure points will help improve your
vision and prevent any other eye conditions from occurring:
1. Around the eye socket
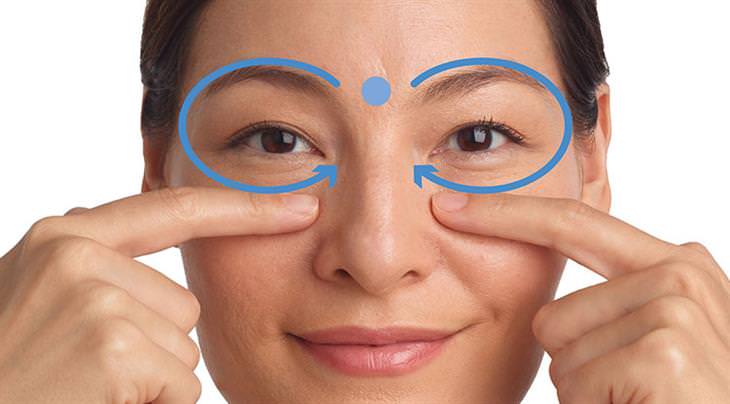
To relax your eye muscles, reduce neck,
back, and shoulder tension, and get rid of headaches, it is recommended
that you massage your eye socket. Place your index finger and middle
finger on your eyebrows and move them in a circular motion across the
edge of the orbital bone. Do this for 5 minutes every day.
2. The third eye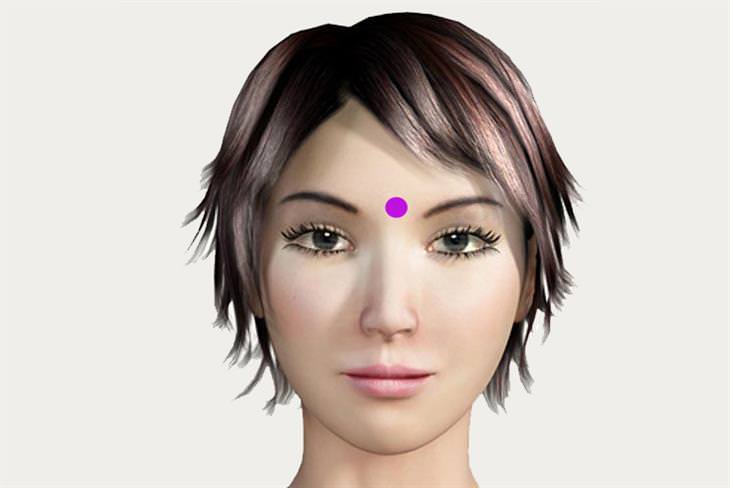
Massaging this point will help reduce eye
pressure and also prevent headaches and nasal congestion. This point
completely relaxes the nervous system and helps you cope with stress
more easily. Place your ring finger on the bridge of your nose, between
your eyebrows, and press on it for 7-8 minutes. Alternatively, you can
massage the area gently. While massaging or pressing on this area, look
straight ahead, keeping your eyes either open or closed.
3. The bridge of the nose
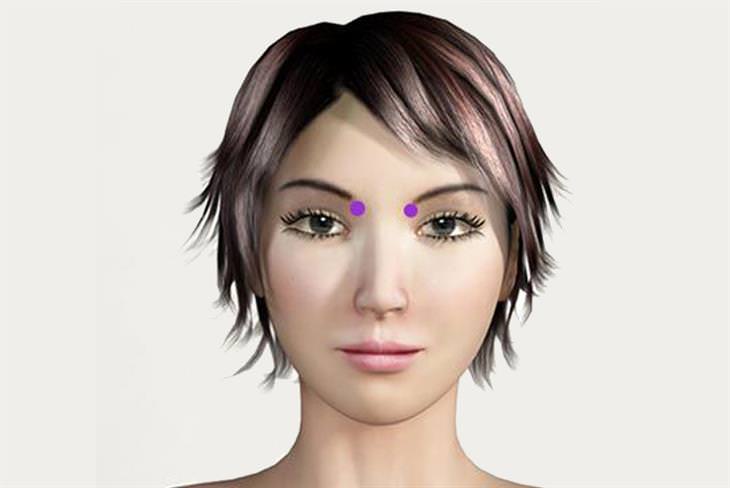
Massaging this point helps to reduce eye
strain, fatigue, and redness. This point can be found under the eyebrows
near the bridge of the nose. Place your thumbs on both sides of your
nasal bridge and apply some light pressure. Do this once a day for 5
minutes.
4. Nostrils
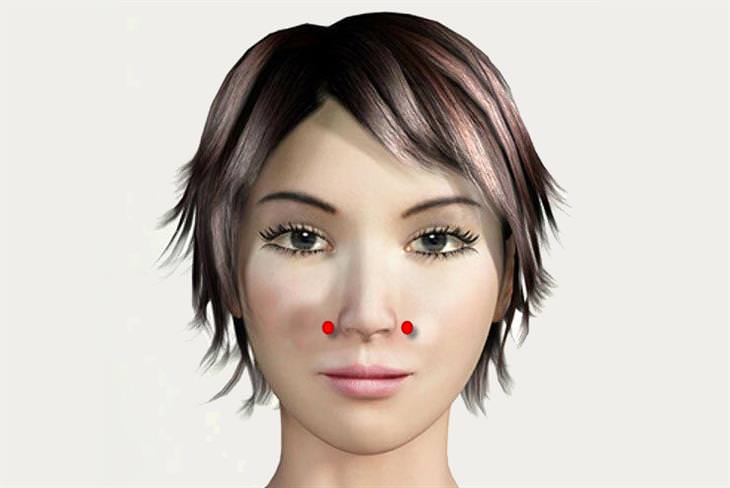
This point can help make your visions
clearer, and at the same time prevent headaches and sinus issues. Place
your index fingers on both sides of your nostrils and gently massage the
area. Make sure your fingers are on the edge of your nostrils and press
both points and the same time. Do this once a day for 5 minutes.
5. The inner corner of the eyes
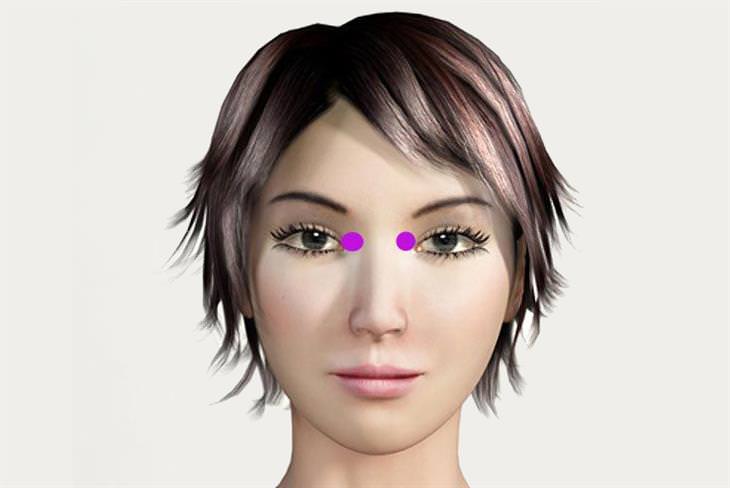
Aiding in clearer vision and relaxation of
the eye muscles, this point is located beside the inner corners of the
eyes near your nasal bridge. Using your index fingers, put pressure on
the inner corners of the eyes. If you would like to apply more pressure
you can use your thumb as well. Be very careful not to touch or press on
the eye itself. Do this for 3-5 minutes daily.
6. Tips of the thumbs

According to Chinese medicine, the tips of
the thumbs are directly related to the neck muscles. The neck muscles
help nourish the eyes through blood flow that travels through the neck
to reach them. It is recommended that you sit in a chair in a relaxed
position and simply massage the tip of your right thumb using your left
hand and then switch to massaging your left thumb with your right hand.
Do this for 3-5 minutes for each thumb daily to see an improvement in
clarity of eyesight.
7. Tips of the big toes
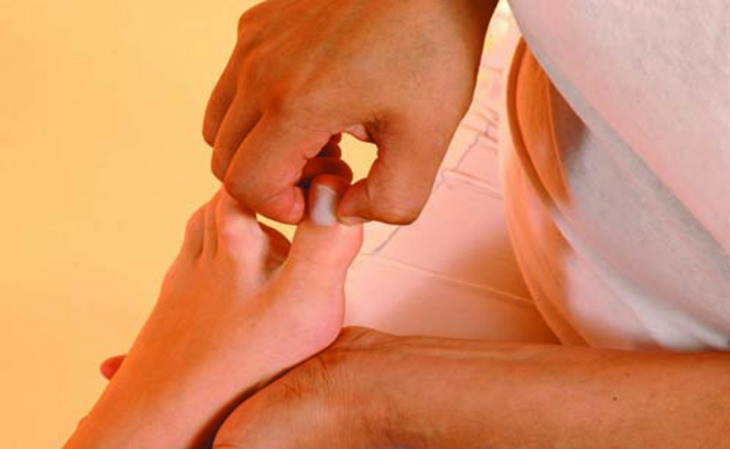
The toes are also connected to the neck
muscles and eyes, and massaging them can help prevent many vision
problems such as allergy-related teariness. Just like in the point
above, to massage this point sit in a chair in a relaxed position, hold
your foot in your hands and press on the tip of the toe for 3-5 minutes
daily for both toes. You can also try to walk on tiptoes – this helps
improve circulation not only in the neck but throughout the whole body.
It's very easy to massage these pressure points, so it is definitely a
solution you should try if you have problems with vision or your eyes in
general. If you wear glasses you should remove them occasionally
throughout the day to give your eyes a rest. Additionally, you can try
to roll your eyes to improve their mobility and keep them fit.
Furthermore, try to avoid being in front of the computer or TV for too
long as this can cause unnecessary strain on the eyes.
picture sources: dermstore, modernreflexology,
acupression, bottomlineinc,
acupressurepointsguide