Neck and Shoulder Stretches to Release Tension
A crick in the neck can be irritating,
painful, and can even cause headaches and upper back pain. To alleviate
the tension you might be experiencing in your neck, there are a number
of natural treatments you can try at home. In addition, the following
simple exercises and stretches are also effective for treating neck and
shoulder pain. Most of the exercises below can be performed while
sitting or standing, holding each stretch for 30 seconds, or a minimum
of five to 10 breaths. For instant relief, take a long, hot shower to
help loosen the muscles prior to exercise.
Set 1: Relieve Neck Tension
Benefits: The following exercises will help relieve tension in the neck.
These simple stretches alleviate neck muscle strain, whiplash (or neck
sprain), cervical nerve stretch syndrome or wryneck (a condition in
which the head becomes angled to one side and is often associated with
painful muscle spasms).
1. Lateral Neck Stretch
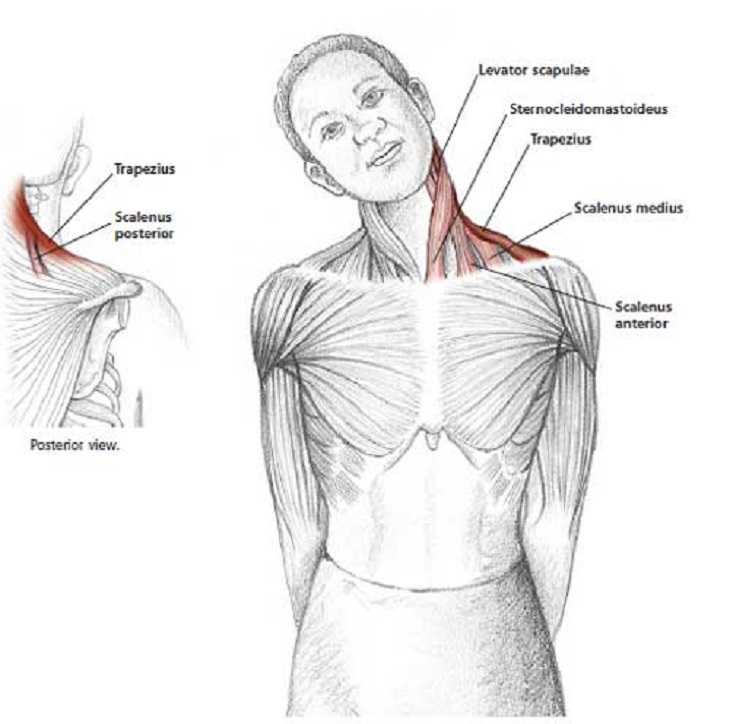

Technique: Look forward and keep your head
up. Keep your hands behind your back. Slowly move your ear towards your
shoulder. Do not lift your shoulders up when you tilt your neck to the
side.
2. Rotating Neck Stretch
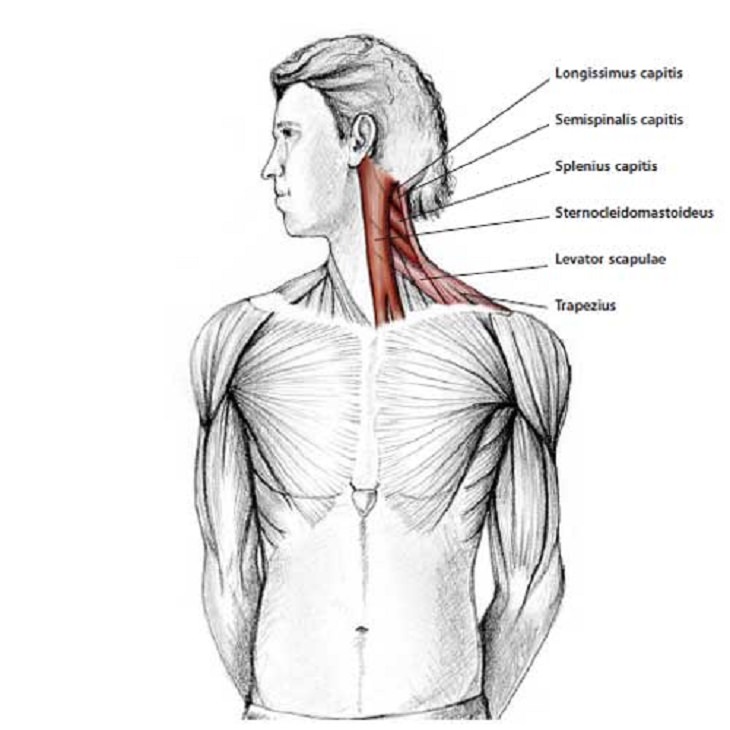
Technique: Keep your spine in an upright
position, with your shoulders still and your head up. Rotate your chin
gently toward your shoulder. While holding the stretch, do not let your
chin fall towards your shoulders - keep it parallel to the floor.
3. Forward Flexion Neck Stretch
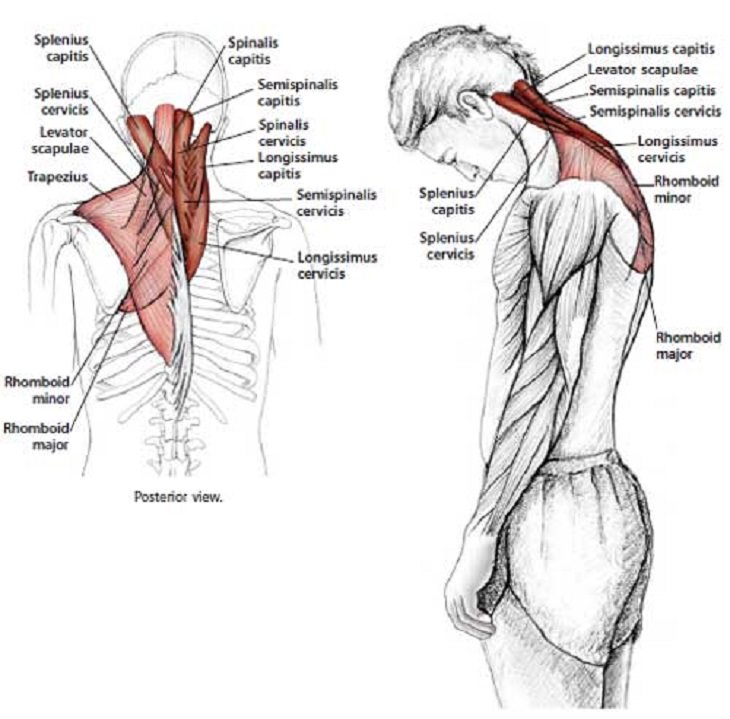

Technique: Stand upright, relax your
shoulders and keep your hands by your side. Let your chin fall forward
toward your chest. Do not overstretch the back of your neck by forcing
your head down - stay relaxed in the stretch and let the weight of your
head do the stretching for you.
4. Diagonal Flexion Neck Stretch
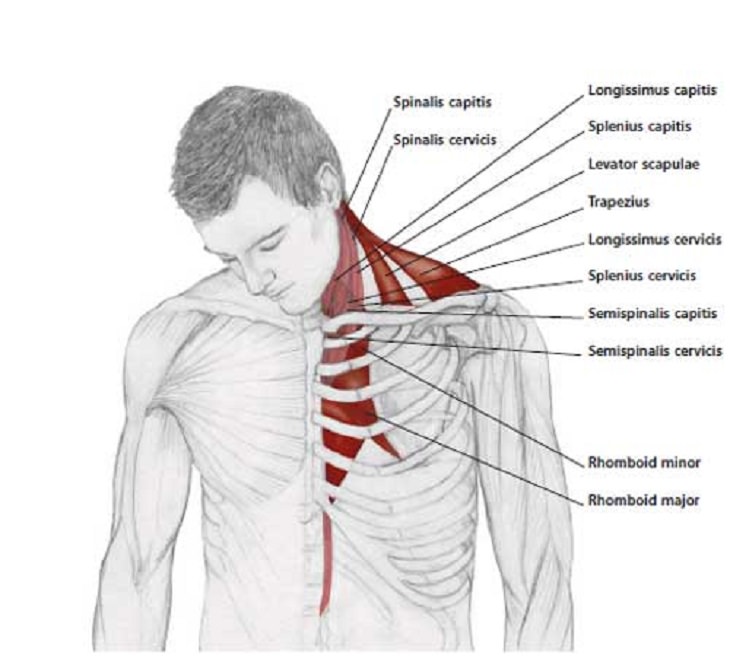

Technique: In an upright position, with
your shoulders relaxed and your hands by your side, allow your chin to
fall forward toward your chest. Then, lean your head to one side,
gently. Do not overstretch your neck by forcing your head downward.
Relax and let the weight of your head do the stretching for you.
5. Neck Extension Stretch
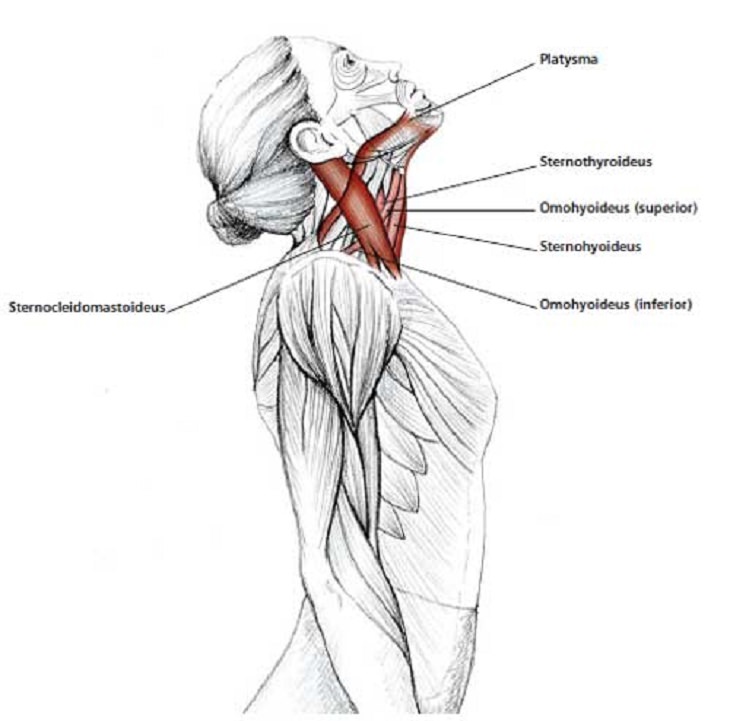

Technique: Stand in an upright position
with your hands by your side. Ensure that your shoulders are relaxed.
Lift your head, looking upwards. Keep your mouth closed and your teeth
together.
6. Neck Protraction Stretch
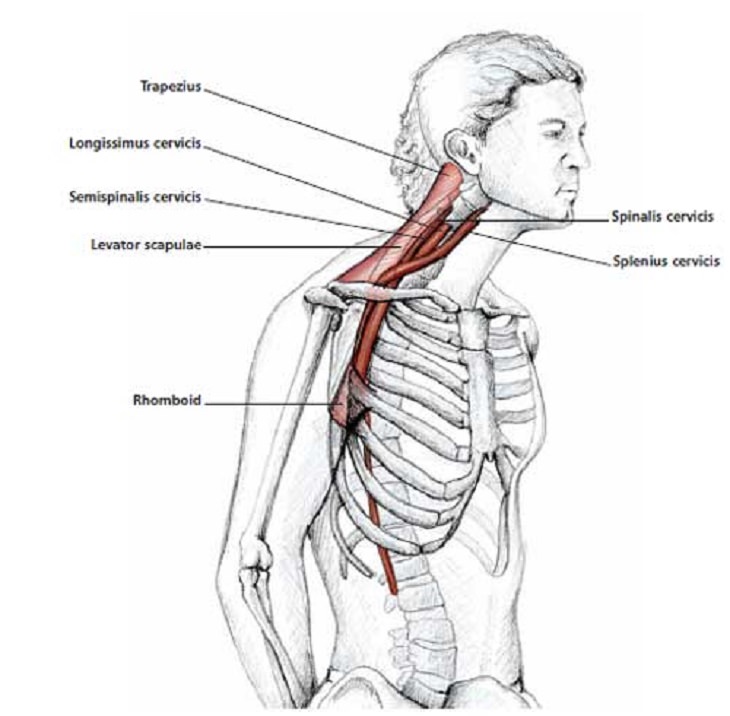

Technique: Keep your head up, chin parallel
to the floor, then push your head forward, sticking your chin out.
Throughout the stretch, keep your head up and do not let your chin fall
towards the ground.
7. Sitting Neck Flexion Stretch
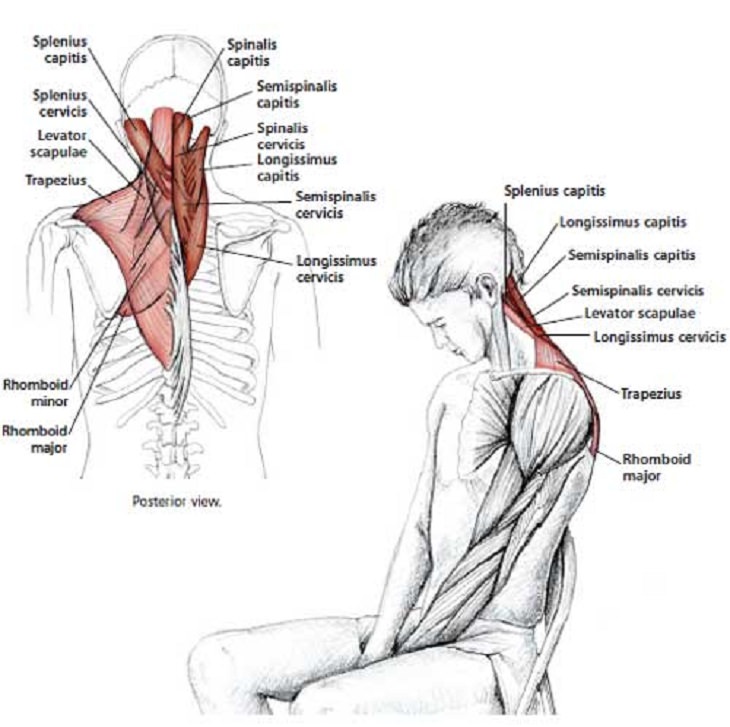

Technique: Sit in a chair, cross your arms
over one another and hold onto the chair between your legs. Let your
head fall forward gently and lean your body slightly backward. Do not
overstretch the muscle by forcing your head down. Relax and let the
weight of your head do the stretching for you.
Set 2: Relieve Shoulder Pain
Benefits: The next set of exercises focus on stretching the shoulders.
These exercises are useful if you have a dislocation, impingement
syndrome, shoulder tendinitis or bursitis (inflammation of the soft
tissue around the muscles and bones) or frozen shoulder.
1. Parallel Arm Shoulder Stretch
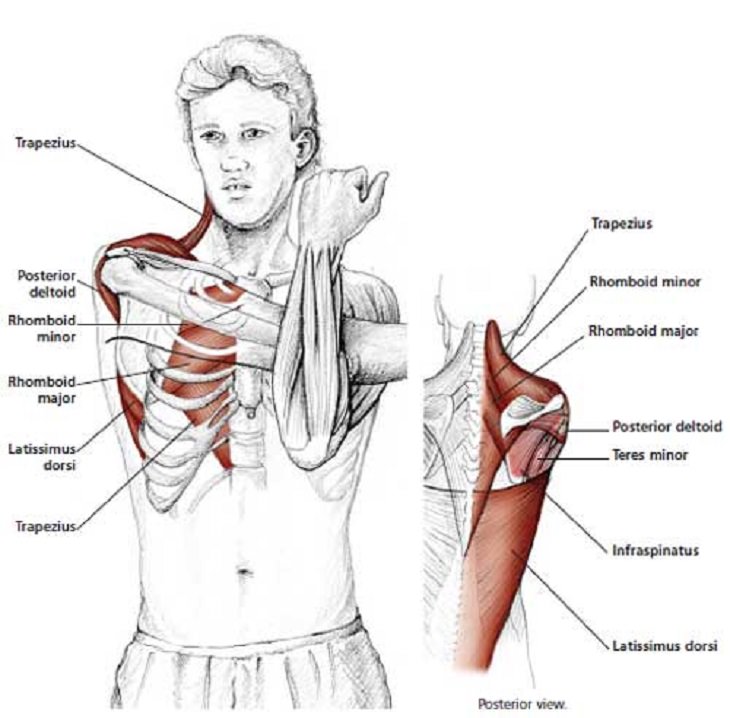
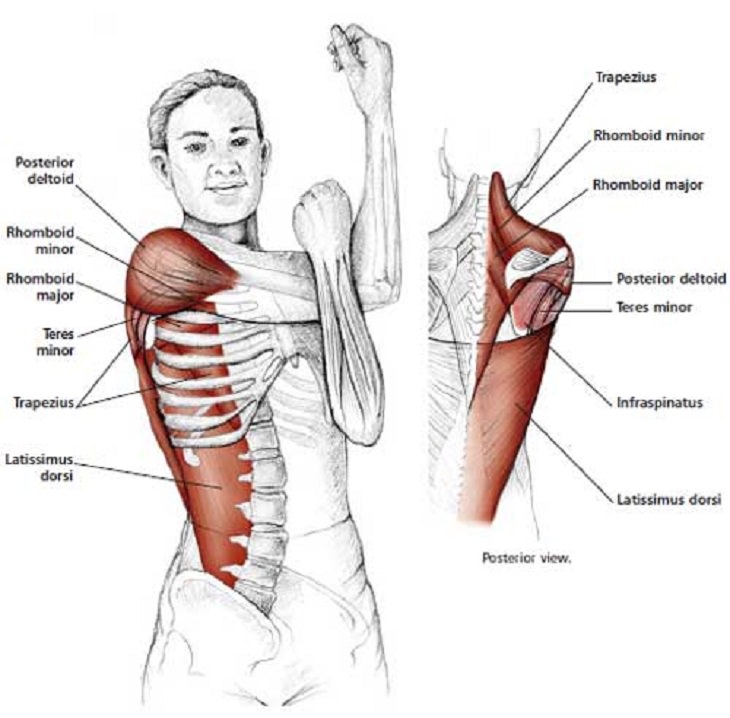

Technique: Stand in an upright position,
placing one arm across your body. Keep your arms parallel to the ground,
pulling your elbow towards your opposite shoulder. Throughout the
exercise, your arm should be straight and parallel to the ground.
2. Bent Arm Shoulder Stretch

Technique: In an upright position, with
your arm across your body, bend your arm at 90 degrees, pulling your
elbow towards your opposite shoulder. Keep your upper arms parallel to
the ground while doing the exercise.
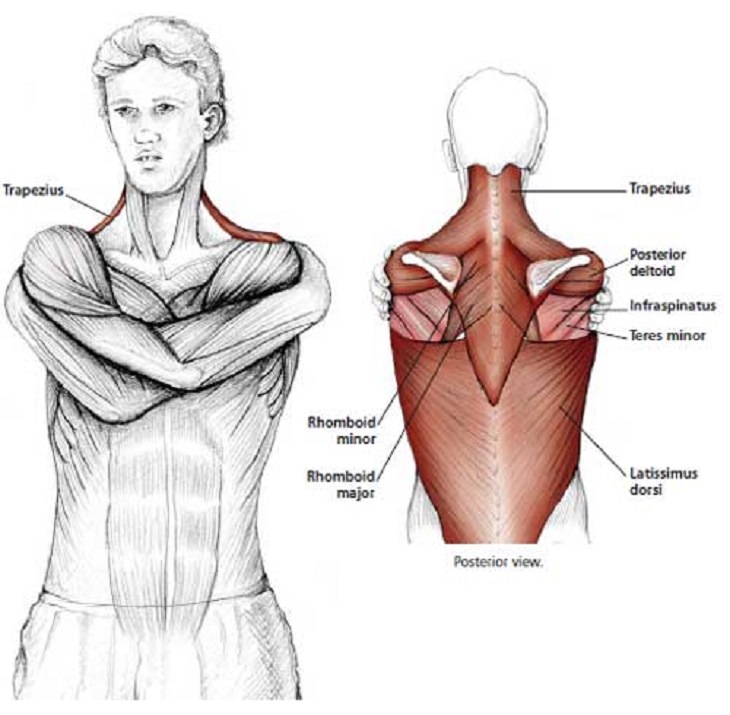
3. Wrap Around Shoulder Stretch

Technique: Stand upright and wrap your arms around your shoulders as if
hugging yourself. Pull your shoulders back. Do not pull too quickly on
your shoulders. Ease into the stretch by slowly pulling your shoulders
back.
4. Cross Over Shoulder Stretch
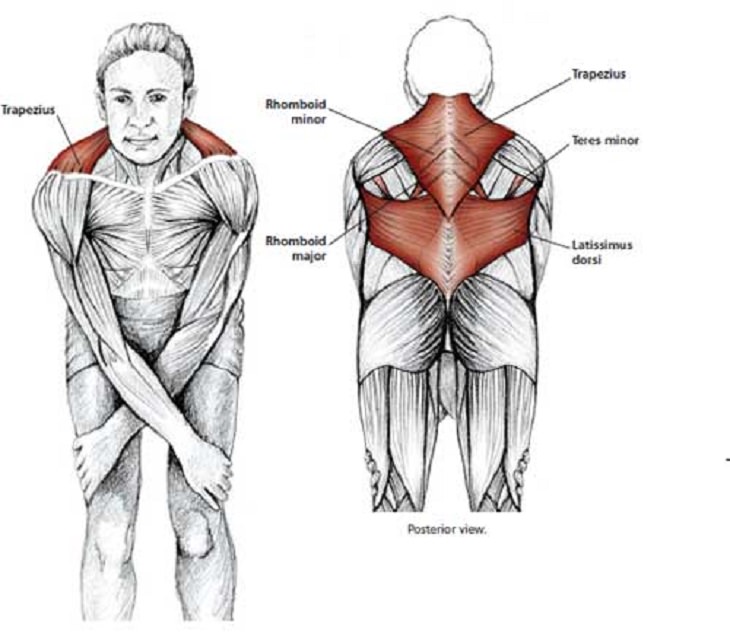

Technique: Stand with your knees slightly
bent. Cross your arms over each other and grab the back of your knees.
Slowly rise upward until you feel tension in your upper back and
shoulders. Your shoulders should be level to the ground and try to avoid
twisting or turning to one side while doing the stretch.
5. Reaching-Up Shoulder Stretch
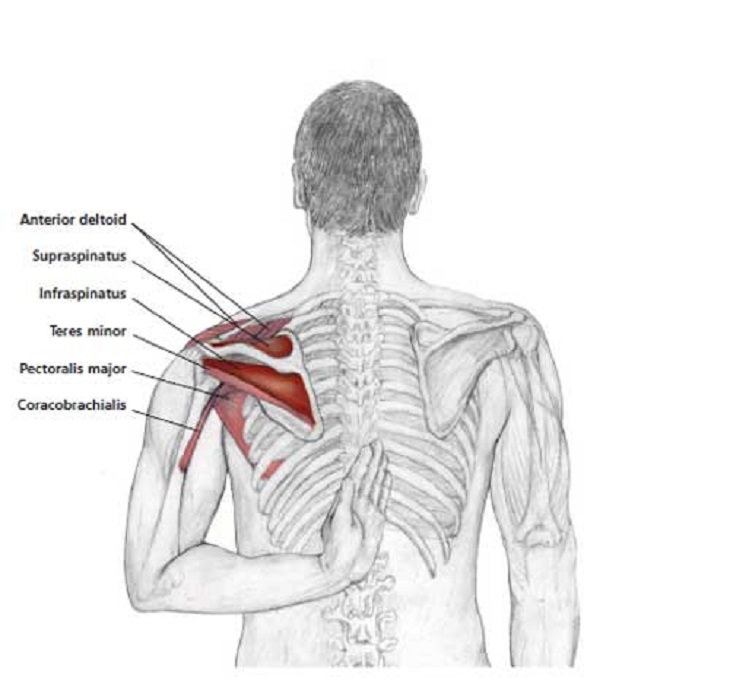

Technique: Keep your spine long, with your
shoulder blades drawing down your back. Place one hand behind your back
and reach up between your shoulder blades. You may notice your rotator
muscles in the shoulder become tight while performing the stretch, so do
so very slowly and with caution.
6. Elbow-Out Rotator Stretch
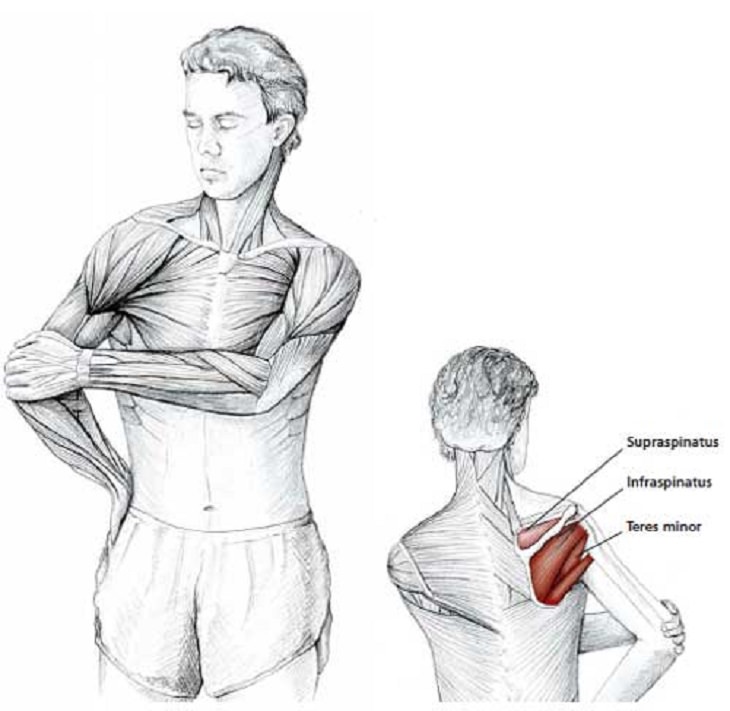

Technique: Stand with your hand behind you,
fingertips on your lower back and your elbow pointing behind you. Reach
over with your other hand and gently pull your elbow forward. since
most people having tight rotator cuff muscles, take care and practice
this stretch gently and slowly.
7. Arm-Up Rotator Stretch
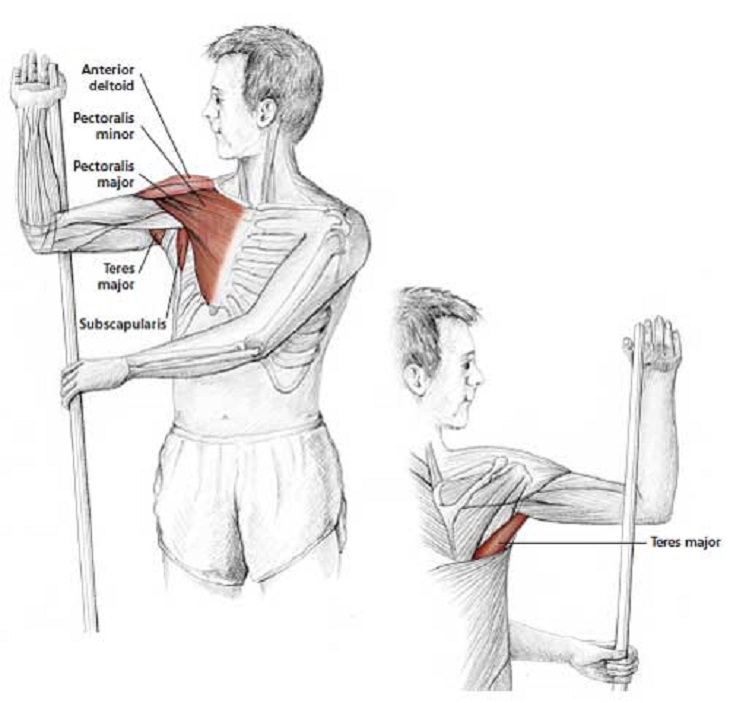
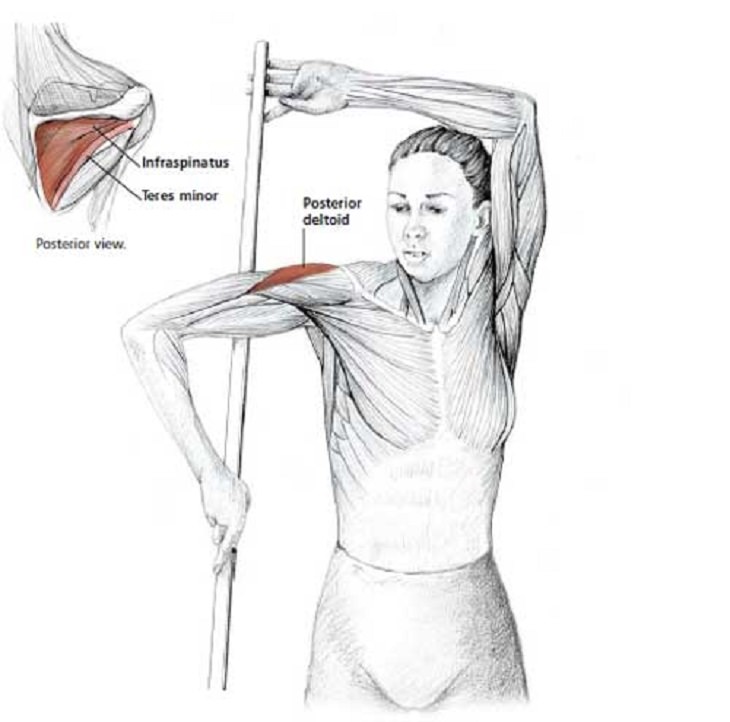

Technique: From a standing position, lift
your arm out to the side, with your forearm pointing upwards at 90
degrees. Use a broomstick for extra support and place it in your hand
behind your elbow. With your other hand pull the bottom of the
broomstick forward. This exercise will help stretch the rotator cuff
muscles of the shoulder.
8. Arm-Down Rotator Stretch

Technique: Stand with your arm out to the
side, this time with your forearm pointing downwards at 90 degrees.
Place a broomstick behind your elbow and pull the top of the broomstick
forward with your other hand. Practice with caution if your rotator cuff
muscles are tight.