Free Your Neck With This Daily Easy Exercises
Sitting in front of the computer at work?
Surfing your smartphone while waiting in line or on public transport?
Lying down at the end of a long day to watch your favorite shows?
You may have not noticed this, but all these routine activities affect
the health of your neck. In fact, about 45% of the population of working
people in the world have complained at one point or another about neck
stiffness and pain. Fortunately for us all, there are several solutions
to these annoying pains. One of the best and healthiest ways is to use
easy exercises you can do at home, and it will only take 5 minutes of
your time. If you start using it today, most chances are you'll save
yourselves future pain and treatments.
Before starting the exercises, a few things to note:
Do all the stages here in order, one after another, and make sure you do
them slowly, gently and without any sudden movements. The neck is a
very tender place and you should be very careful when exercising it. If
your pain gets worse, stop and consult a doctor before continuing. Good
luck!
Stage 1: Releasing the neck muscles
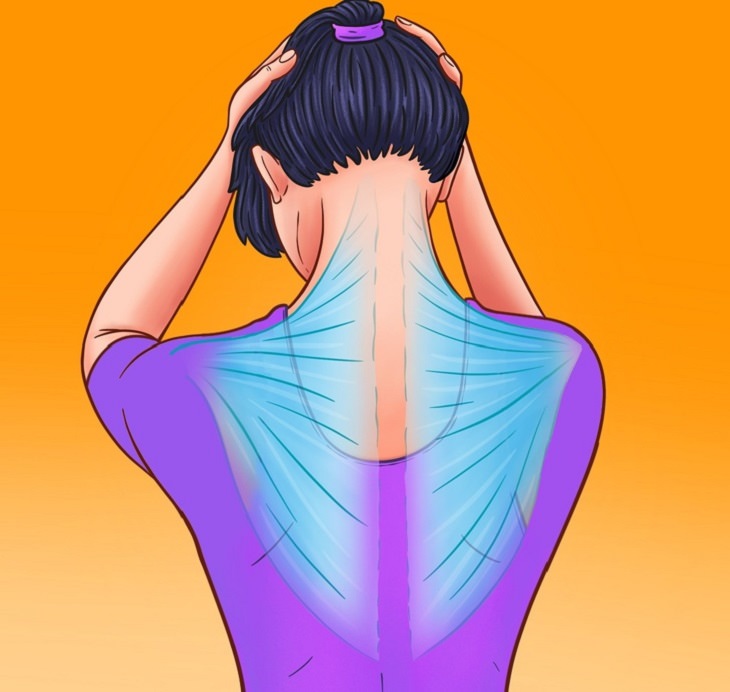
A. Sit comfortably on a chair with your
back straight.
B. Put both your hands on the base of your skull.
C. Let your chin fall towards your chest.
D. Gently put pressure on your head with your hands, meaning push it
forward and downward, until you feel a stretch in the back of your neck.
Stay in this position for about 30 seconds.
Stage 2: Improving the movement of your shoulders
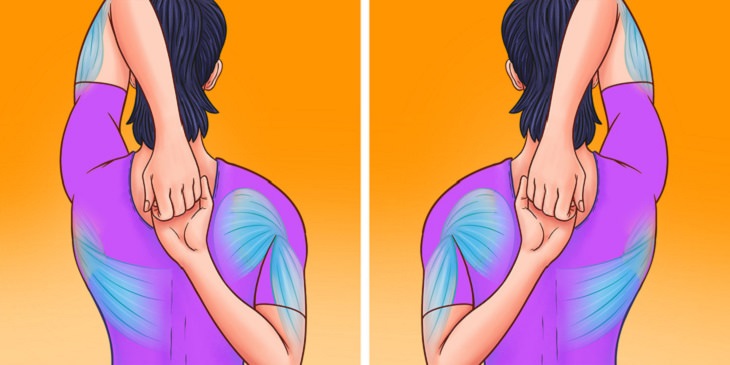

A. Sit comfortably on a chair with your
back straight.
B. Lift your left arm towards your left ear, and bend your elbow so your
palm is turned towards your back.
C. Bend your right arm back from the elbow, so the back of your right
hand is turned towards the back of your body.
D. Keep your back straight, push your chest forward and press your palms
against each other behind your back.
E. Make sure you feel pressure on your arms and chest. Stay in this
position for 30 seconds and then switch your hands and repeat the
exercise for 30 more seconds.
Stage 3: Increasing the blood flow to the neck

A. Stand on the floor with your back straight, your arms at the sides of your body and your legs spread at shoulder width.
B. Keep your arms straight and gently pull your shoulders towards your ears. Hold your shoulders like this for several seconds.
C. Return your shoulders to their normal state, and repeat this exercise for 2 more times for 30 seconds each.
Stage 4: Releasing the arm muscles
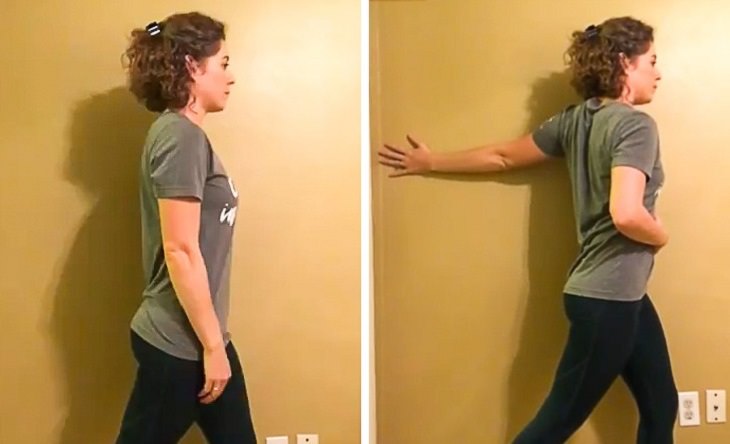

A. Stand straight with the left side of
your body turned towards a wall and your left leg ahead of your right
leg.
B. Turn your head gently towards your left shoulder.
C. Slowly stretch your left arm behind your shoulder, turn your upper
body and put your left palm against the wall at shoulder height.
D. Keep your left arm straight. Gently turn your head and look forward.
E. Gently stretch your chest until you feel a pull in your right
shoulder muscles and chest. After 30 seconds, return to the starting
position A, and repeat the exercise with the sides reversed, again for
30 seconds.
Stage 5: Improving head stability
treating neck pain improving neck stability
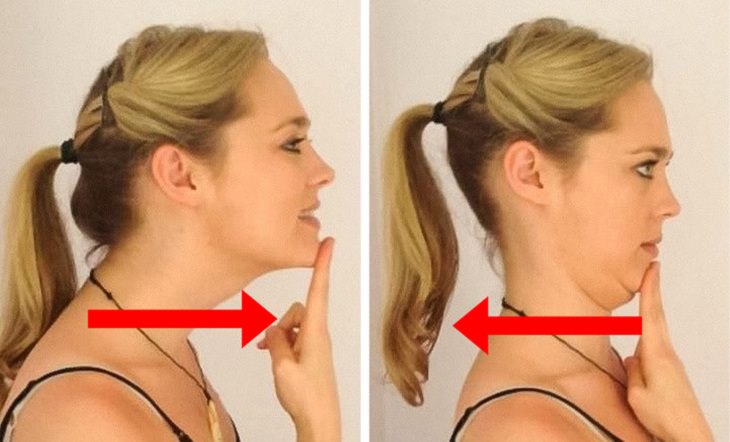

A. Sit comfortably on a chair or on the
floor, with your back straight, shoulders pushed a bit back and your
head facing forward.
B. Take 2 fingers from the hand on the side of the neck pain (if your
neck pain is on the left side, use your left hand) - and put them on
your chin.
C. Pull your fingers up as much as you can, putting upwards pressure on
the chin.
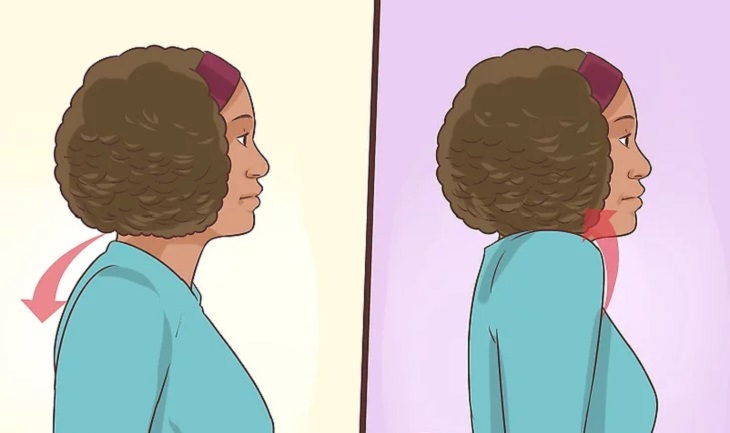
D. Gently press your chin with your fingers and take it as back as
possible, until there is a "double chin" as shown in the image.
E. Stay like this for several seconds (5-10) and then repeat the
exercise again for 30 seconds (you can "rest" for several seconds when
you feel you need to).
Stage 6: Getting rid of muscle twitches
treating neck pain getting rid of muscle twitches
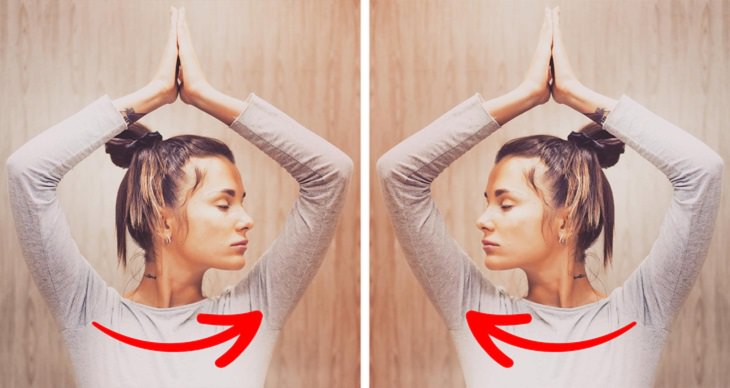

A. Sit in a comfortable position, with your back straight.
B. Raise your hands upwards, bend at your elbows and have your palms touch each other above your head.
C. Keep your lower jaw parallel to the floor, and turn your head to the left.
D. Stay like this for several seconds, and then slowly turn your head to the right.
E. Keep this position for several seconds and then turn your head to the left.
F. Continue switching sides every 5-10 seconds for 30 seconds.
Stage 7: Strengthen your shoulders
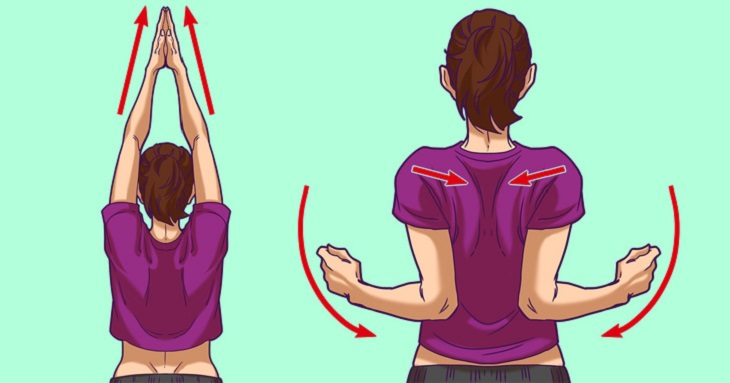

A. Stand on the floor with your legs spread
at the width of your shoulders and your arms straight at your sides.
B. Raise your arms above your head, straighten the elbows and press your
palms together.
C. Keep your arms straight, stretch your spine upwards and remain in
this position for several seconds.
D. Slowly lower your arms, bend your elbows and bring them behind your
back while trying to keep your shoulder blades as close to each other as
possible.
E. Keep this stretch for several seconds and then straighten your arms
again. Repeat this exercise for 1 minute.